Building a 3D experience in visionOS: Volumes
Learn how to create a 3D volumetric experience in visionOS for Apple Vision Pro by enhancing a visionOS app with an interactive model in 3D space.


Welcome back to our tutorial series on developing for visionOS! In our previous article, we explored Windows and created a basic 3D experience. Now, we're diving deeper into the spatial computing capabilities of Apple Vision Pro by focusing on Volumes.
Volumes in visionOS allow us to create truly three-dimensional interfaces that users can interact with from multiple angles. This tutorial will walk you through the process of developing a volumetric experience, showcasing their power and flexibility.
What You'll Learn
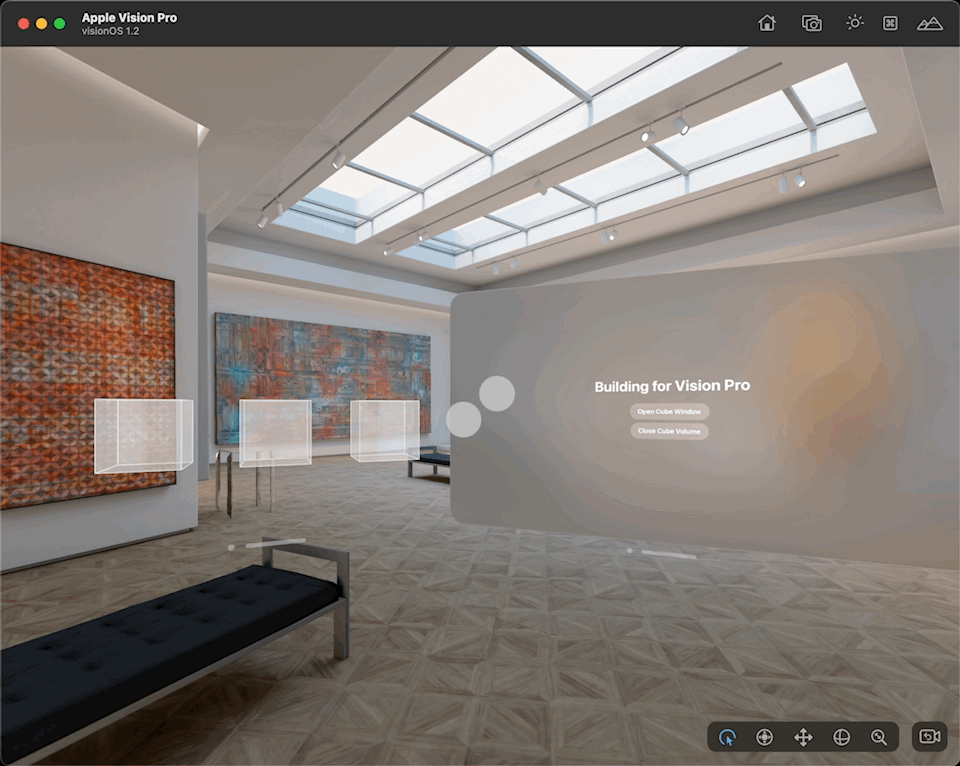
In this tutorial, you'll enhance the visionOS app we created in the previous article by adding a glass cube in the space the users can interact with. Specifically, you'll learn how to:
- Create and configure a volumetric window
- Implement 3D content using RealityView offered by RealityKit
- Add interactions to RealityKit objects
- Use RealityView attachments to display information in the space
Let's dive in and start building your first interactive volumetric experience for visionOS!
Prerequisites
- Completion of the previous tutorial about Windows
- Xcode 15.4 or later
- Basic knowledge of SwiftUI and RealityKit
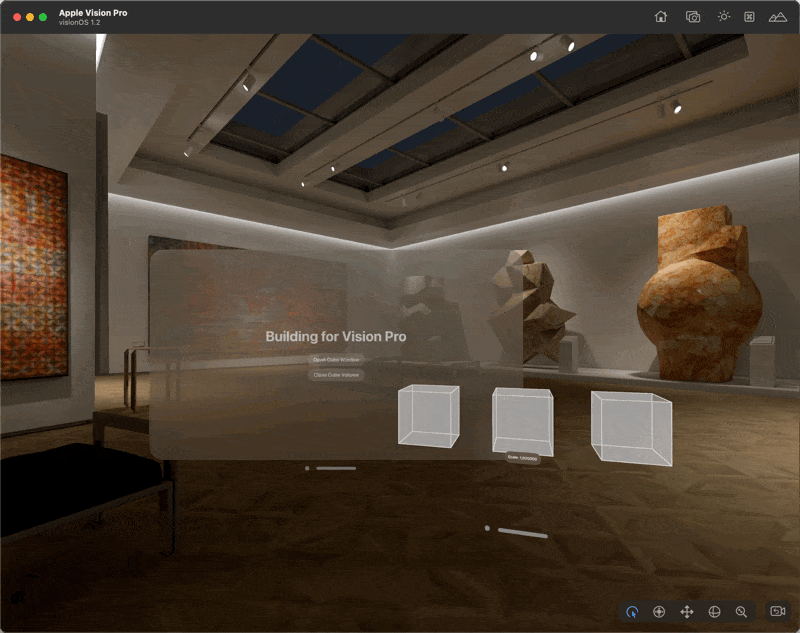
Step 1: Define a New WindowGroup for the Volume
- Open
Building_for_Vision_ProApp.swift - Add a new Window Group using this initializer:
WindowGroup(id:content:) - Use "CubeVolume" as an id (this will help you follow the tutorial later)
- Use
CubeRealityView()as the view to display in the volume content. We'll create in the next step - Specify the Window Style to be
volumetric
WindowGroup(id: "CubeVolume") {
    CubeRealityView()
}
.windowStyle(.volumetric)
- Specify the Volume default size using the
defaultSize(width:height:depth:in:)modifier
WindowGroup(id: "CubeVolume") {
    CubeRealityView()
}
.windowStyle(.volumetric)
.defaultSize(width: 1, height: 0.5, depth: 0.5, in: .meters)
defaultSize scene modifier is even more important with volumetric windows since the user cannot resize them in visionOS 1.0.Step 2: Create the CubeRealityView
- Create a new SwiftUI View named CubeRealityView:
- Press
Cmd + Nor navigate to File > New > File - Select "SwiftUI View" from the template options
- Name it
CubeRealityView.swift
- Press
- Set up the RealityView:
- Add
import RealityKitat the top of the file - Replace the default
Textview with aRealityView
- Add
- Create a new
ModelEntityusing the “Cube” - Add three
cubeentities to the RealityView content
RealityView { content in
    if let cube = try? await ModelEntity(named: "Cube") {
        let firstCube = cube.clone(recursive: false)
        firstCube.position = [0.35, 0, 0]
        firstCube.generateCollisionShapes(recursive: false)
        firstCube.components.set(InputTargetComponent())

        let secondCube = cube.clone(recursive: false)
        secondCube.position = [0, 0, 0]
        secondCube.generateCollisionShapes(recursive: false)
        secondCube.components.set(InputTargetComponent())

        let thirdCube = cube.clone(recursive: false)
        thirdCube.position = [-0.35, 0, 0]
        thirdCube.generateCollisionShapes(recursive: false)
        thirdCube.components.set(InputTargetComponent())

        content.add(firstCube)
        content.add(secondCube)
        content.add(thirdCube)
    }
}
- Set the Preview window style attribute as
.volumetric
#Preview(windowStyle: .volumetric) {
    CubeRealityView()
}
Step 3: Update the LaunchView
- Open
LaunchView.swift - Add a state variable to track the volume status:
@State private var isVolumeOpen: Bool = false- Add a button to toggle the volume:
Button(isVolumeOpen ? "Close Cube Volume" : "Open Cube Volume") {
    if isVolumeOpen {
        dismissWindow(id: "CubeVolume")
        isVolumeOpen = false
    } else {
        openWindow(id: "CubeVolume")
        isVolumeOpen = true
    }
}
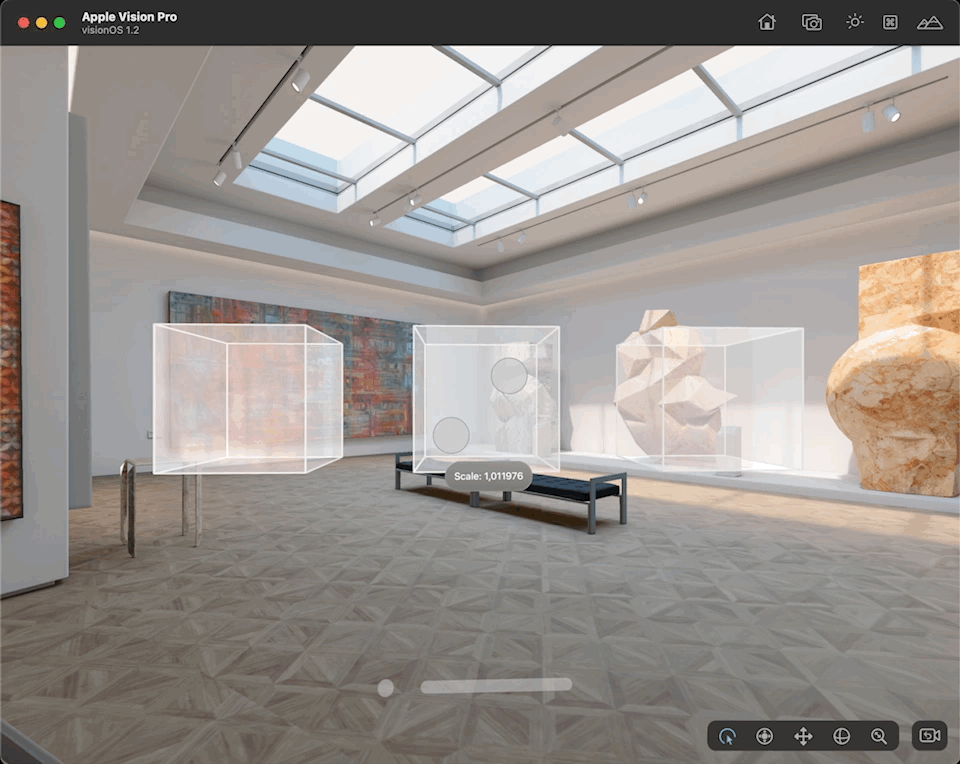
Step 4: Implement Scale Interaction
- In
CubeRealityView.swift, add a state variable for scale:
@State private var scale: CGFloat = 1.0- Add a gesture modifier to handle scaling with a
MagnifyGesture:
.gesture(
    MagnifyGesture(minimumScaleDelta: 0)
        .onChanged { value in
            scale = min(max(1, value.magnification), 1.5)
        }
        .targetedToAnyEntity()
)- Update the RealityView to apply the scale on entities when the state of the view changes:
RealityView { content in
    ...
} update: { content in
    for entity in content.entities {
        entity.transform.scale = [Float(scale), Float(scale), Float(scale)]
    }
}
Step 5: Add a RealityView Attachment
- Add
attachmentsparameter to theRealityViewclosures
RealityView { content, attachments in
    ...
} update: { content, attachments in
    ...
}
.gesture(
    ...
)
- Add an
attachments:closure to theRealityView - Define a new “Scale Info” attachment
RealityView { content, attachments in
    ...
} update: { content, attachments in
    ...
} attachments: {
    Attachment(id: "ScaleInfo") {
        Text("Scale: \(scale)")
            .padding()
            .glassBackgroundEffect()
    }
}
.gesture(
    ...
)
- Add code to handle attachments in the main closure:
RealityView(make: { content, attachments in
    ...
    if let attachment = attachments.entity(for: "ScaleInfo"){
         attachment.position = [0, -0.1, 0.15]
         content.add(attachment)
    }
}, update: { content, attachments in
    ...
}, attachments: {
   ...
})
Conclusion
Congratulations! You've now created a volumetric experience in visionOS.
You've learned how to:
- Create and configure a volumetric window
- Implement 3D content using RealityKit
- Add scale interactions to 3D objects
- Use RealityView attachments to display information in 3D space
This volumetric interface allows users to interact with 3D content in a more immersive and intuitive way, showcasing the unique capabilities of spatial computing on Apple Vision Pro.
In the next and final tutorial of this series, we'll explore Immersive Spaces, taking our visionOS app to an even more immersive level.