
Creating CarPlay apps within a SwiftUI app lifecycle
Understand and apply correct settings in Xcode to create CarPlay apps within a SwiftUI Lifecycle App.

The next generation of CarPlay, CarPlay 2, was announced at WWDC 2022 and peeked at again at WWDC 2024. It has still not been released, but that does not mean you can't develop CarPlay features for your existing SwiftUI or UIKit apps.
Let's look at what it takes to implement CarPlay capabilities within a SwiftUI-based application.
Requesting CarPlay Entitlements
To develop any app with CarPlay integration, you must request the appropriate entitlement for the app’s category at CarPlay Contact Us. You must agree to the CarPlay Entitlement Addendum and provide some details about the app under development for Apple to review.
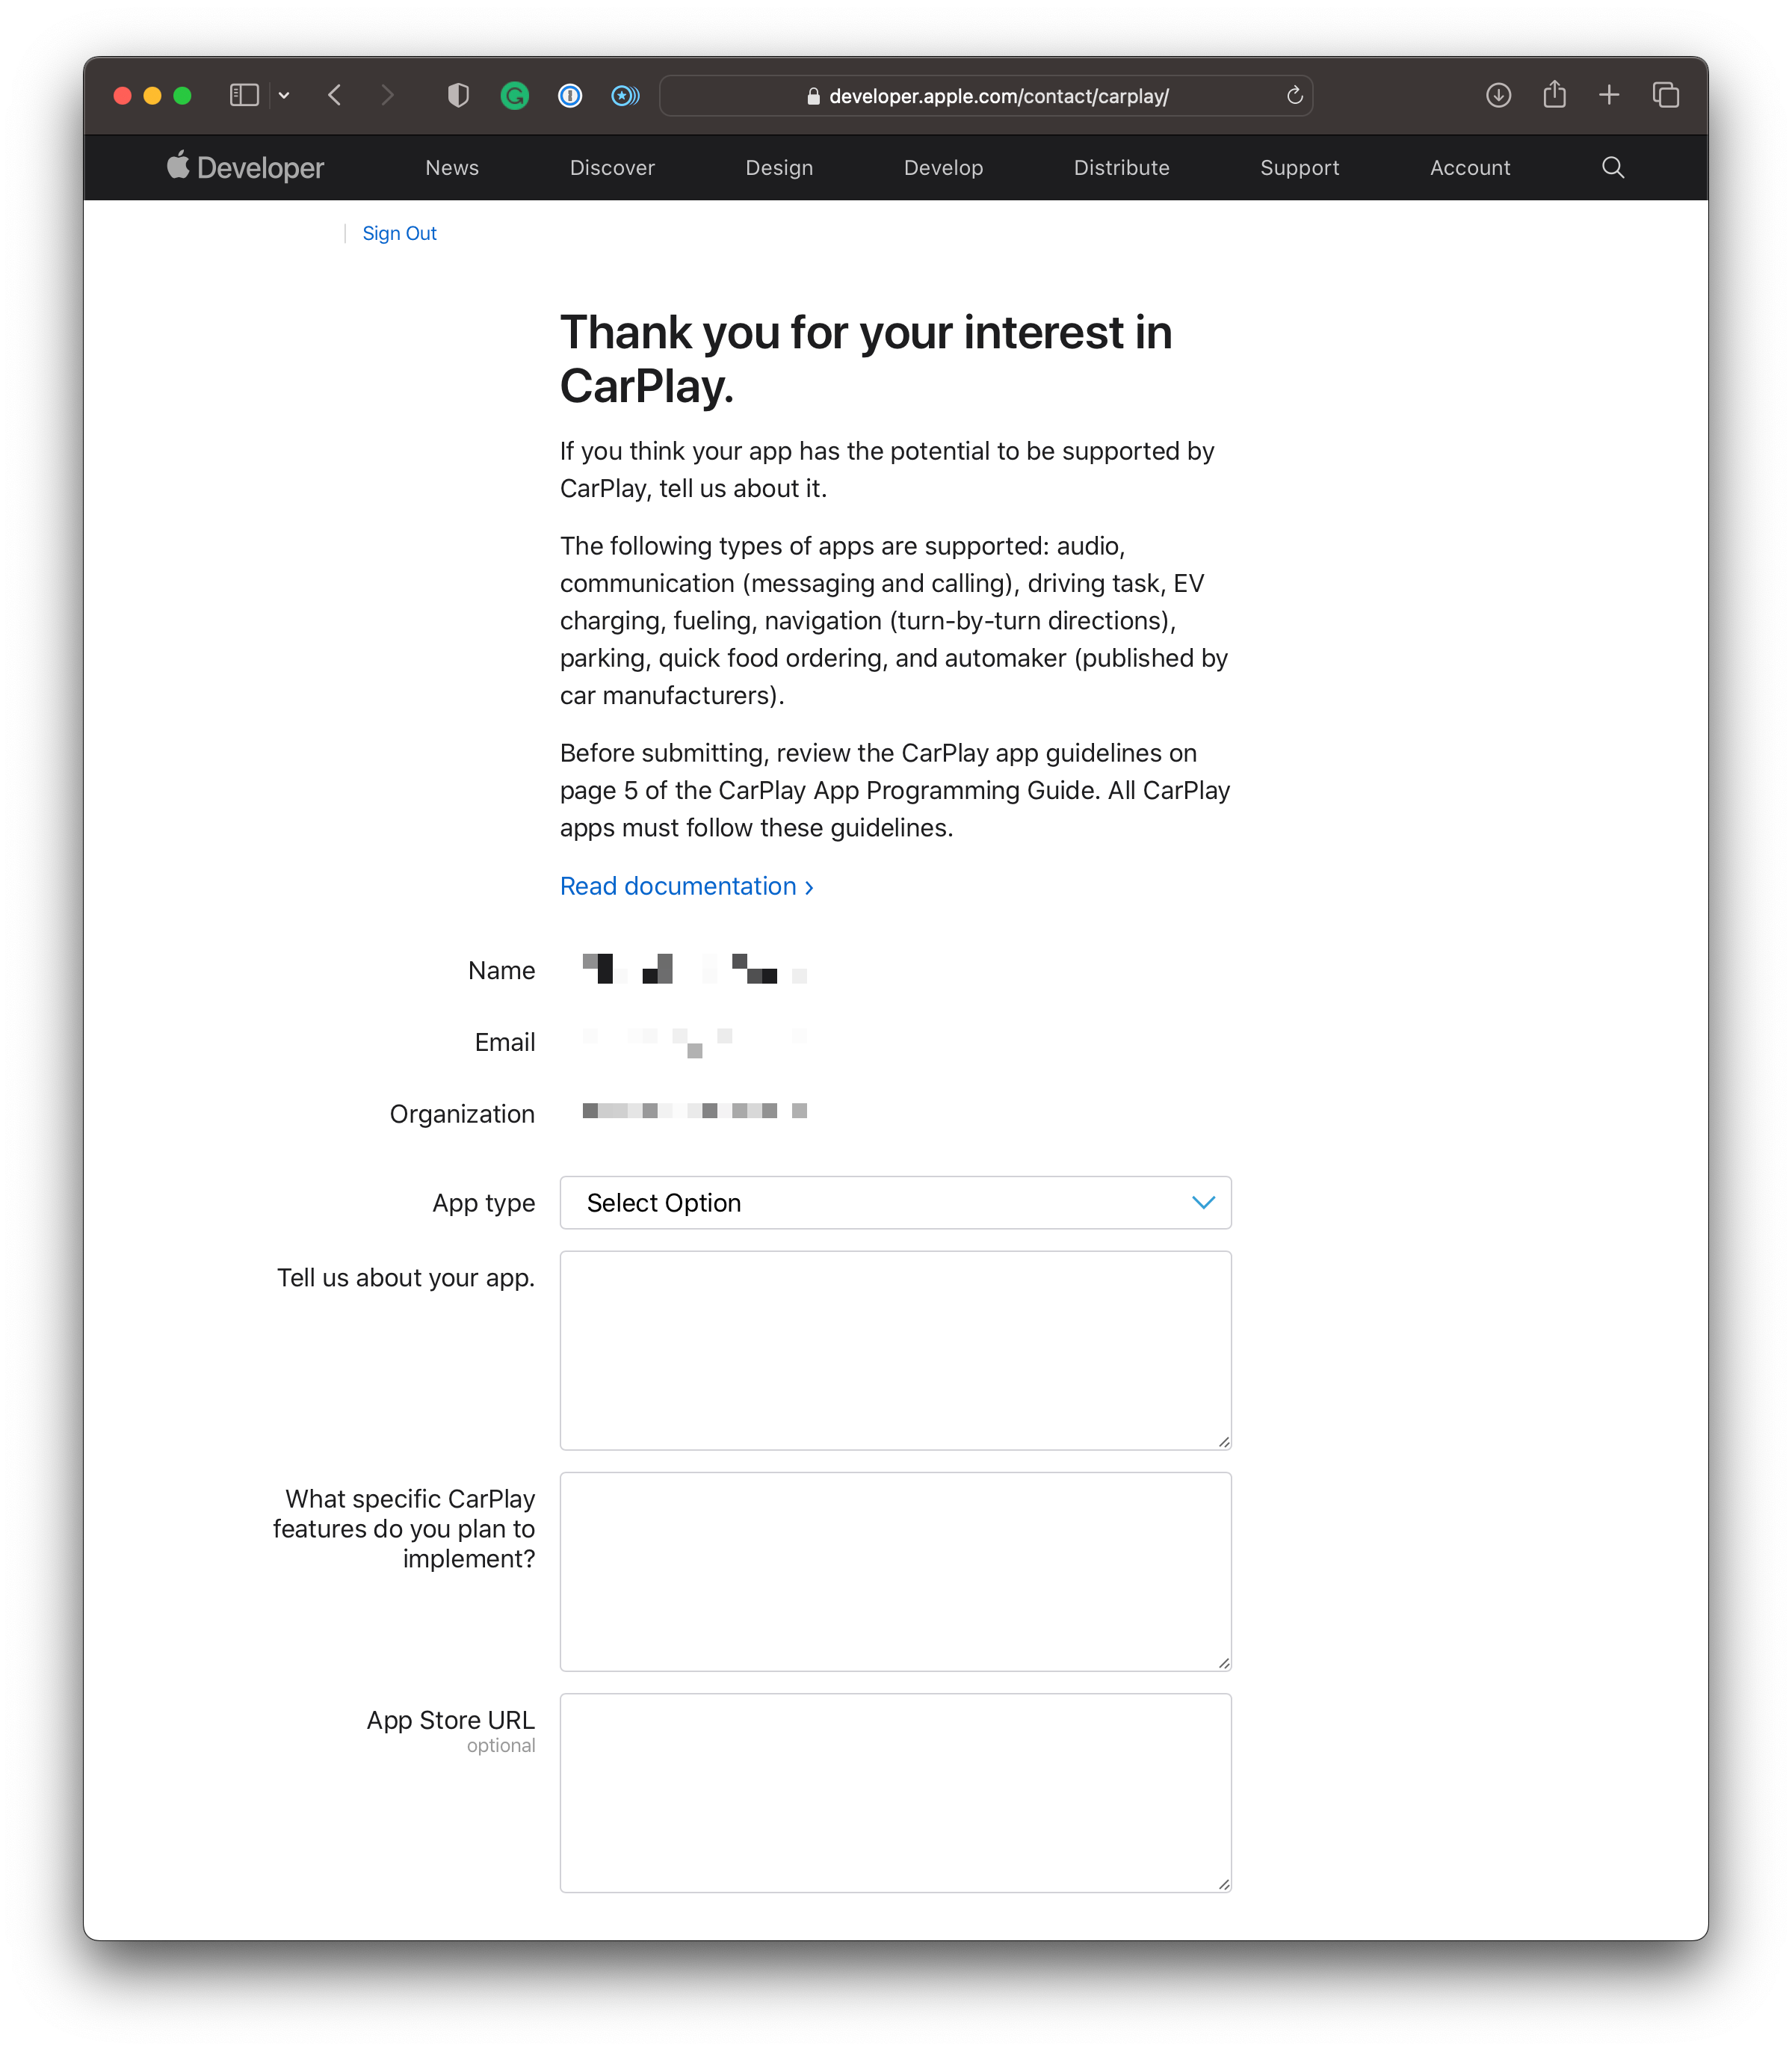
There are various types of apps supported which may be safely used while driving:
- Audio
- Communication
- Driving Task
- EV Charging
- Fueling
- Navigation
- Parking
- Quick Food Ordering.
It is also possible to request CarPlay entitlements for apps to be released by an automaker.

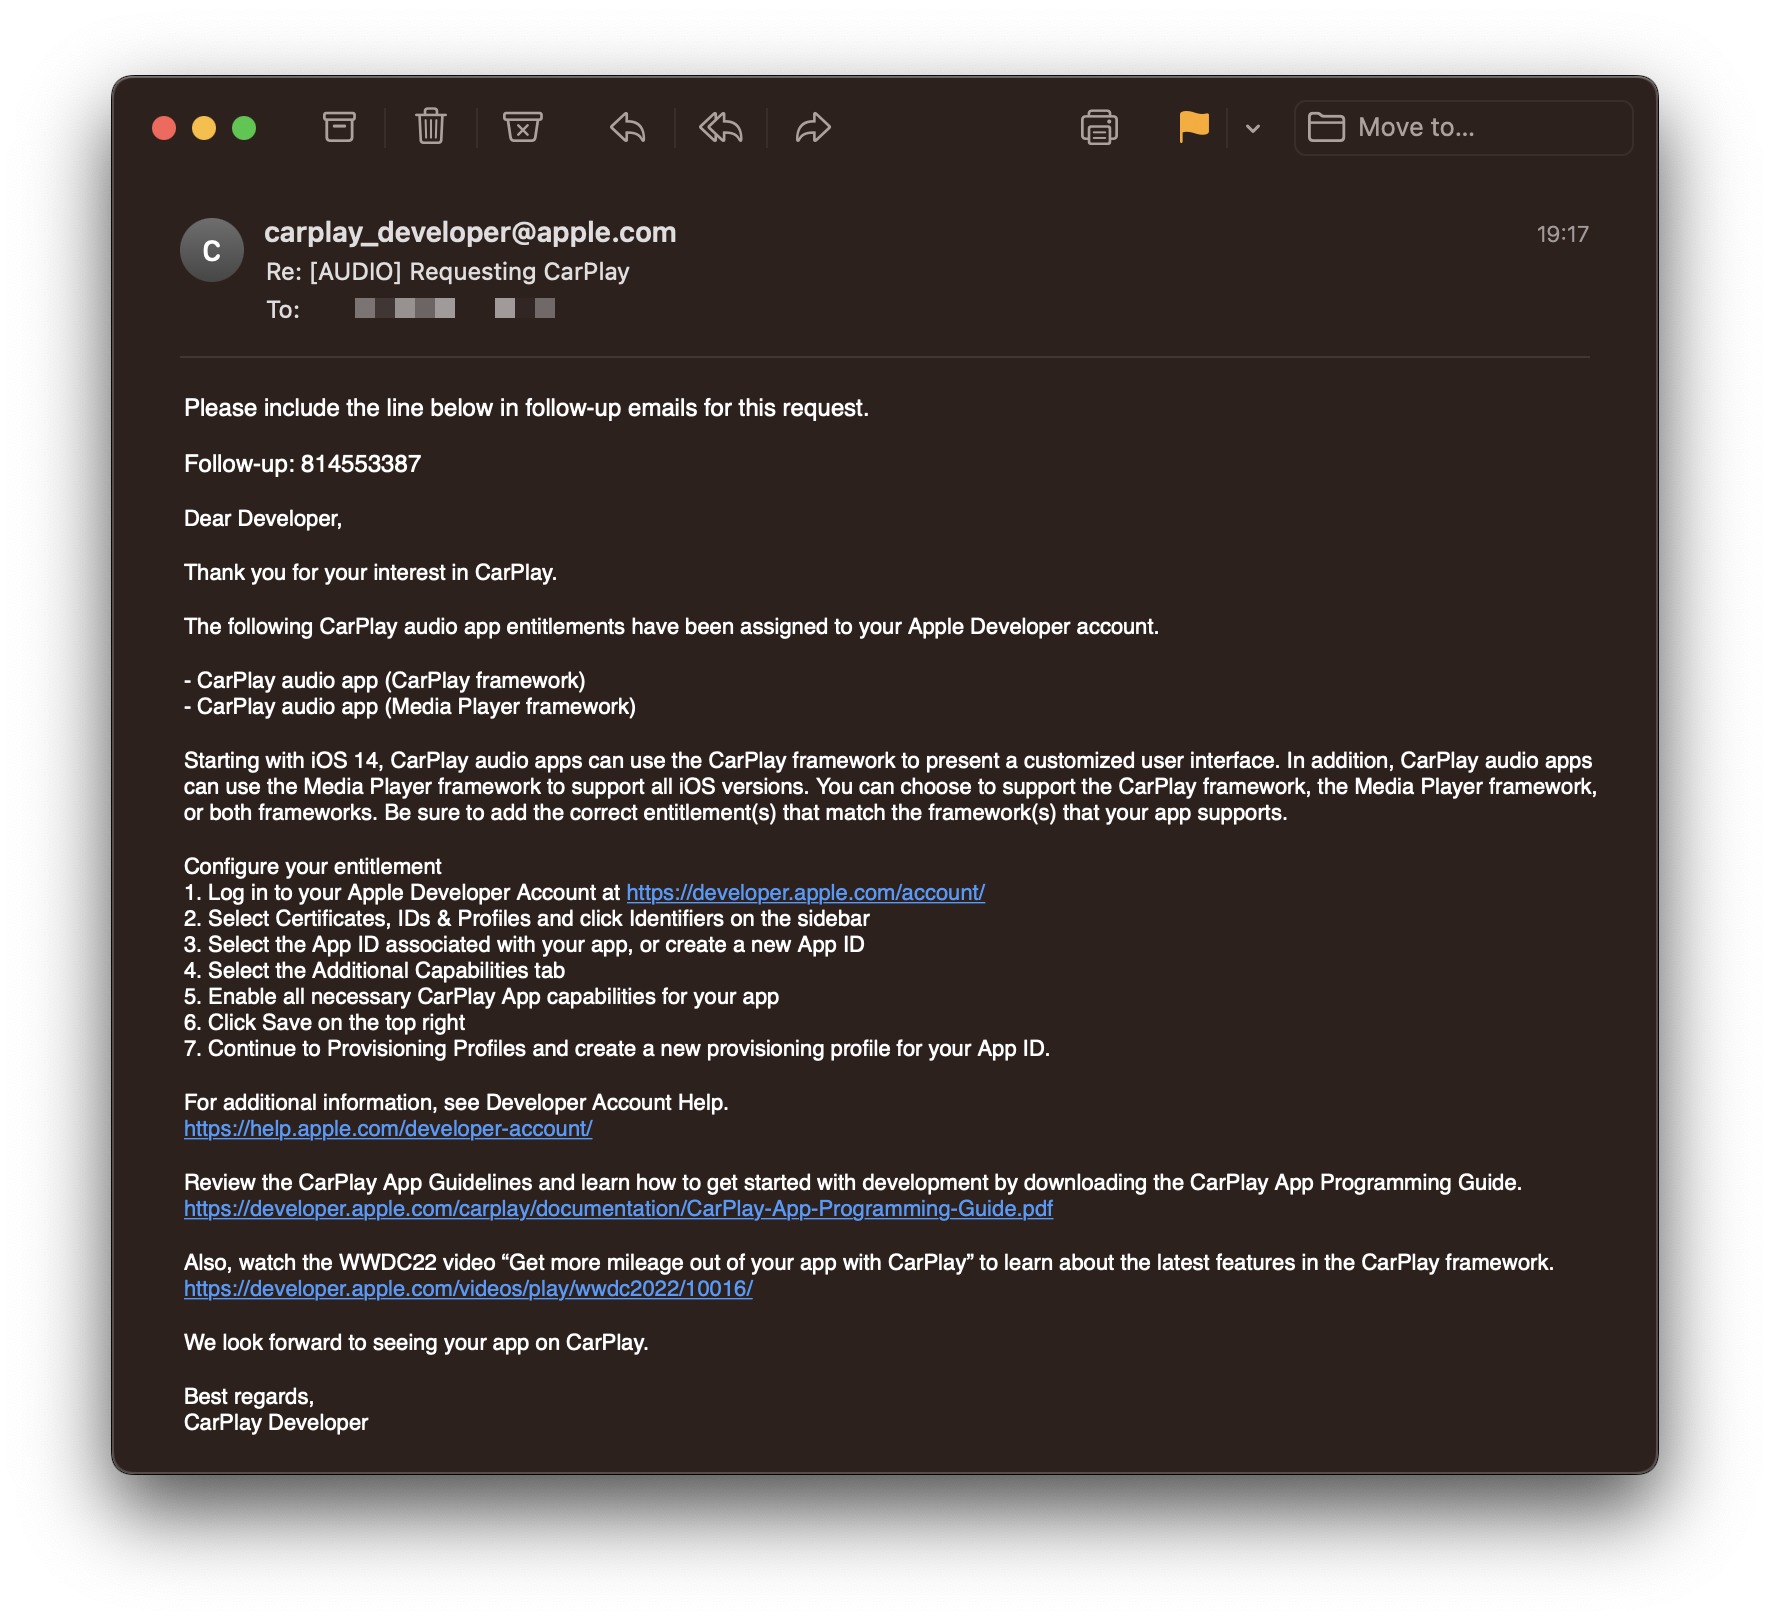
If the request is accepted, Apple will reply with an email and add the entitlement to your developer account using managed capabilities.
Configuring an Xcode Project to support CarPlay
Adding CarPlay Entitlements
Once the entitlements are available, the Xcode project using CarPlay needs to be configured with a corresponding provisioning profile, an Entitlements.plist file, and some custom code signing settings. This is quickly done by adding capabilities to the project in the App Target's Signing & Capabilities tab.
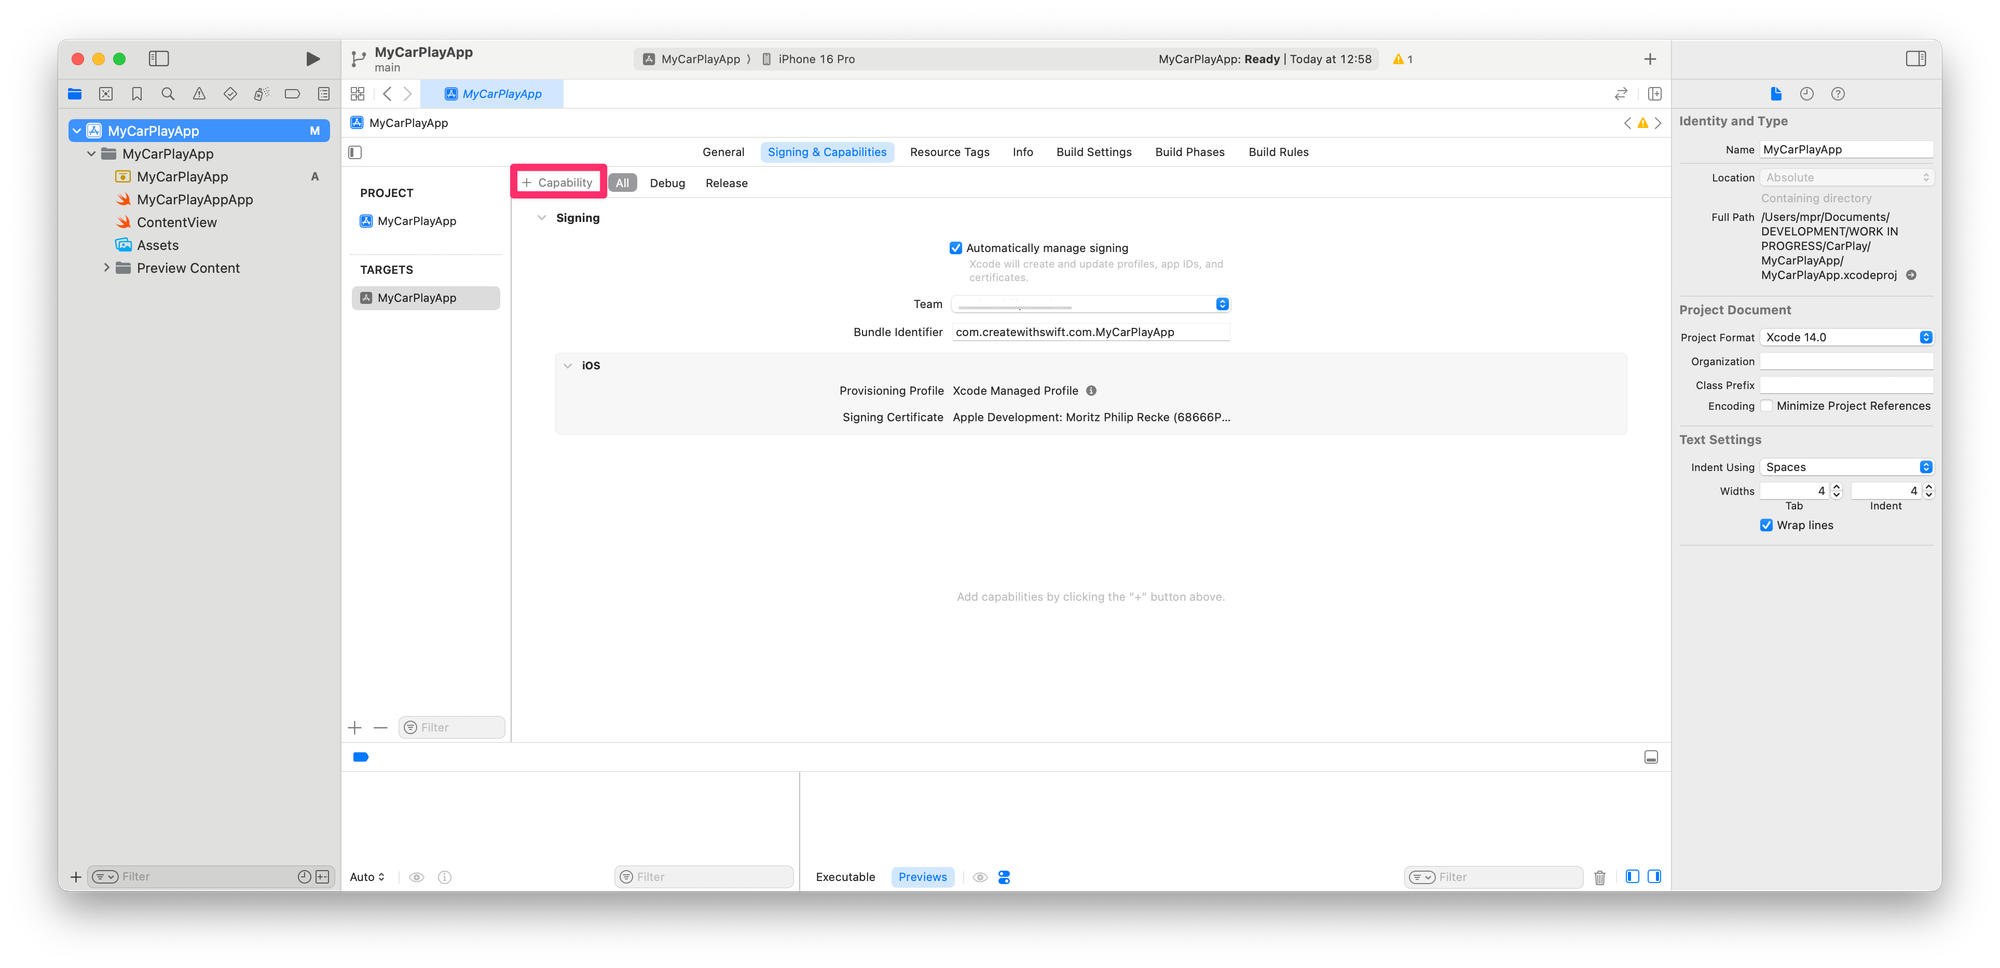
You will be able to add to your project all the entitlements that were requested by you and approved by Apple.
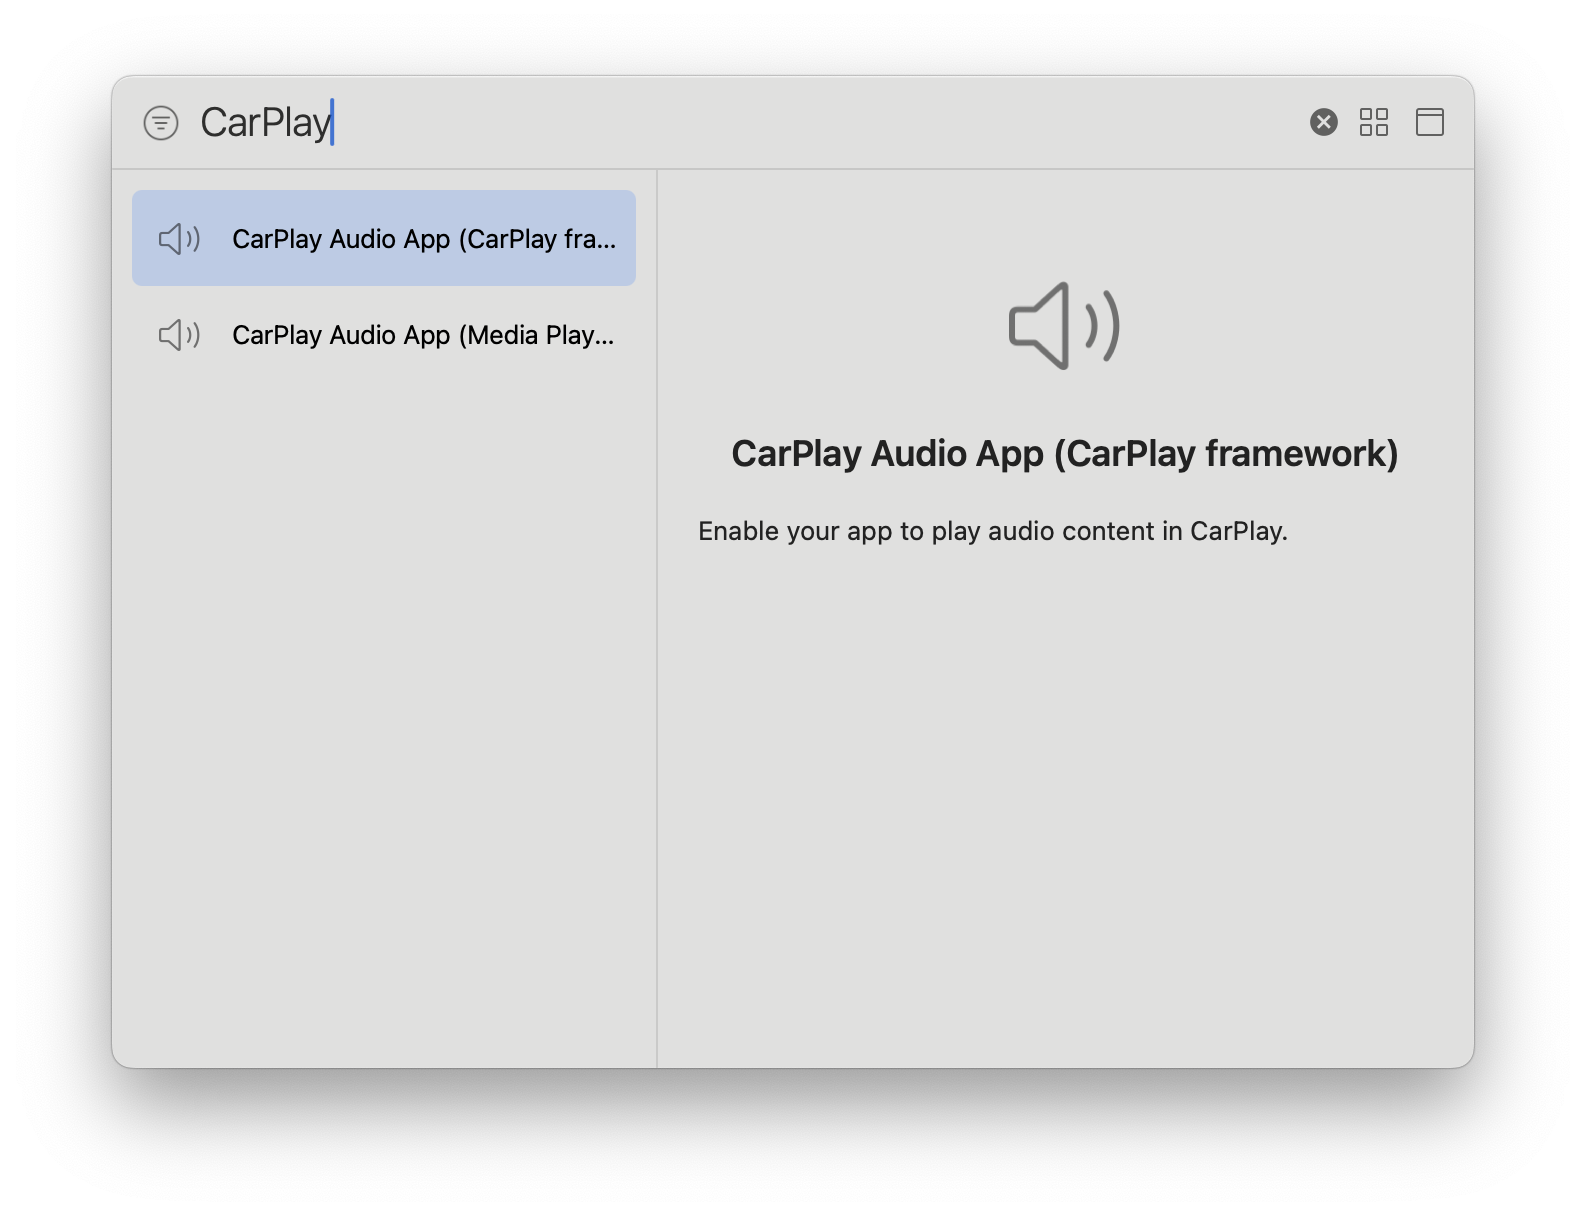
In the example below, Audio App entitlements were requested so that both the CarPlay Audio App (CarPlay framework) and the CarPlay Audio App (Media Player framework) capabilities could be added. All the CarPlay capabilities you might need for your app can be added by following this procedure.
Alternatively, the Entitlements.plist file of the project can be edited by adding appropriate keys to enable the CarPlay capabilities.
Adding the CarPlay Framework
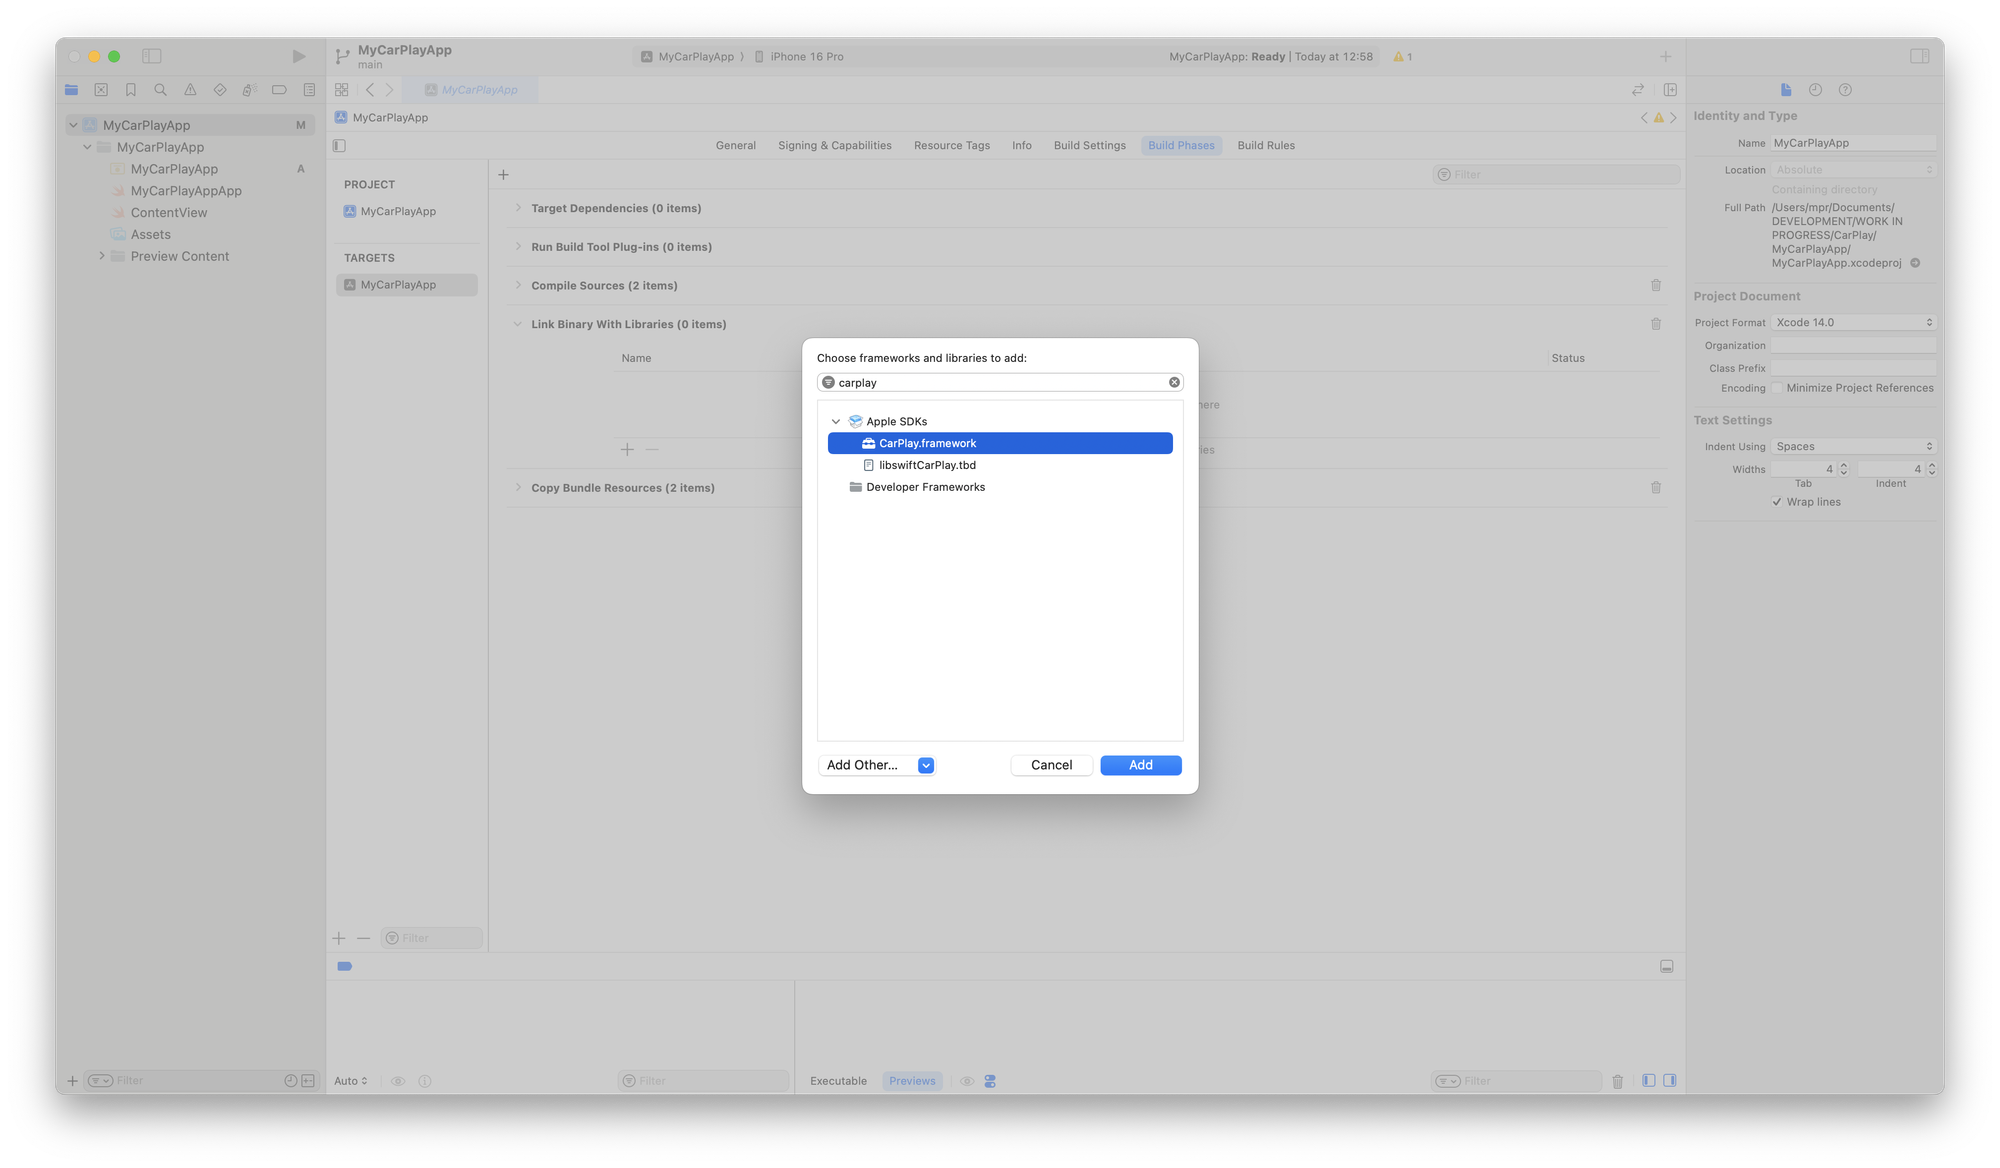
At the tab Build Phases of the App Target, you can now add the CarPlay framework as a library for use in the project. Go to the section Link Binary with Libraries and choose the framework to be added.
Setting Application Scene Manifest in the Info.plist
To allow the app to support CarPlay, we need to add a scene that manages the CarPlay UI and a window that displays CarPlay on the vehicle screen. While Navigation apps can access these windows, all other CarPlay app types can only access the scene’s interface controller to manage their user interface.
For this to work, we must provide a Scene Delegate who will notify the system about any scene lifecycle changes over time. These scenes and their delegates are created when a user launches the app.
You can configure these settings in the Info tab of the App Target, as shown below. Overall, the app will have two scene configurations, one for the CarPlay UI and one for the iPhone UI.
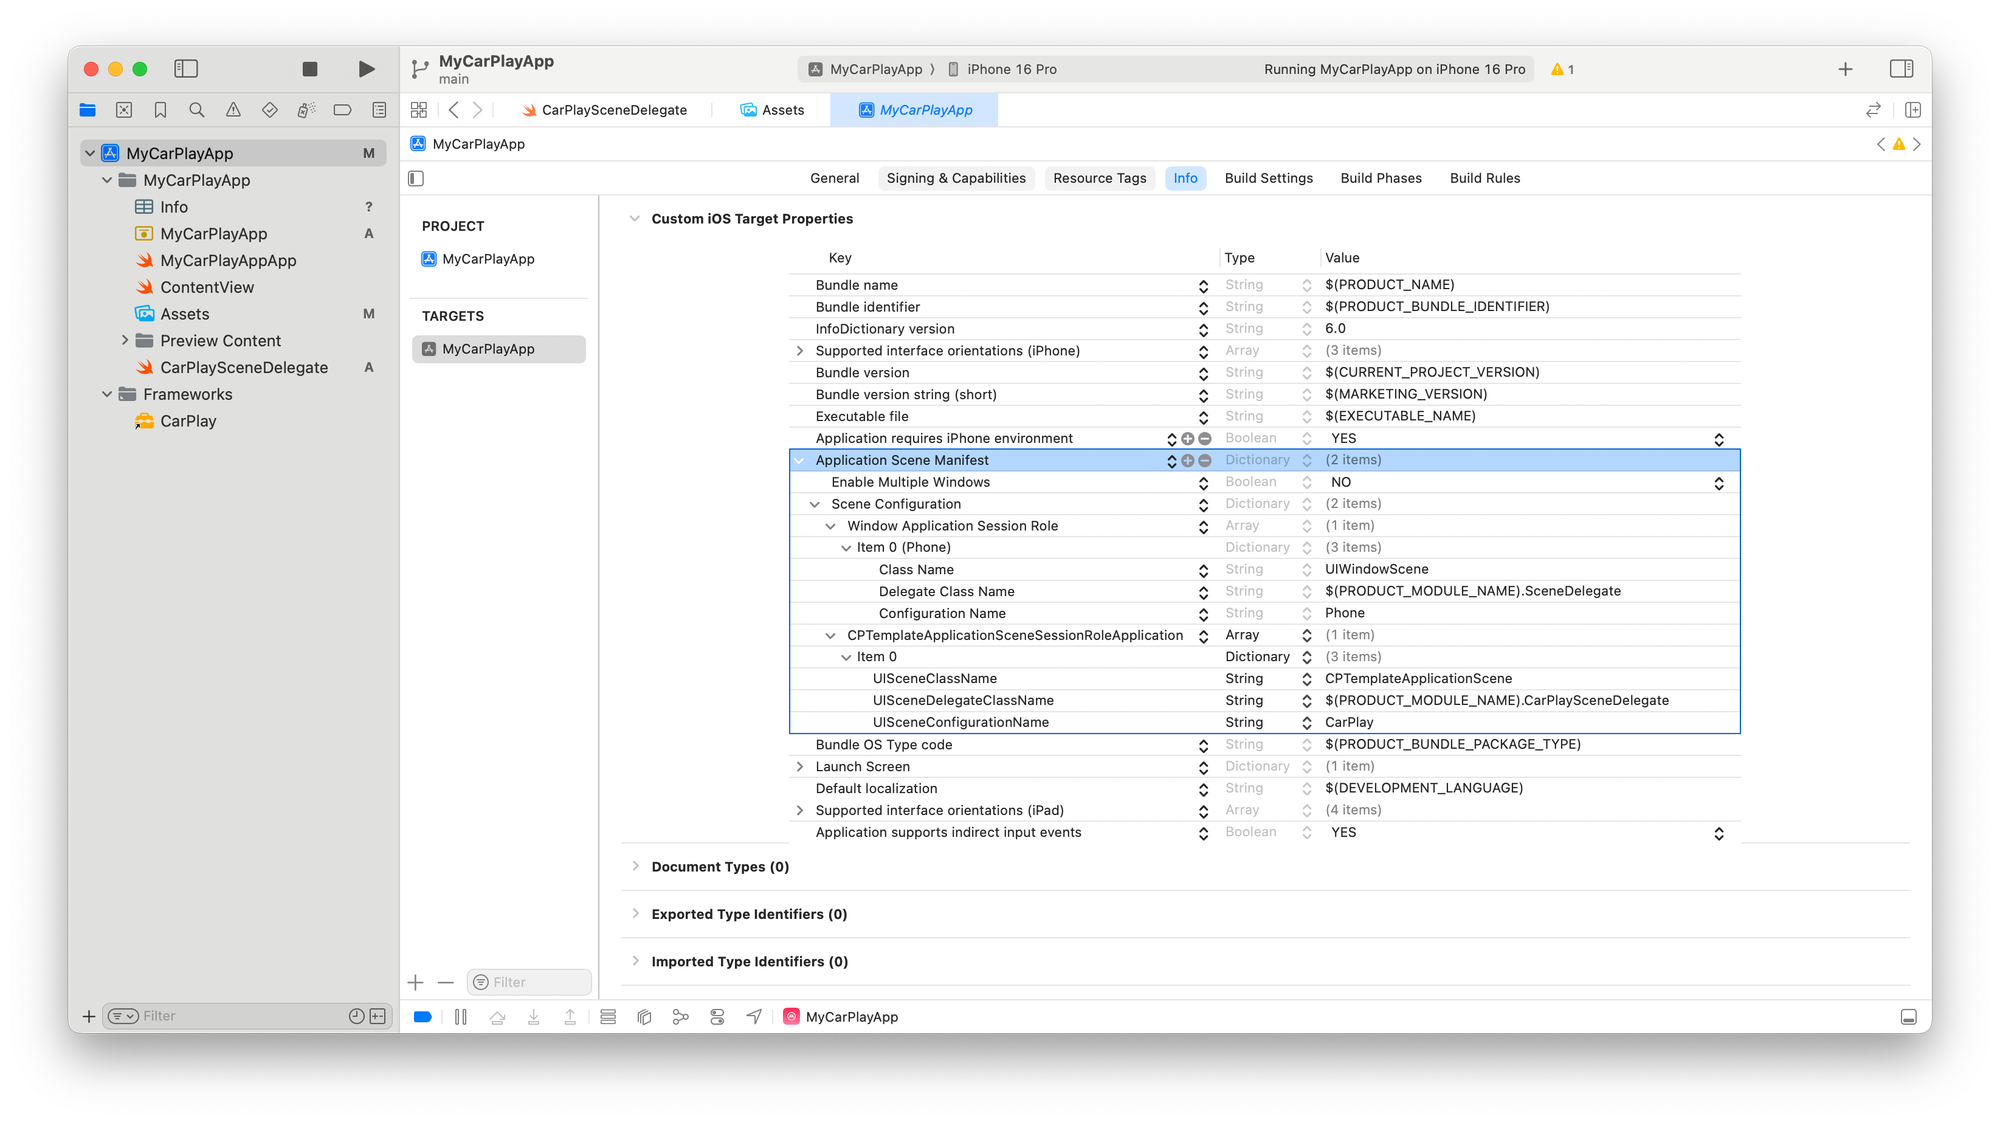
In the Xcode project’s Info.plist file, we can specify the scene delegate’s class name as the value of the key UISceneDelegateClassName.
<key>UIApplicationSceneManifest</key>
<dict>
    <key>UIApplicationSupportsMultipleScenes</key>
    <true/>

    <key>UISceneConfigurations</key>
    <dict>
        <key>CPTemplateApplicationSceneSessionRoleApplication</key>
        <array>
            <dict>
                <key>UISceneClassName</key>
                <string>CPTemplateApplicationScene</string>

                <key>UISceneConfigurationName</key>
                <string>CarPlay</string>

                <key>UISceneDelegateClassName</key>
                <string>$(PRODUCT_MODULE_NAME).CarPlaySceneDelegate</string>
            </dict>
        </array>

        <key>UIWindowSceneSessionRoleApplication</key>
        <array>
            <dict>
                <key>UISceneClassName</key>
                <string>UIWindowScene</string>

                <key>UISceneConfigurationName</key>
                <string>iPhone</string>

                <key>UISceneDelegateClassName</key>
                <string>$(PRODUCT_MODULE_NAME).SceneDelegate</string>
            </dict>
        </array>
    </dict>

</dict>
Updating Build Settings
Lastly, some Build Settings must be adjusted to overcome some common challenges when working with the SwiftUI application lifecycle. There are extensive discussions around making CarPlay play nice with SwiftUI, e.g. on Stackoverflow.
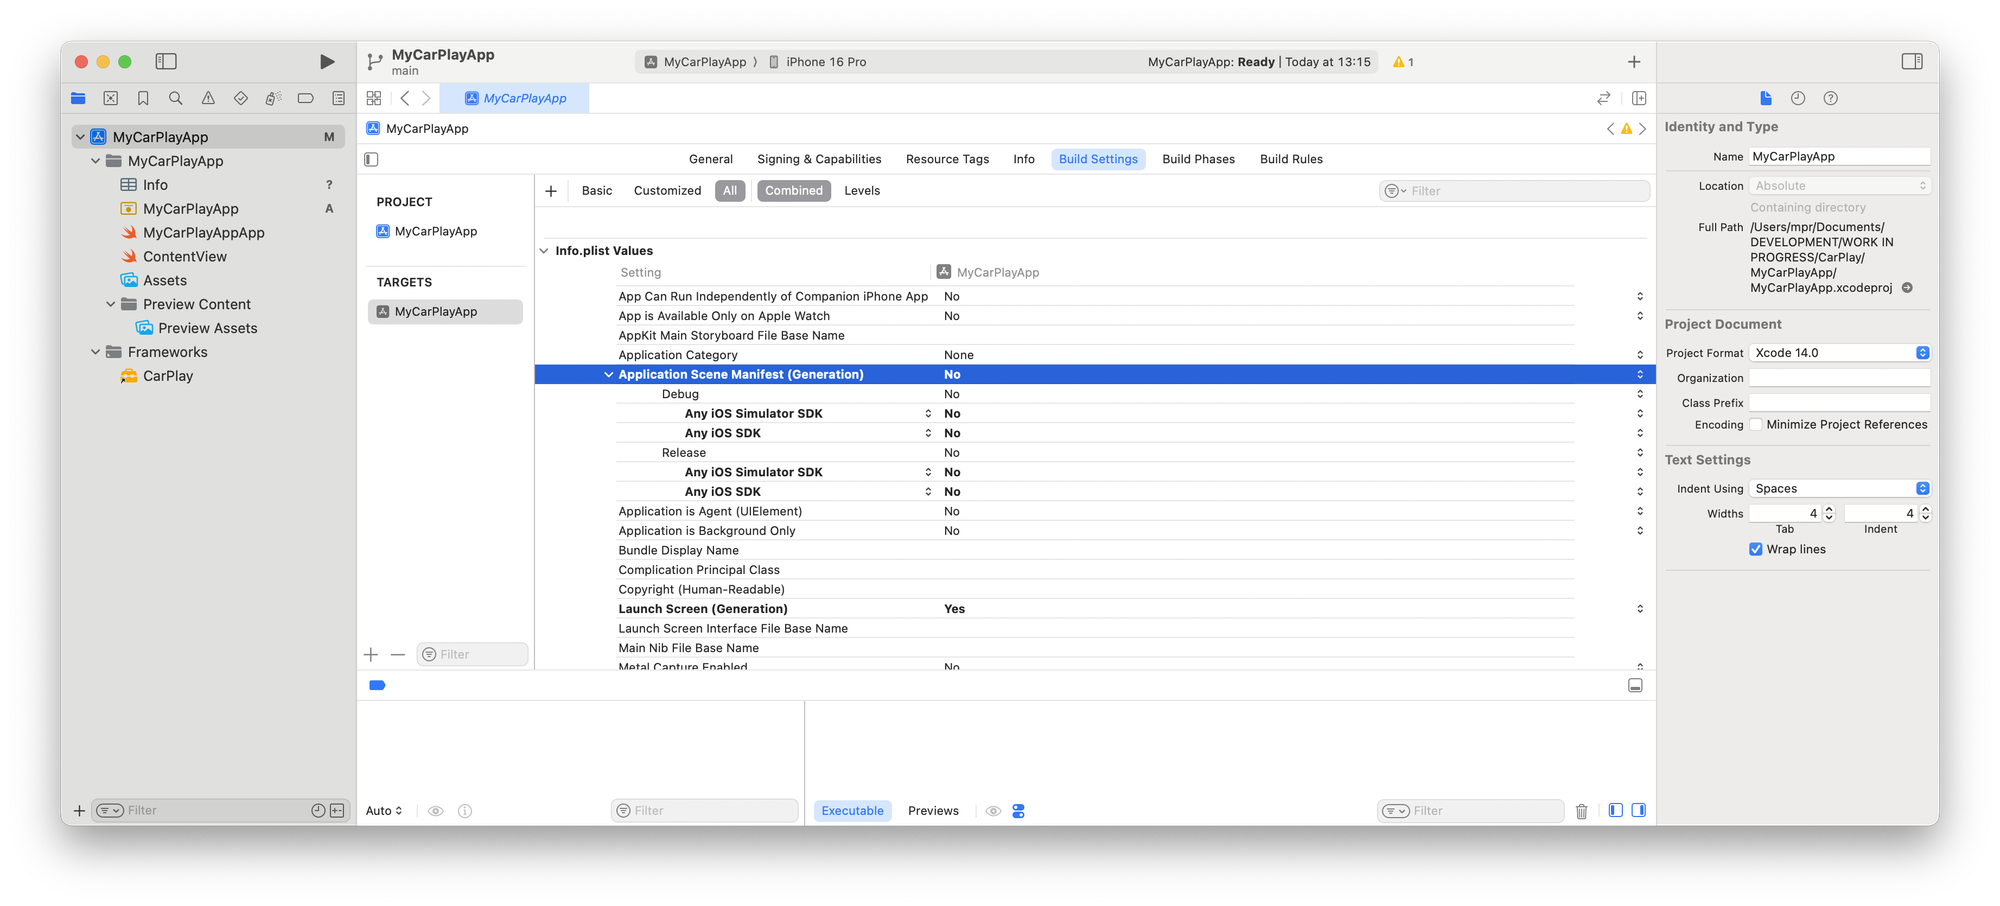
A viable solution is to adjust the Application Scene Manifest (Generation) settings in the app target's Build Settings tab.
There are no defined constraints by default, but we can override the build settings in the info.plist to ensure that these are not overwritten with automatically generated Application Scene Manifests generated in the build phase.
With these settings completed, the Xcode project is ready to build the CarPlay UI, which will run correctly. This approach has been supported for a while and works with Xcode 16.2. It is unclear what changes will be coming when the next generation of CarPlay is announced, but until then, this approach works just fine.
Templates to build CarPlay UI
This article will not go into detail about building a SwiftUI interface for a CarPlay app. So, let's focus on how to build CarPlay UI and outline a simple interface to illustrate some of these concepts.
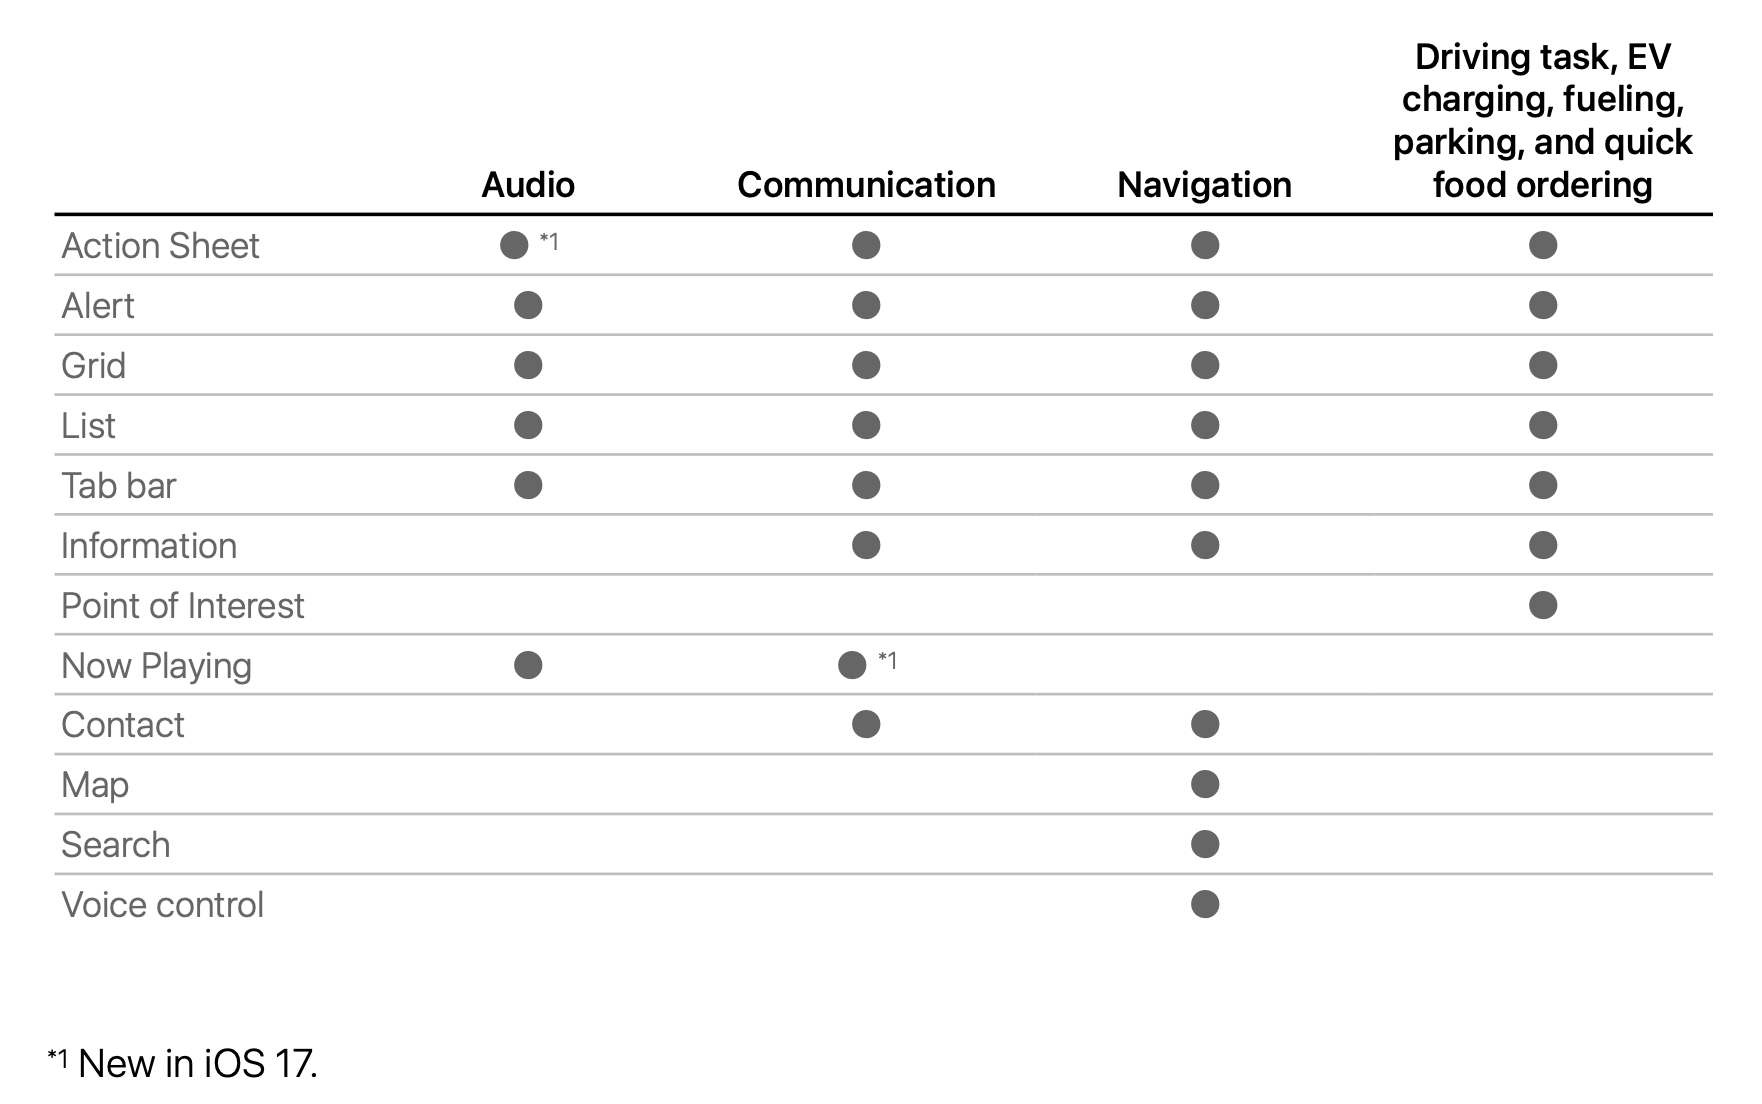
There is extensive documentation from Apple on how to display content in a CarPlay app. CarPlay generally works with templates that unify the overall UI and navigation within any CarPlay app. This ensures a consistent - and also safe - experience while driving.
The current available templates are:
- Action Sheet Template (
CPActionSheetTemplate) displays a modal action sheet with a title, a message and a list of actions (CPAlertAction) the user can perform. - Alert Template (
CPAlertTemplate) displays a modal alert with an array of title variants and actions, similar to the Action Sheet Template. - Contact Template (
CPContactTemplate) displays information about a person or a business and can contain up to four contextual actions for the user, such as directions or calling the contact (CPContact). - Grid Template (
CPGridTemplate) displays a grid of items. All items are implemented as buttons (CPGridButton) with a title and an image. The maximum amount of items in the grid is not limited, however only the first eight items will be displayed. They are split into two rows if there are more than four buttons. - Information Template (
CPInformationTemplate) provides information about parking locations, charging locations, points of interest and the like in the form of a list of items (CPInfomrationItem) with a maximum of three actions (CPTextButton) for the user to perform. - List Template (
CPListTemplate) displays and manages a list of items (CPListItem) that can be grouped into sections. Upon selection of an item, navigation into hierarchical data is supported. - Map Template (
CPMapTemplate) displays a navigation overlay drawn by the app on the map. The template acts as a control layer with navigation, map buttons (CPMapButton), and more that allows the user to interact with the app. It can be used to display trip previews, navigate during trips, provide trip estimates, display navigation alerts and panning the map. Most importantly, it is a layer on top of the actual base map view. - Now Playing Template (
CPNowPlayingTemplate) displays Now Playing information, e.g., playback controls (CPNowPlayingButton), information about the album artist and what is coming up next. - Point of Interest Template (
CPPointOfInterestTemplate) displays a map with points of interest (CPPointOfInterest) annotations that the user can select. Information can also be displayed with scrollable pickers. When an item is selected, the template can display detail views with secondary information and actions that can be performed. Also, the map can be zoomed and panned. - Search Template (
CPSearchTemplate) displays the ability to search for destinations and browse a list of search results. CarPlay displays a search field, a cancel button and a localized keyboard to facilitate the search. The results are displayed as list items (CPListItem) and can be selected. - Tab Bar Template (
CPTabBarTemplate) serves as a container template to manage or display other templates, presenting them as tabs. Each tab can occupy a single tab space in the CarPlay UI tab bar. To add a tab bar template as the app navigation hierarchy, usesetRootTemplate(_:animated:completion:)to add the tab bar as the root template of the app. - Voice Control Template (
CPVoiceControlTemplate) displays a voice control indicator while the app is using audio input.
Supported templates are defined through CarPlay entitlements, meaning which template you can use depends on the type of app your entitlement was approved for. Using unsupported templates will result in a runtime error.
When it comes to developing comprehensive and intuitive CarPlay applications, there is much more to explore. Apple provides an in-depth CarPlay App Programming Guide, last updated in March 2024. The guide describes how to create all the types of CarPlay apps described above, except for automaker apps.