Creating Custom SF Symbols
Learn everything you need to know to create custom SF Symbols for your applications.

Introduced in 2019 with 1,000 symbols, the SF Symbols library has since grown exponentially, reaching a substantial 6,000 symbols over six years. These symbols are designed to integrate seamlessly with Apple’s San Francisco font, ensuring visual consistency across apps. This enhances user familiarity, promotes intuitive navigation, and creates a smoother experience across devices.
With the extensive variety SF Symbols offers, it's rare not to find a symbol that fits your app's needs. The comprehensive collection caters to a wide range of use cases, reducing the necessity to design icons from scratch.
However, there is always room for customization: if a specific symbol isn't available, for instance, icons can be exported into vector graphics editing tools, modified, or created entirely from scratch, maintaining the shared design language and accessibility features of the existing library. This flexibility ensures that app interfaces can be unique and consistent with Apple's design standards.
There are many ways to create a new custom symbol and despite which of these ways is going to be used, the process always follows the same structure:
- Create the symbol.
- Optionally, you can customize it to have more control over its rendering behavior.
- Get the file ready to be used in the Xcode.
- Use the symbols in a SwiftUI view.
Let’s explore this process.
Creation
There are two different approaches by which you can create a new symbol:
- Combining a symbol with a component available in the SF Symbols app;
- Creating symbols using vectorial tools.
Each method has pros and cons, balancing ease of use, flexibility, and the required level of design expertise.
Combining a symbol with a component available in the SF Symbols app
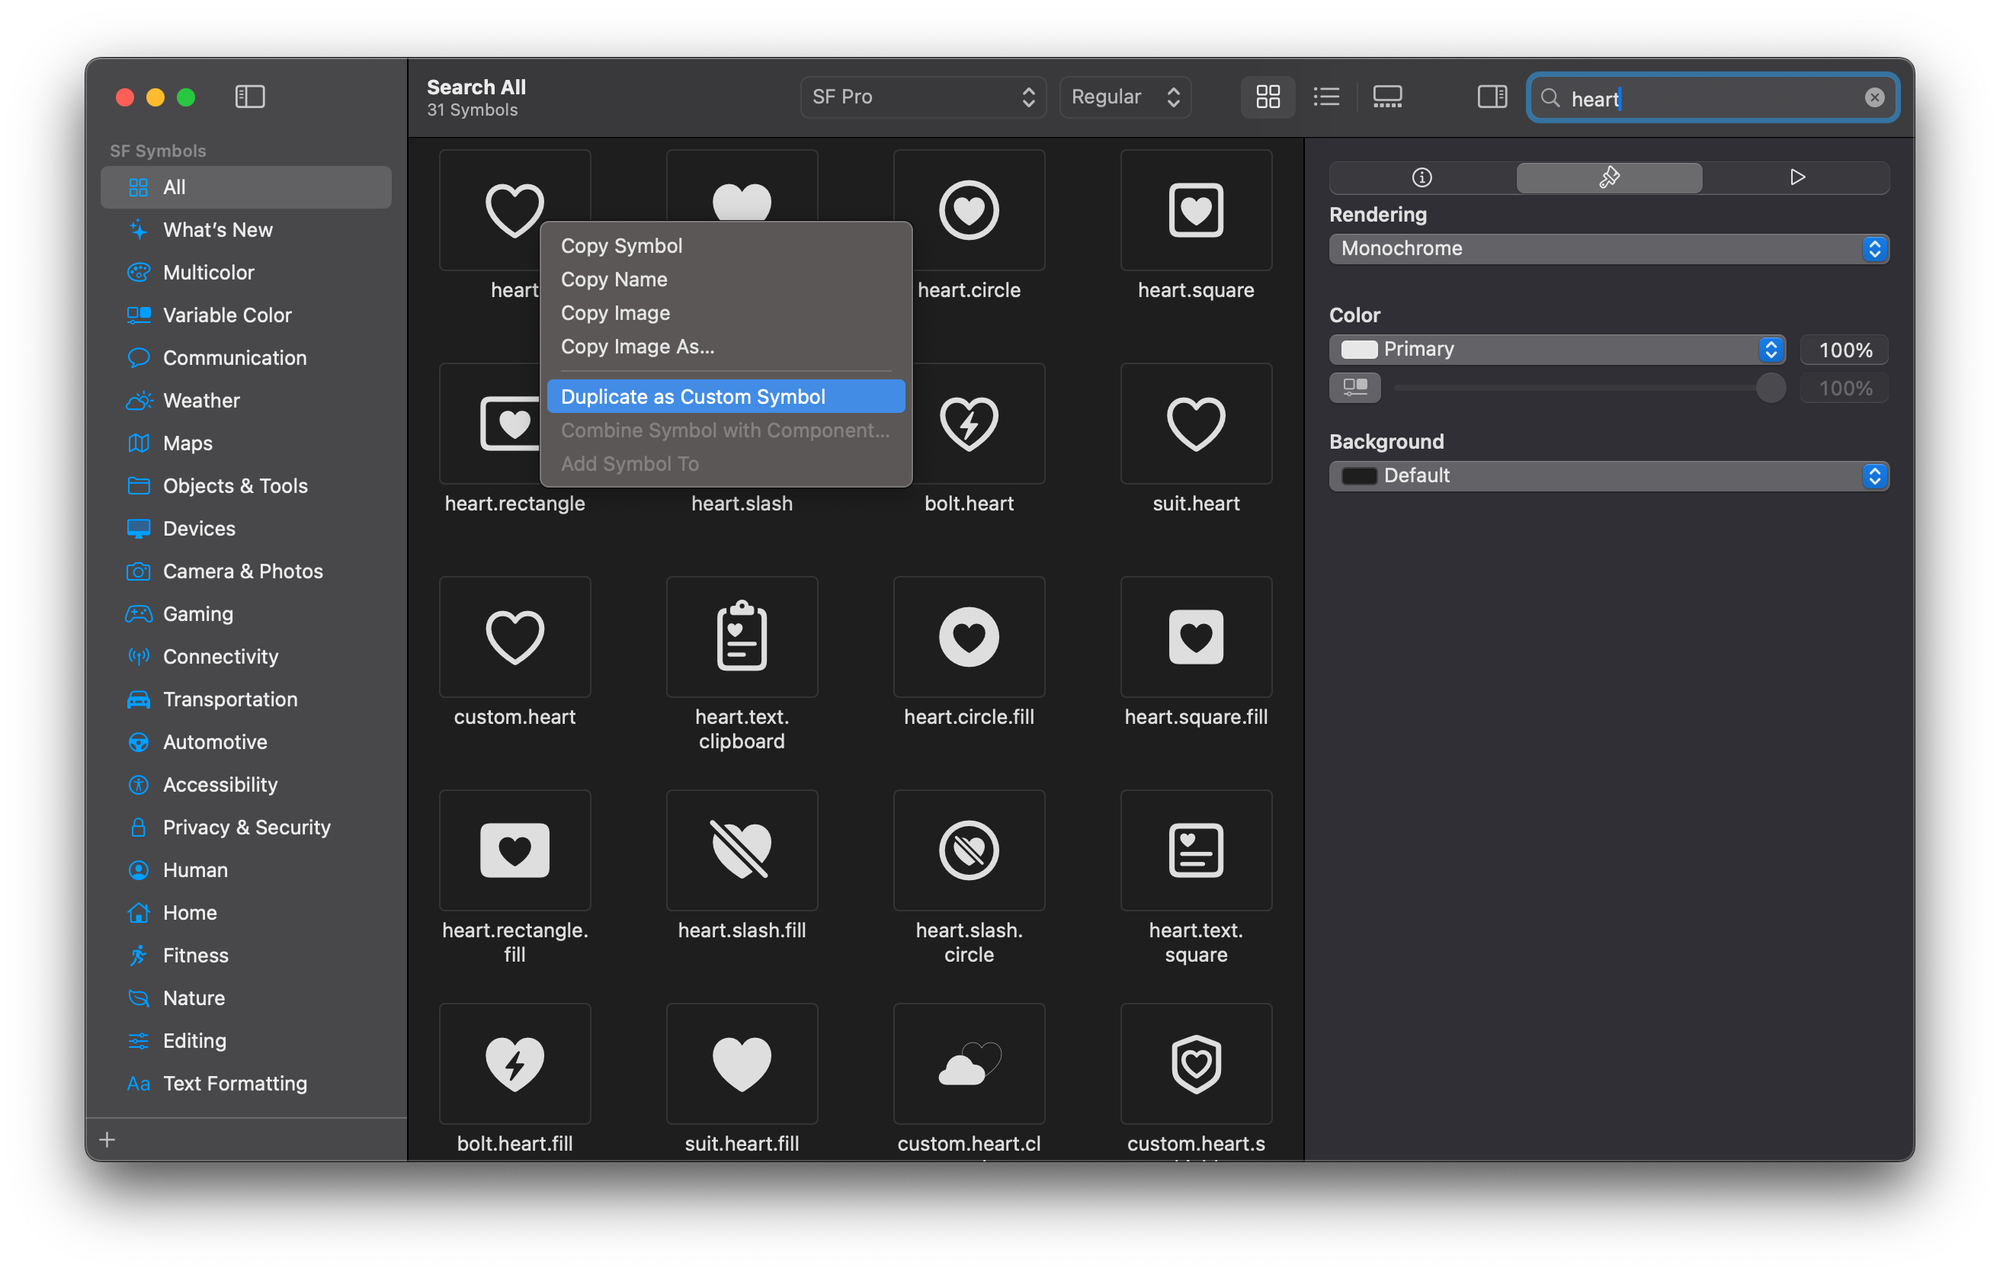
- Start from any symbol of your choice present in the app, right-click on it and select the option "Duplicate it as Custom Symbol".
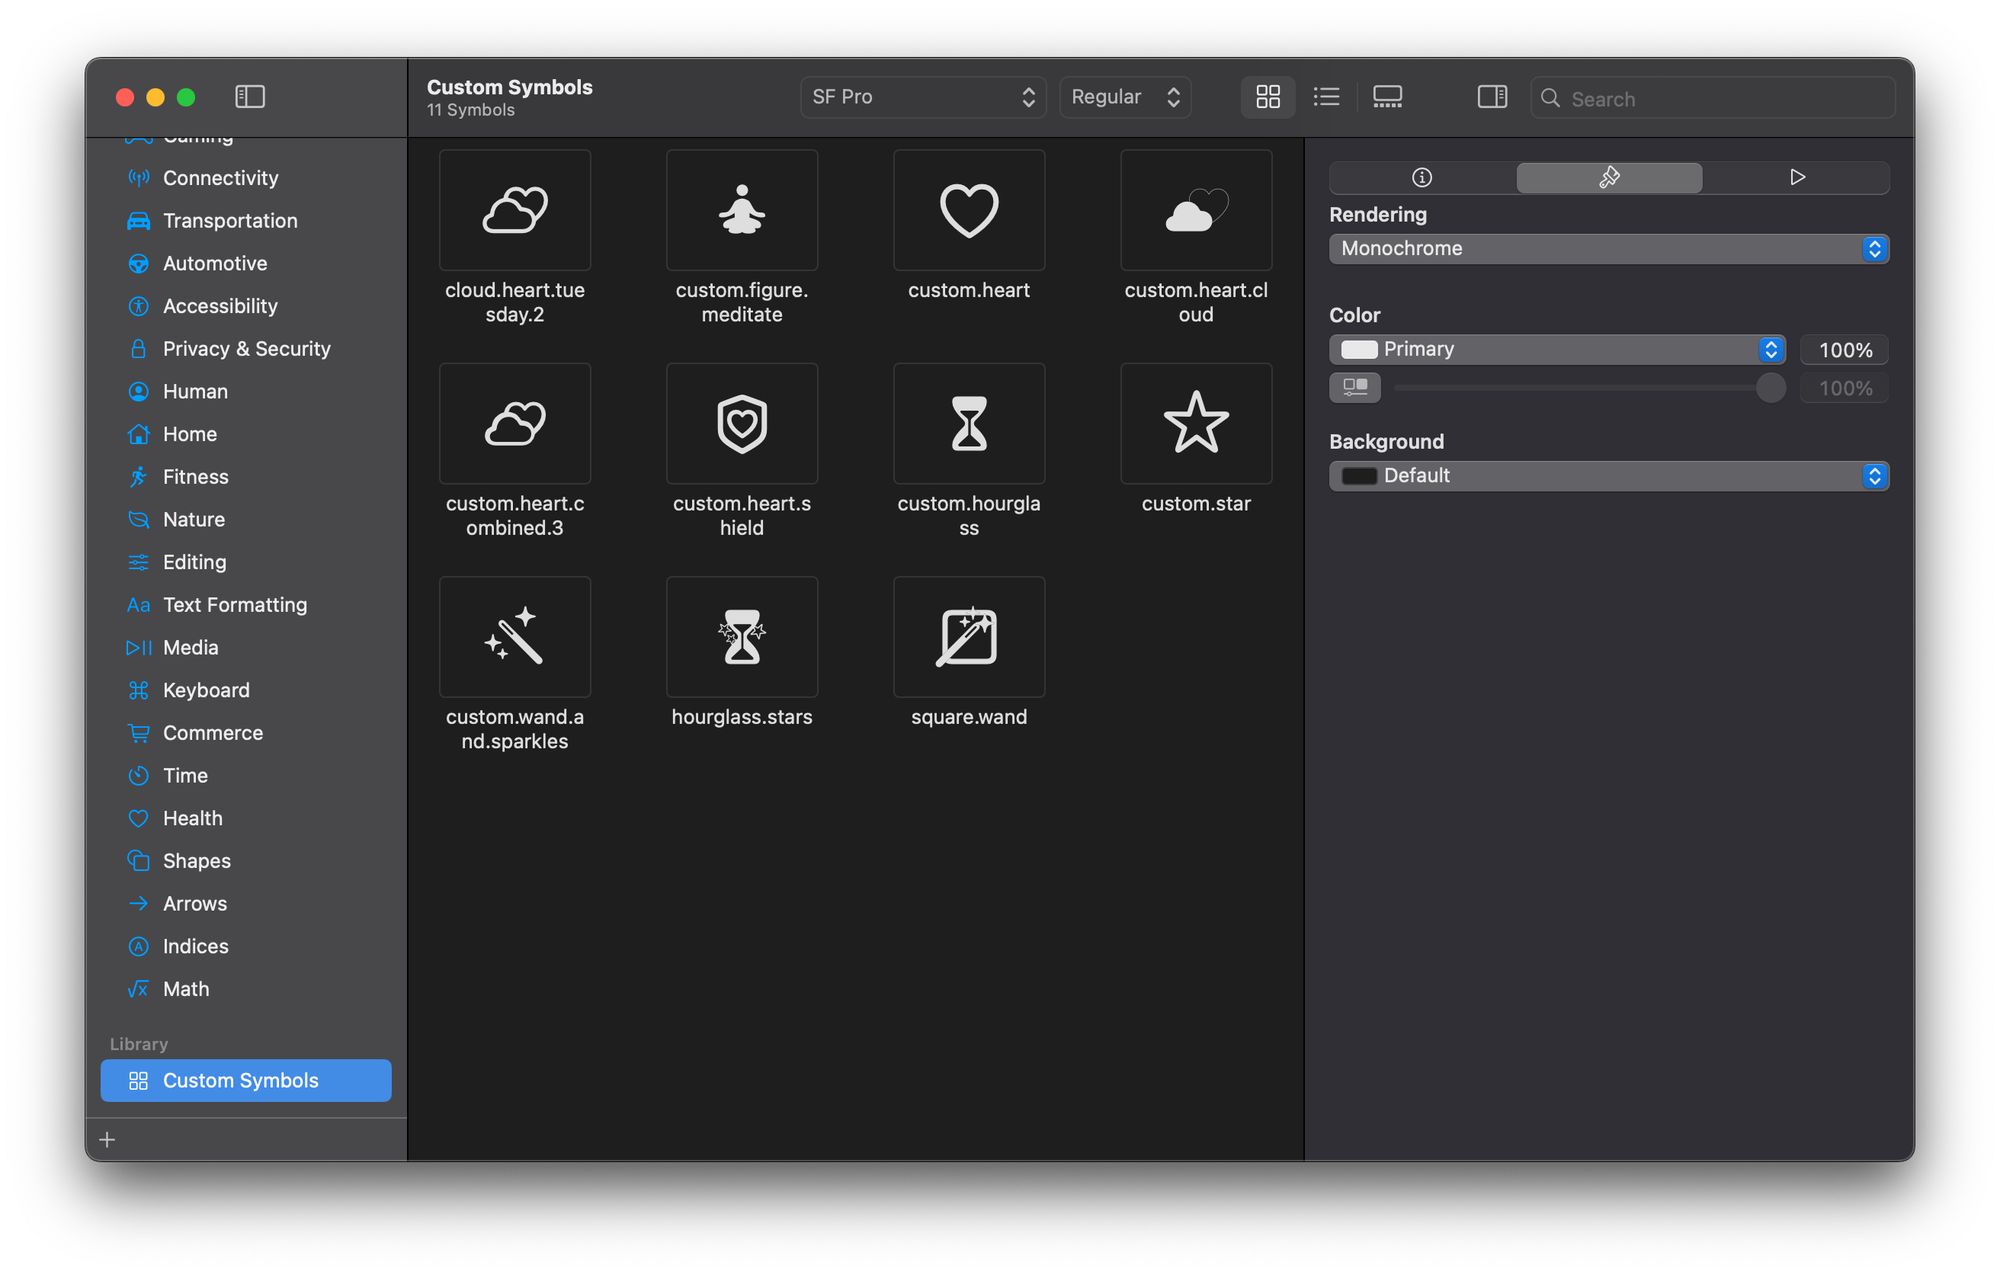
- On the leading sidebar, scroll down and select the Custom Symbols folder.
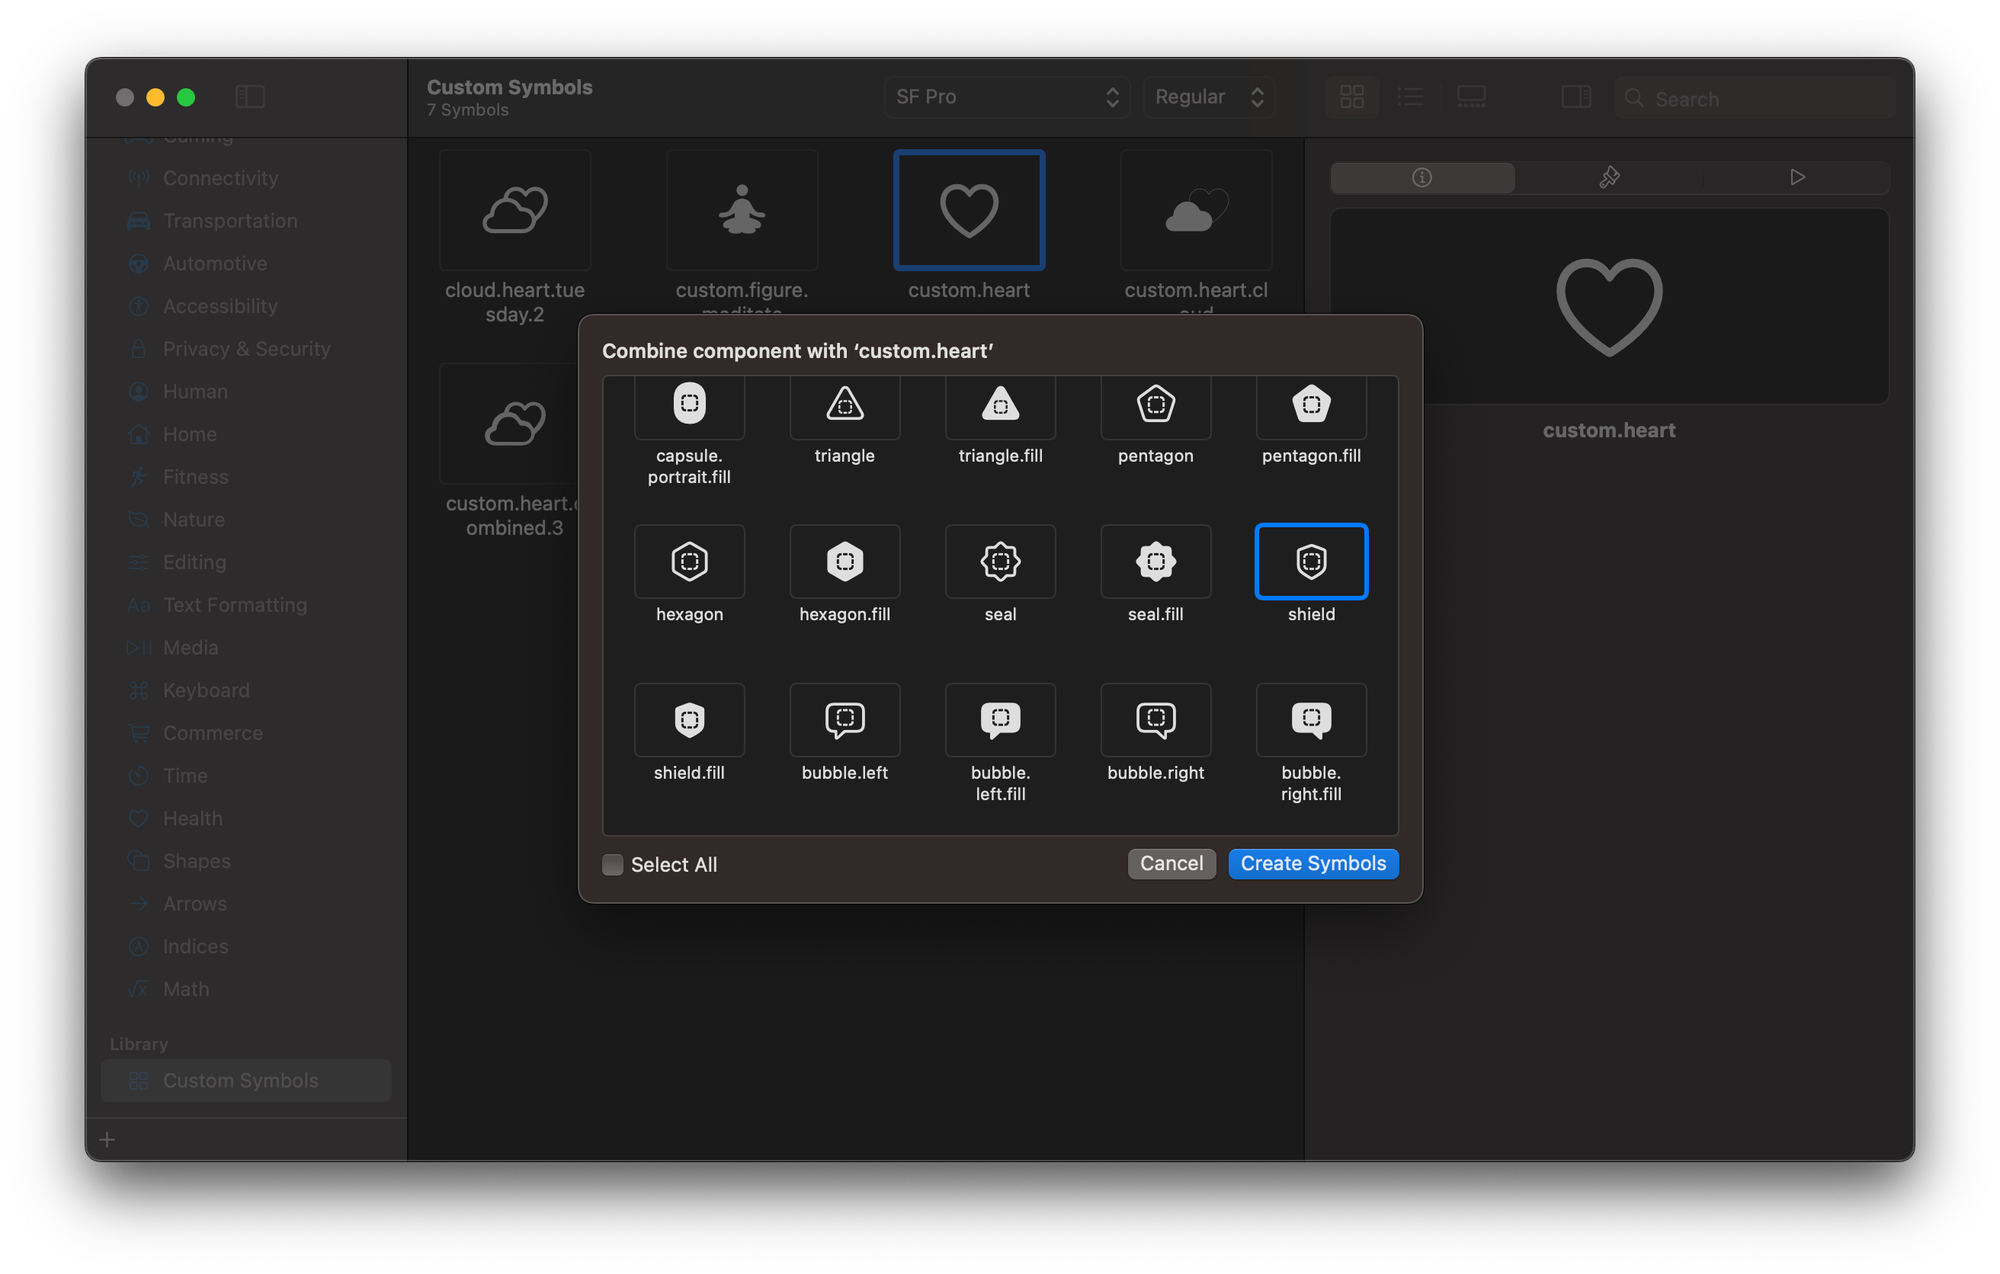
- Right-click on the symbol and select the option "Combine Symbol with Component...".
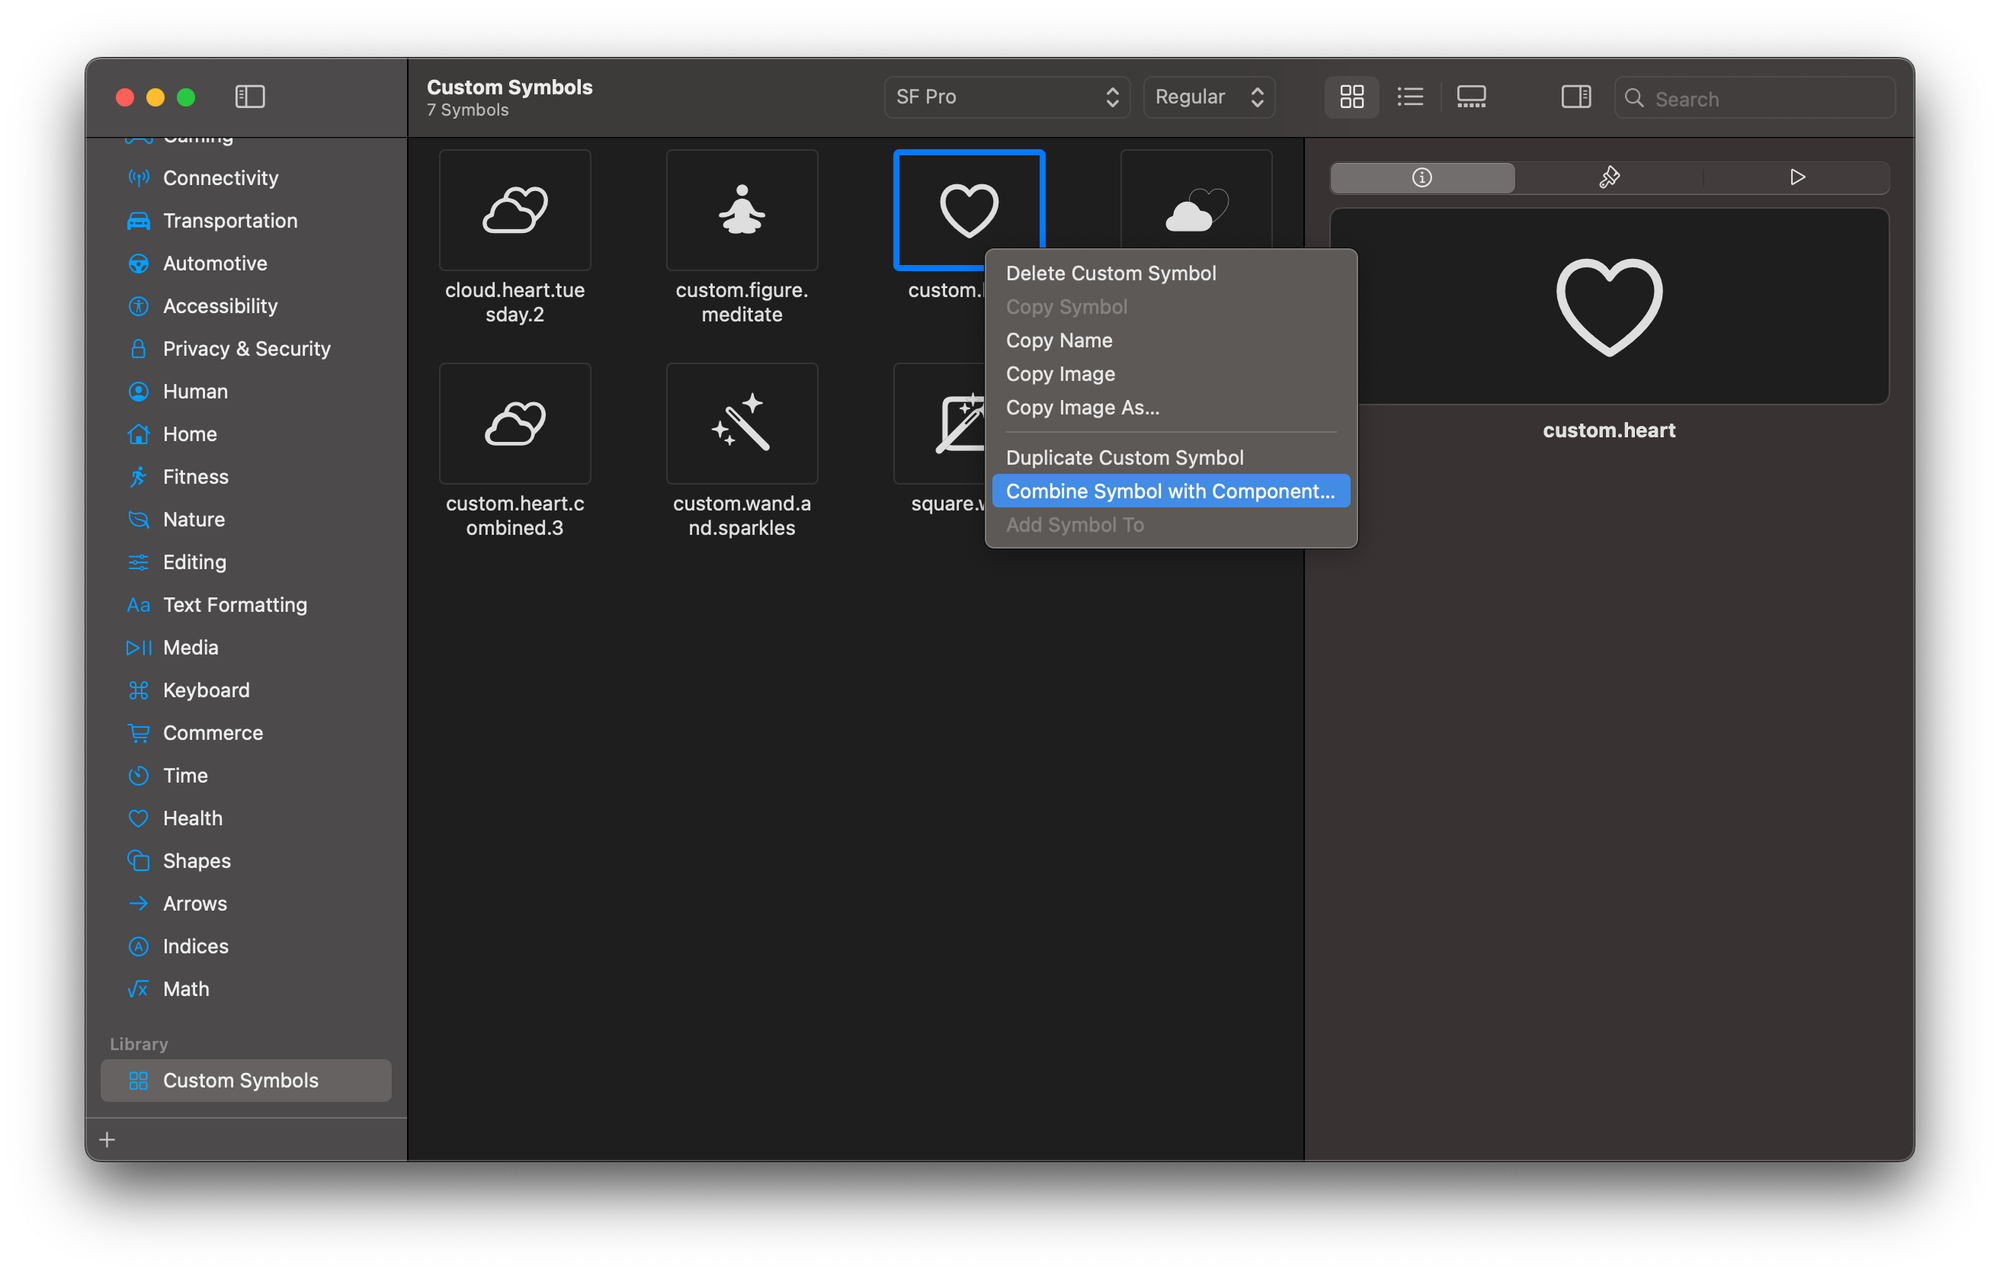
- Select which component you would like to combine the symbol with and click on "Create Symbols".
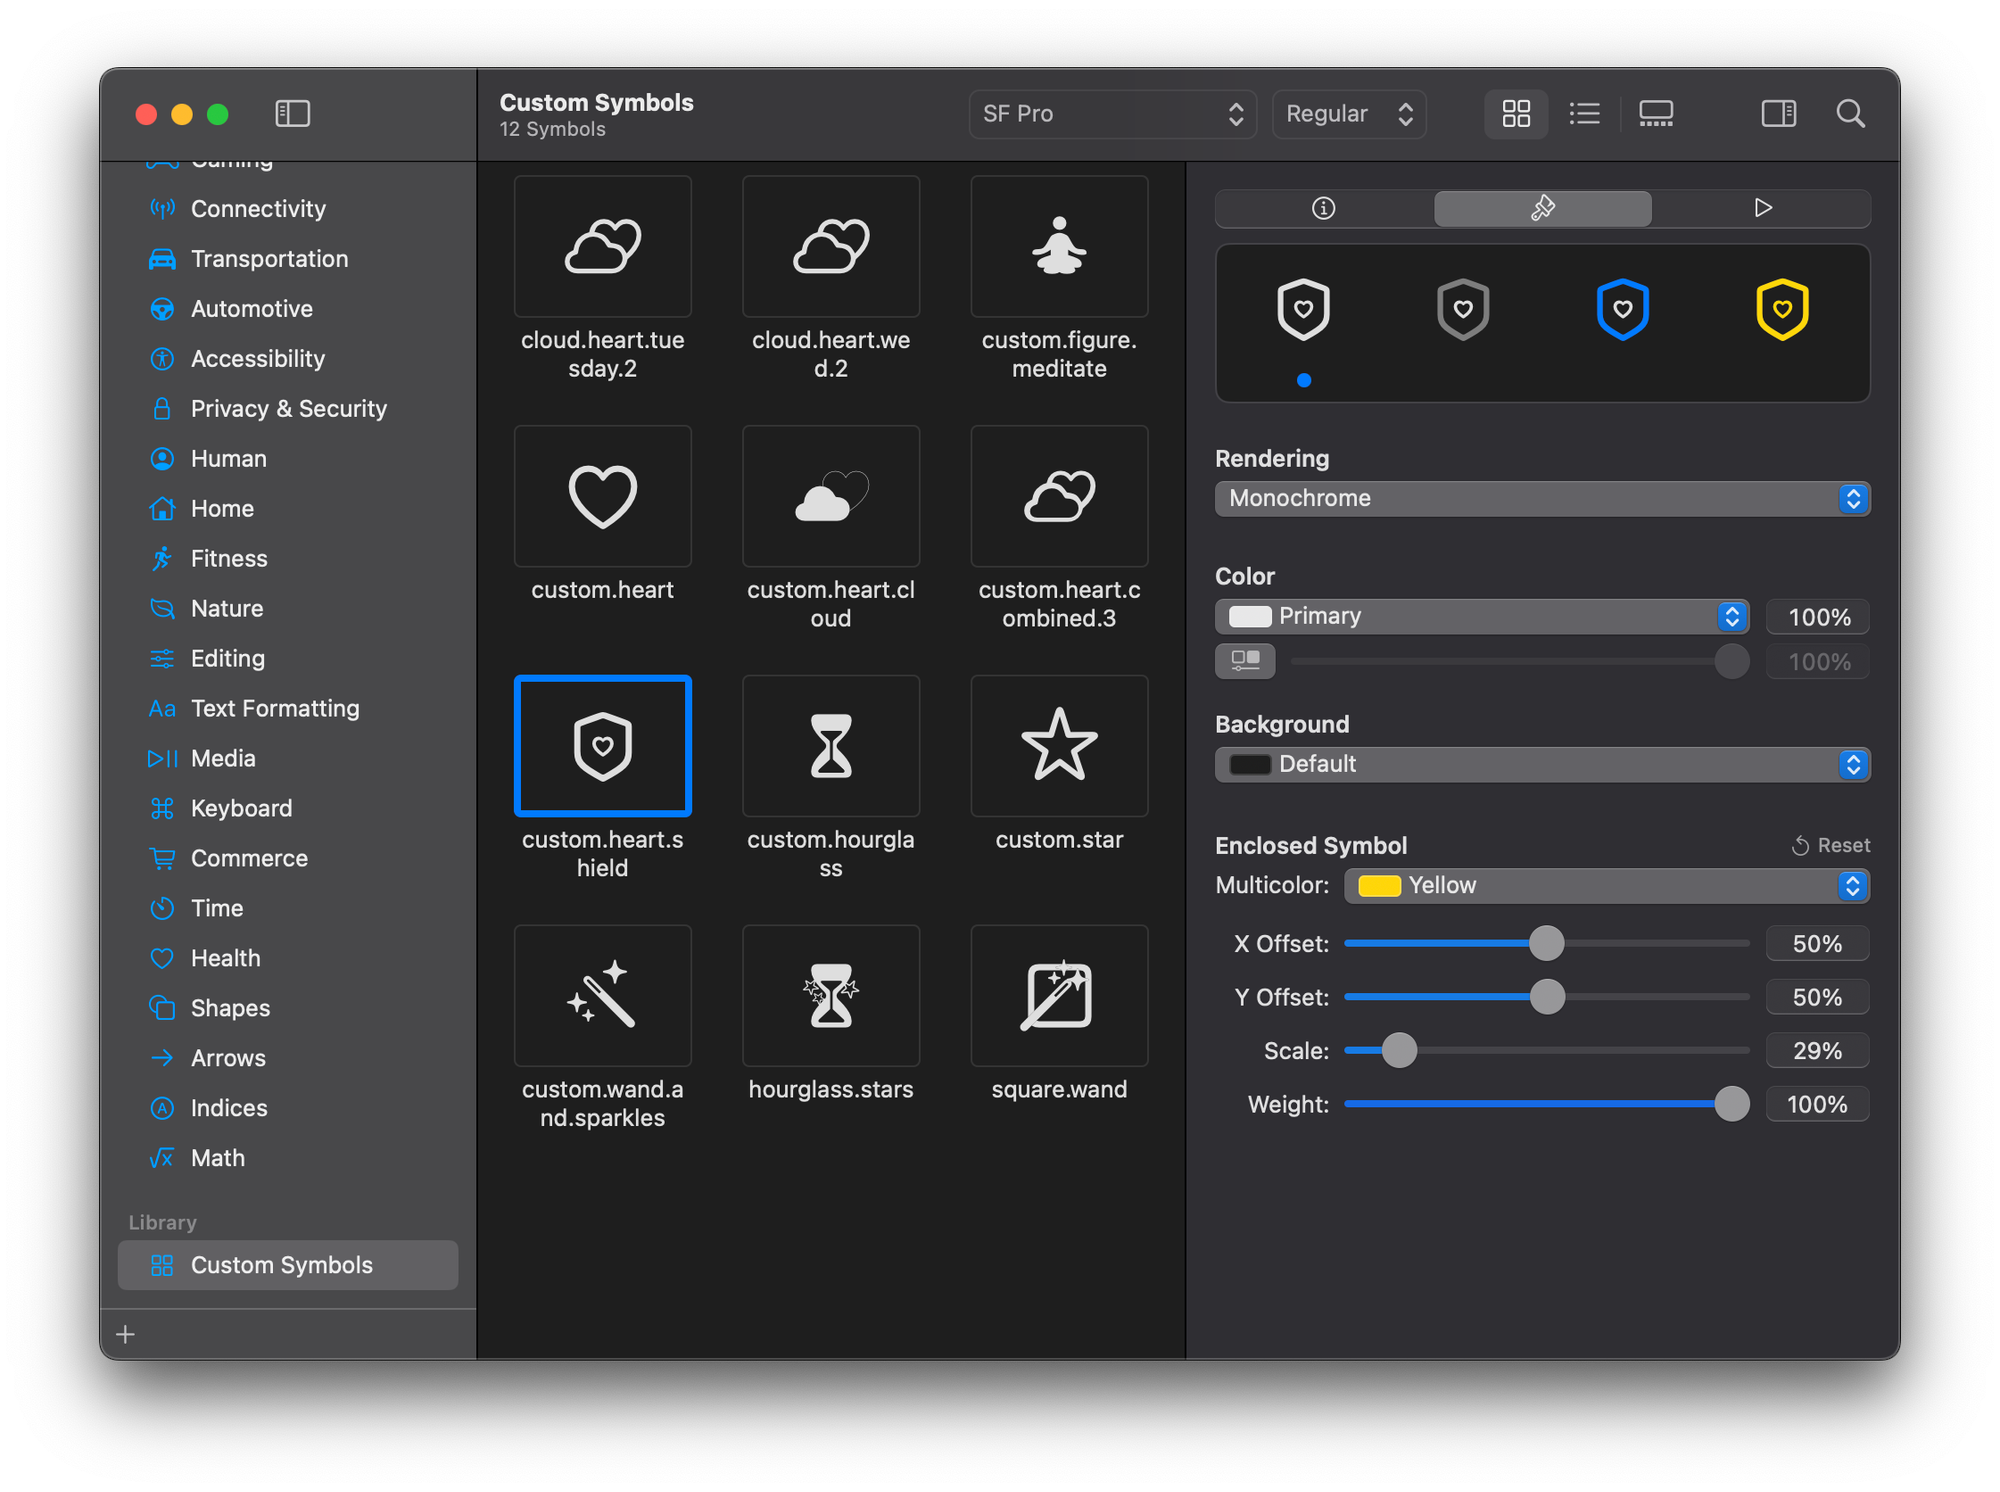
- On the Inspector panel, you can customize the new symbol even further. You can choose the offset of the enclosed symbol, its scale and its weight. This allows more control over how the symbol will combine with the component, where it will be placed in relation to it, and what its size and weight will be.
Creating symbols with this approach is pretty simple and allows developers without a design background to add new symbols without effort. However, it presents some constraints, as only a limited set of components can be combined with the pre-existing symbols.

Creating symbols using vectorial tools
To start creating symbols using vectorial tools, you will need two main things:
- Vectorial tools such as Sketch, Inkscape, Figma, Illustrator, etc. The one used in this tutorial is Sketch.
- A template on which the icon will be placed.
It is strongly suggested that one of the SF Symbols be exported as a template and that the pre-existing vectors be removed from it to avoid the absence of the metadata needed to make the file work once it is imported into the SF Symbols app. To export the template you need to:
- Select any symbol;
- From the file menu, choose the export template;
- Export the template.
Before creating the vector that will be your custom symbol, let’s highlight some specifics about the template that will affect the amount of work you have to do.
The template
The template of a new SF Symbol must include 27 variations of the same symbol. There should be nine weights (from ultralight to regular to black) and three scales (small, medium, and large).
It can be of one of two types: static or variable.
- When the template is static, all 27 paths are required, specifying the margin of only the regular medium-scale variations.
- When the template is variable, it only requires three variations (ultralight, regular, and black for the small scale), each with its margins. This template type works with interpolation, by which the other symbols will be computed.
Be careful about which template you use because not all are compatible with all iOS versions. For instance, version 2.0 is supported from iOS 14 down and only comes with monochrome rendering annotations, while the 3.0+ template supports all rendering annotations (monochrome, multicolor, hierarchical). The template needs to be imported back into the SF Symbols app to implement the rendering annotations.
Pay also attention to the folders' names inside the template. The general rule is component-weight-scale; for example, left-margin-Regular-M is the name of the left margin of the medium variation in the regular weight found in a static template.
This convention applies to any other folder. For instance, in a variable template, the symbols folder must be divided into Ultralight-S, Regular-S, and Black-S.
Understood this, let’s move forward onto how to create a vectorial symbol.
Creation of the vector
There are two ways to create symbols using vectorial tools:
- Assembling symbols that already exist, taking advantage of their existing weights.
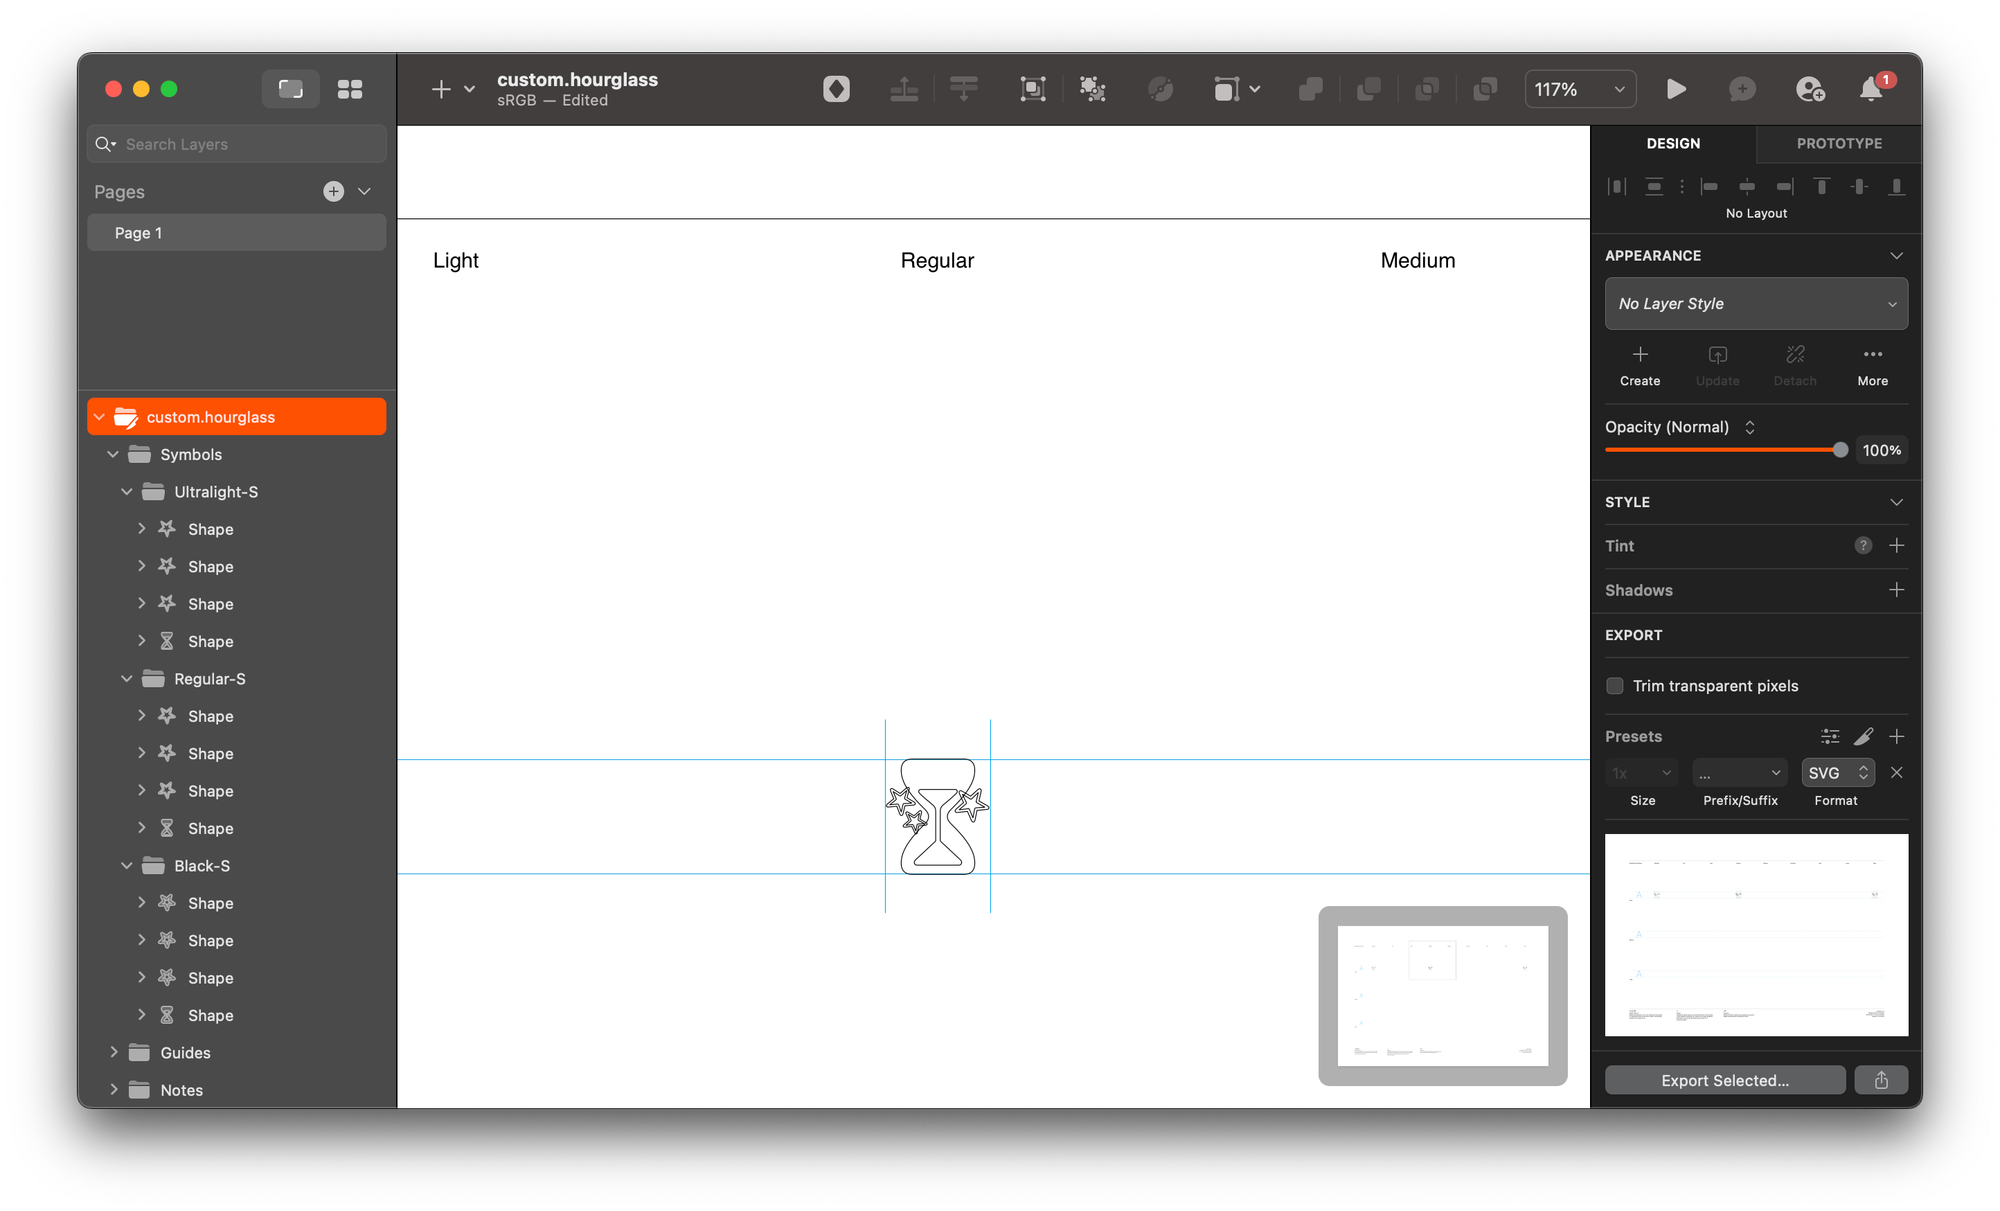
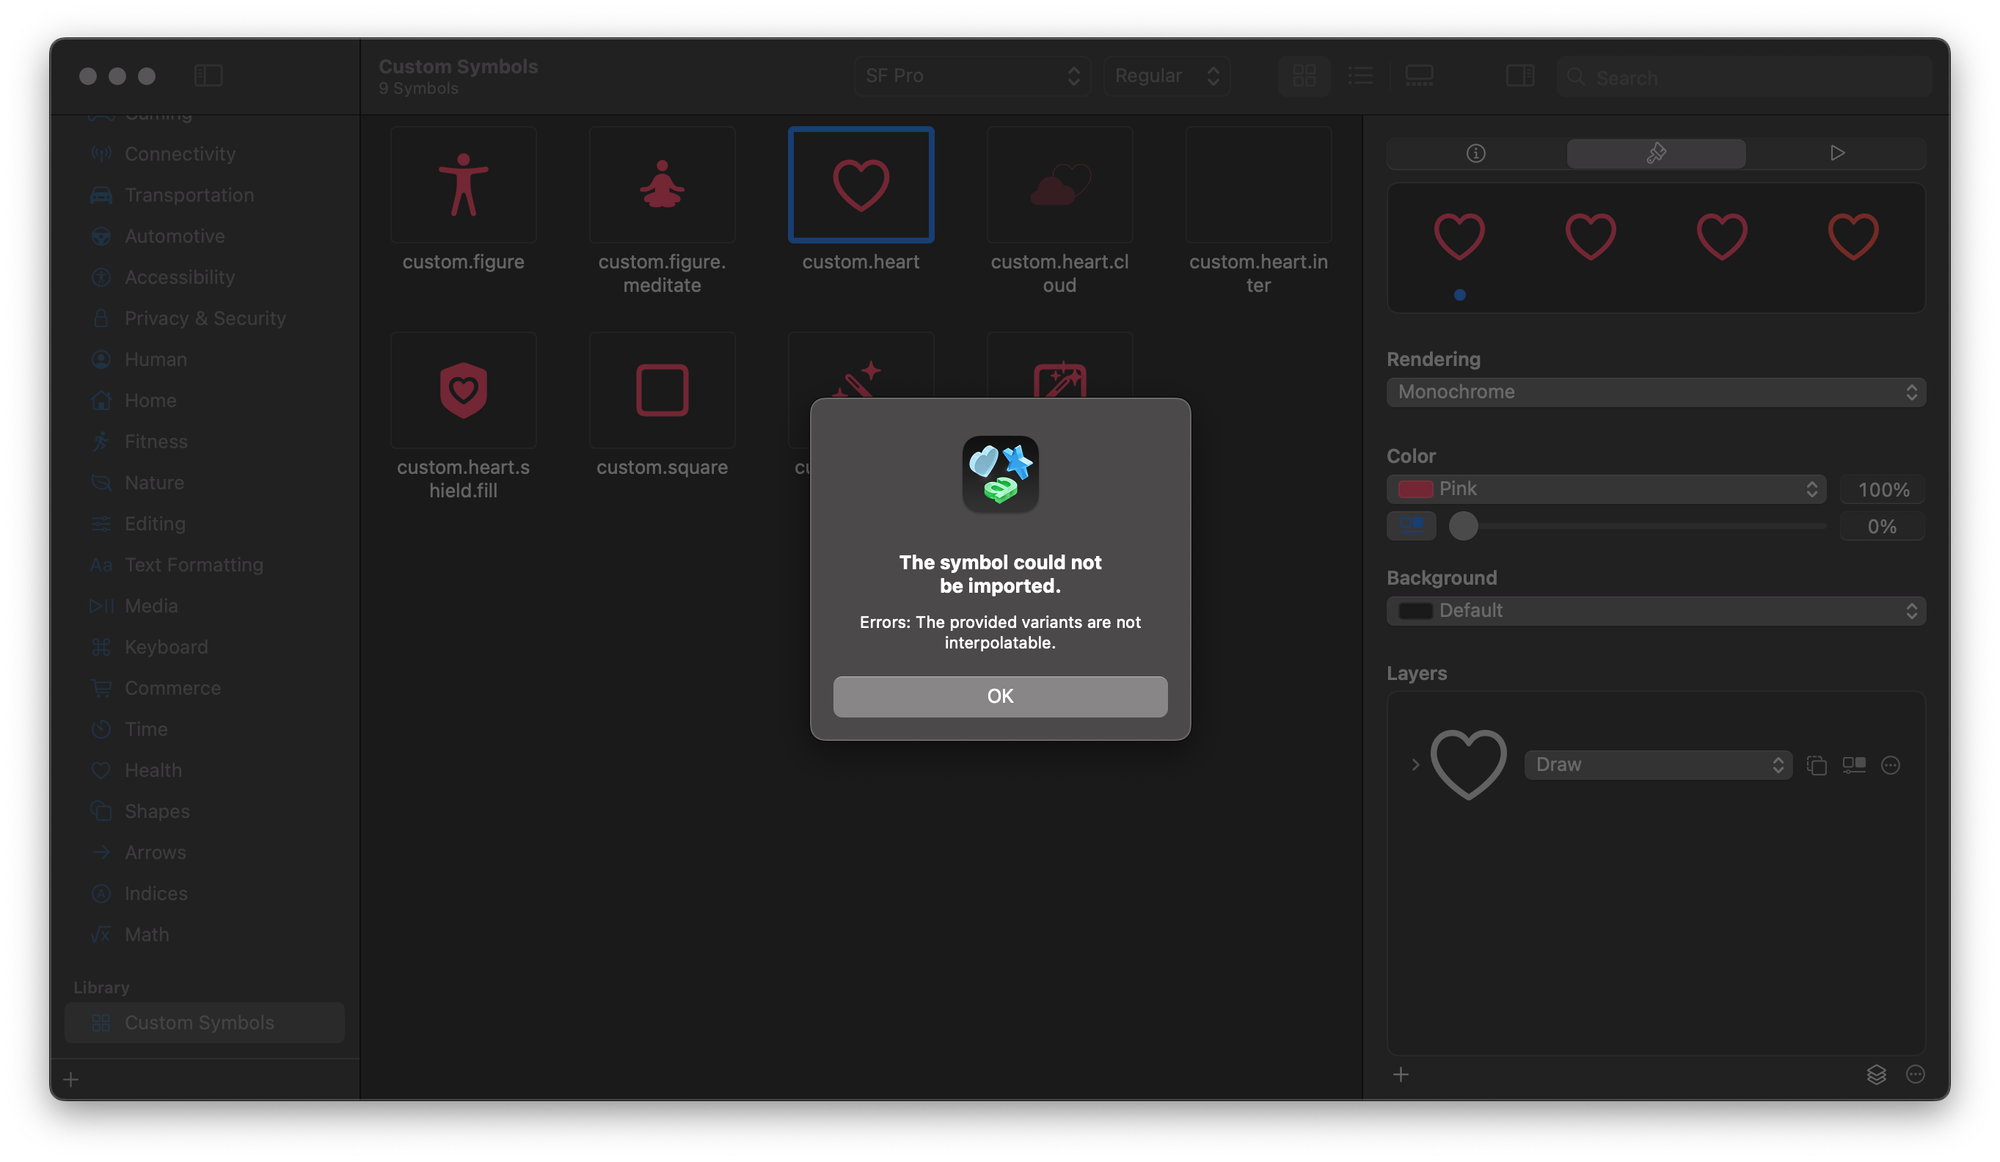
In this example, the custom symbol is the result of merging the star SF symbol and the hourglass one, using a variable template 6.0 version that uses interpolation.
The pros of going with such an approach are several, as you won’t encounter errors like ‘the provided variants are not interpolatable’ or ‘margins not provided’, which you might face when creating new shapes; in addition, you don’t have to create symbols in different weights and handle all the problems that come with that as you can take advantage of what is already provided, ready to be assembled.
Also, considering the number of symbols in the library, 6000 at the moment, there’s a high chance to find a symbol that already includes a similar path to what you need for your creation and mix and match them together.
- Creating variations of the symbols from scratch.
When starting from scratch, it is strongly suggested that you begin with the regular-small version of your icon and create the other variations using that as a starting point. Think of the final shape as something made of layers that you will erase, fill, draw, and hide in the SF Symbols app.
The icon must have the following requirements to avoid possible errors:
- It is expected to be a vector;
- It doesn’t include open paths, strokes, gradients, or effects;
- If you are using strokes, turn them into paths to ensure they can be filled with color;
- Consider using the outline tool if you want to create a simple shape with void parts;
- Outline works best for simple geometric shapes, while for more complex or combined symbols, it’s better to change the approach;
- Place the symbols within a margin to be sure they are centered next to one another. This will help the typography alignment and ensure it looks good next to the text.
If this approach is the most suitable for your situation, understanding how the interpolation works first may help you create shapes with different weights that can actually work with the variable template.
Understanding Interpolation
Interpolation enables the creation of multiple variations of a design by defining only a few key instances. It is used in the variable template and allows the generation of all 27 required icon variations—spanning different weights and sizes—by providing just three of them: Ultralight, Regular, and Black.
This technique fastens the icon creation process as you only need to create three symbols instead of 27. However, to make the interpolation work, the vector icons provided must follow the following rules:
- Have the same number of nodes;
- Be in the same position and on the same layers;
- Maintain the same layer hierarchy.
In vector graphics, offsetting is a tool for creating new paths. It ensures a uniform distance from the original. Offsetting seems suited for making variations, as it could accelerate the process.
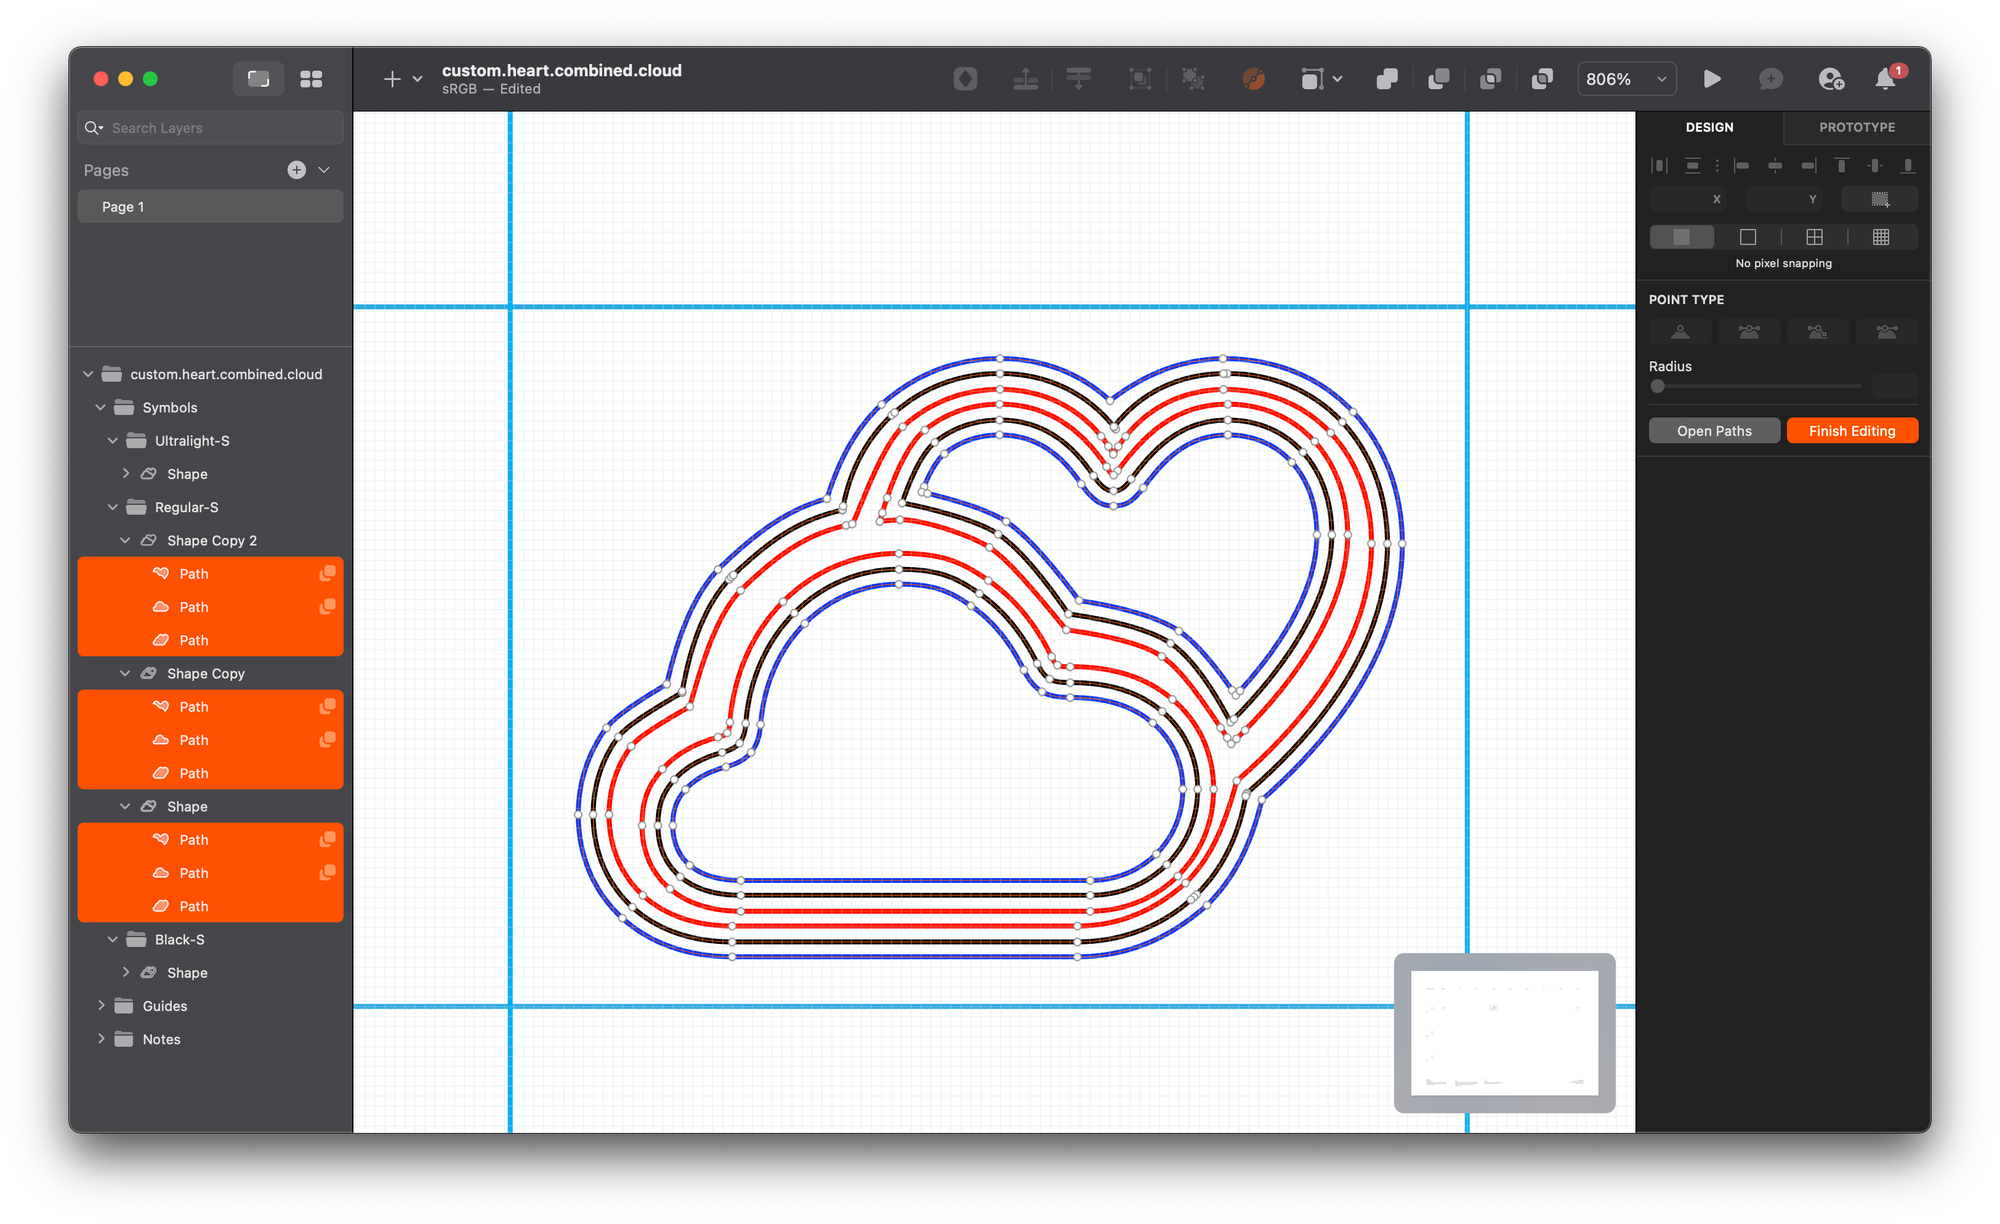
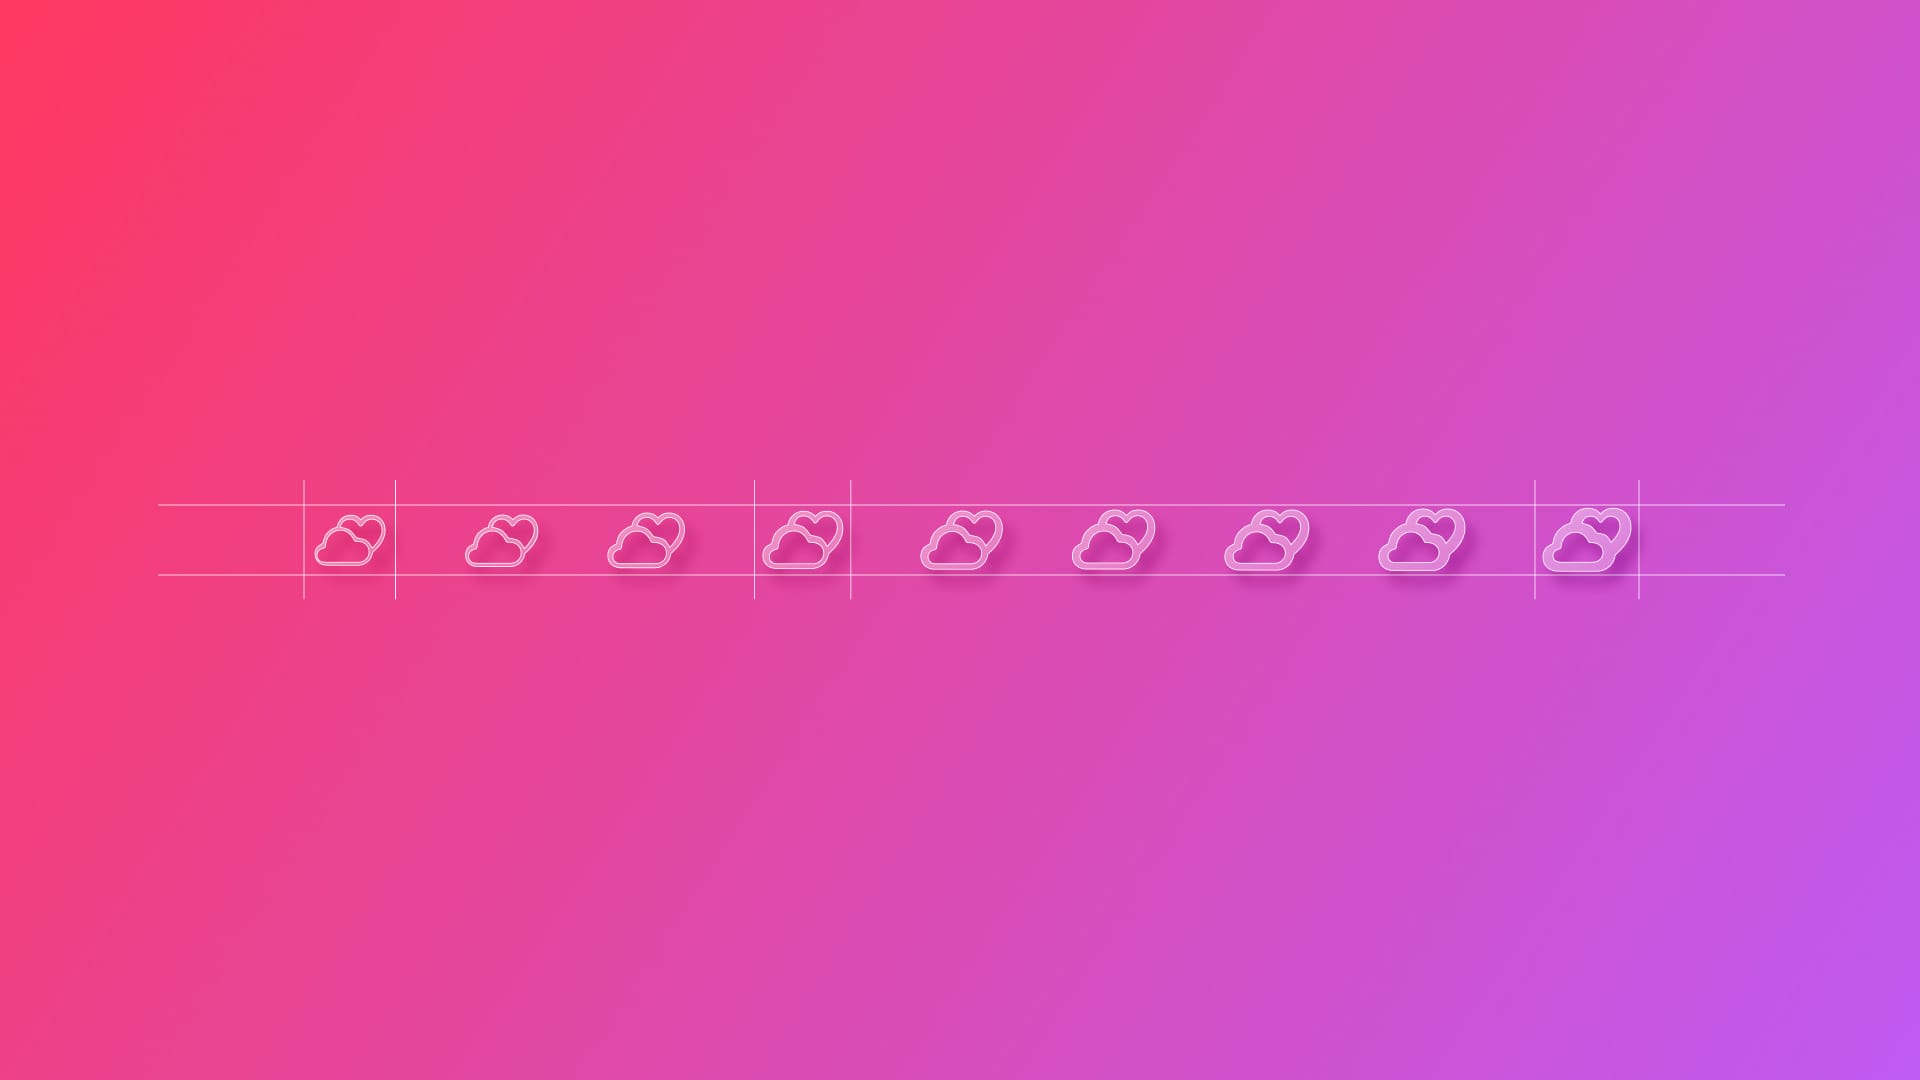
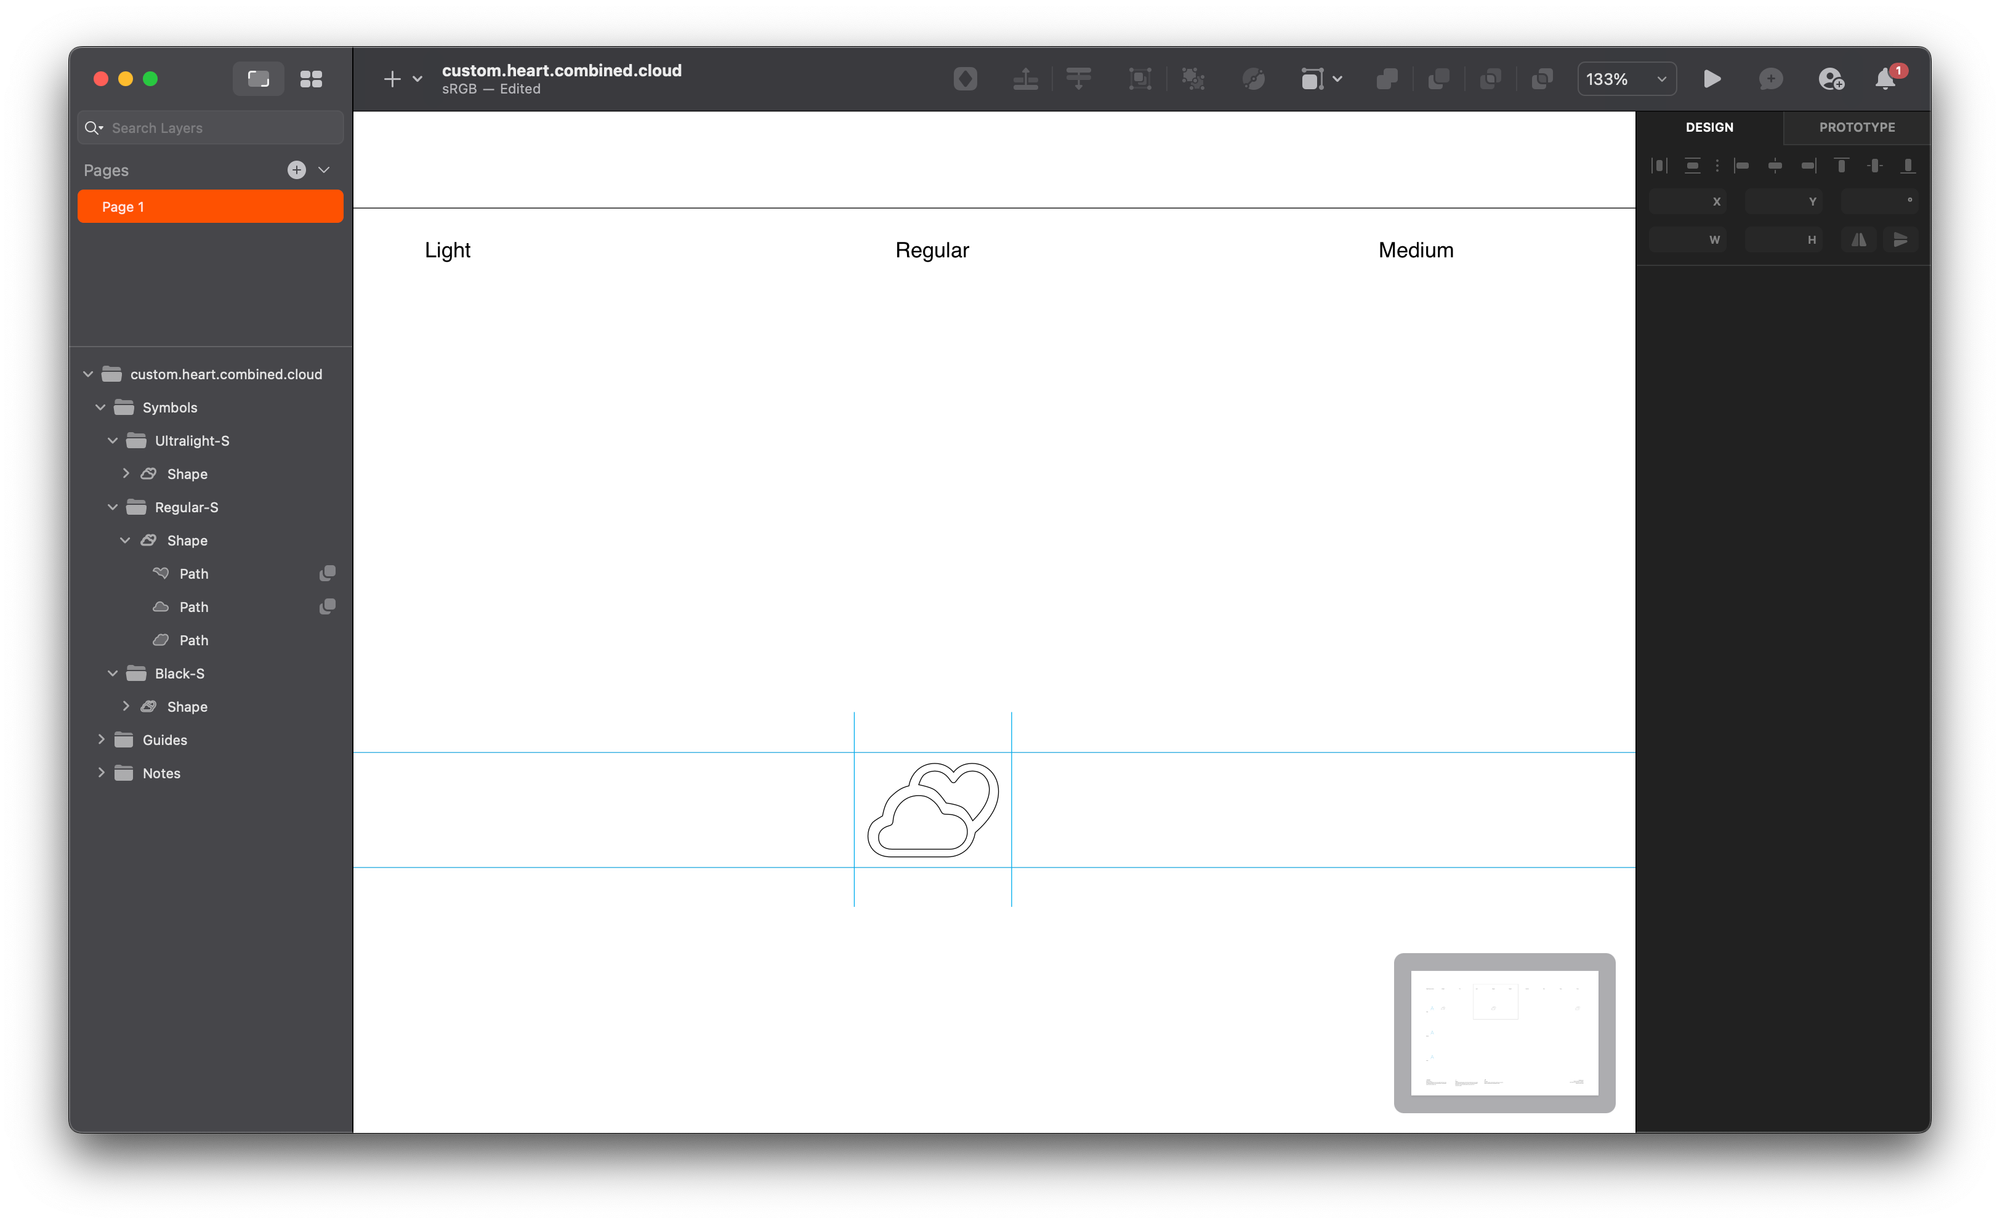
In the example above, we have a complex shape made of a cloud and a heart in the three variations needed to be made with the offset tool - moving from the ultralight (red) to regular (in black) and black weight (in blue). As you can see, the number of nodes is inconsistent, and generating different weight variations using this approach won’t make the interpolation work in a variable template.
In fact, for intricate shapes, especially those with sharp angles or curves, the offset tool may introduce additional nodes or adjust existing ones to maintain accuracy and smoothness. This alteration disrupts the uniformity required for effective interpolation and will generate the error ‘The provided variants are not interpolatable’.
To overcome this error, try this approach:
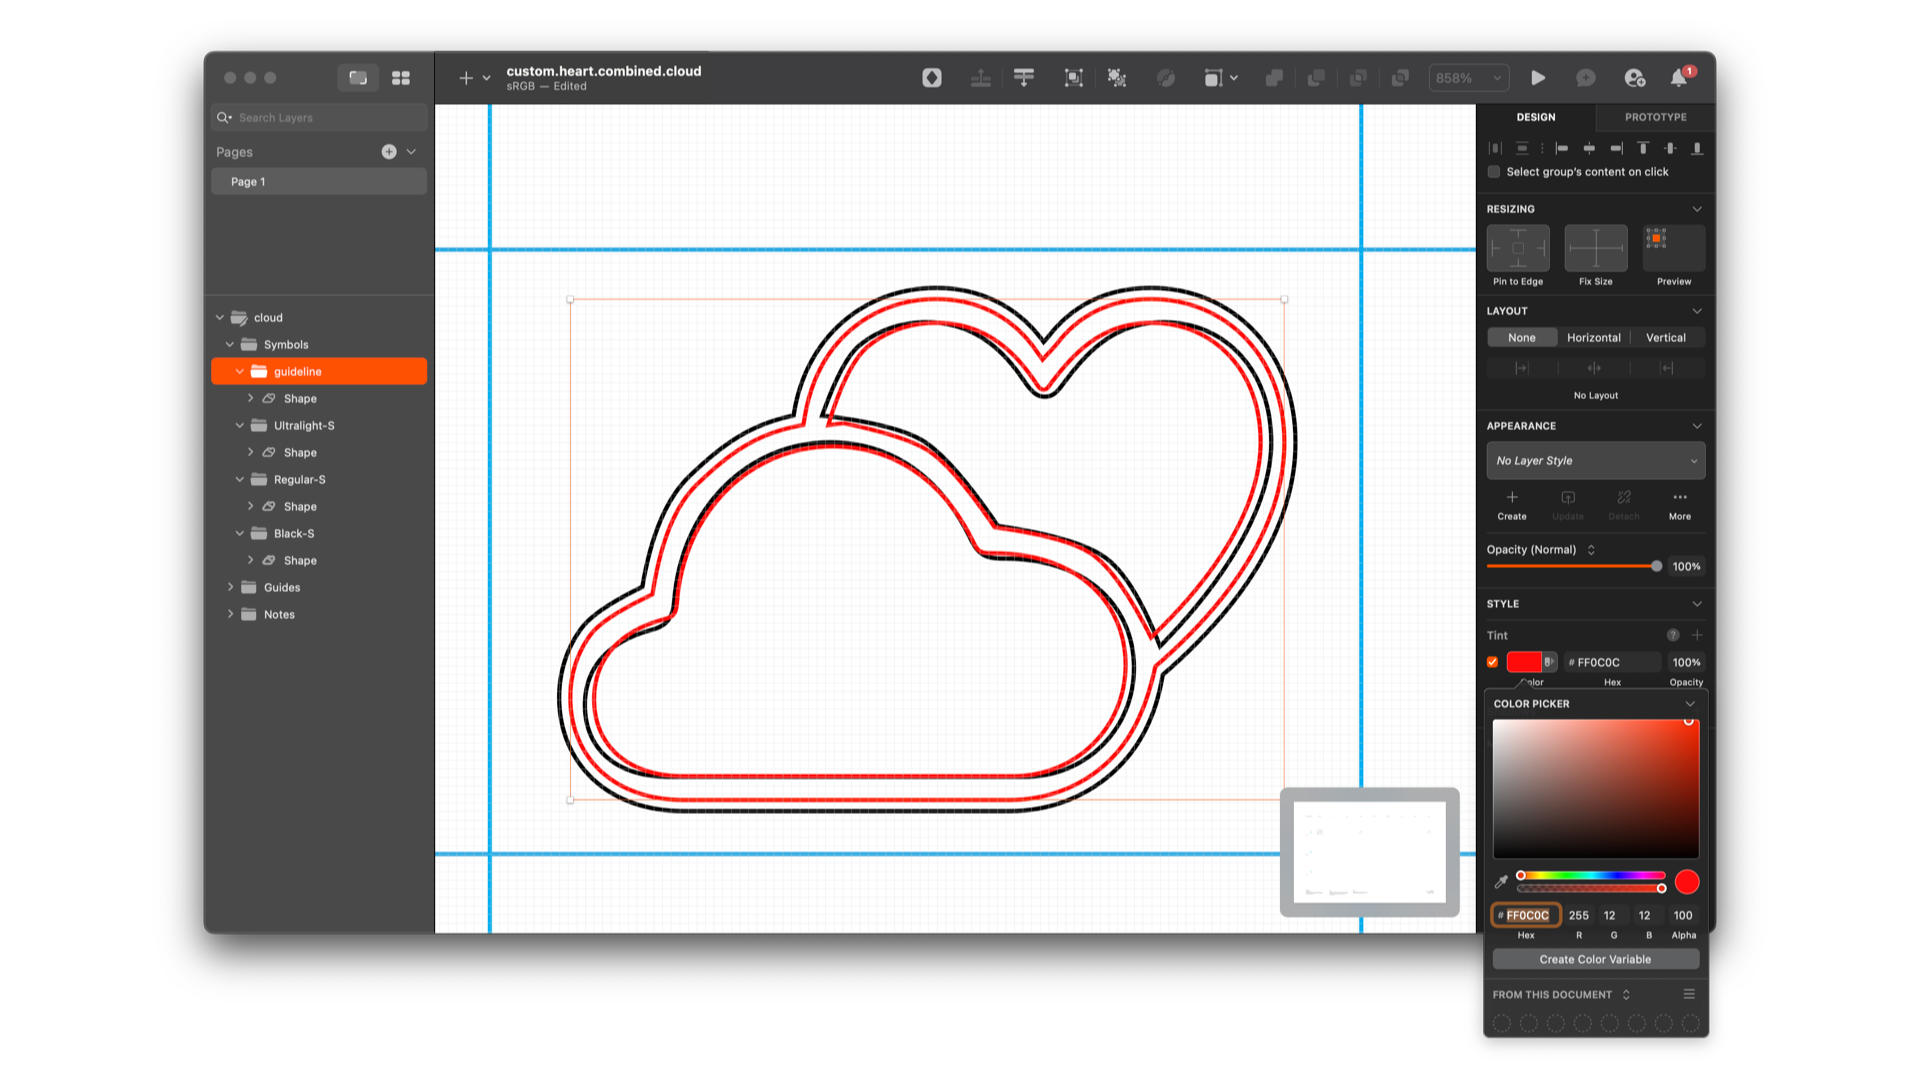
- Create the offset of the symbol and use it only as your guideline to adjust the variation in the weight you want to achieve;
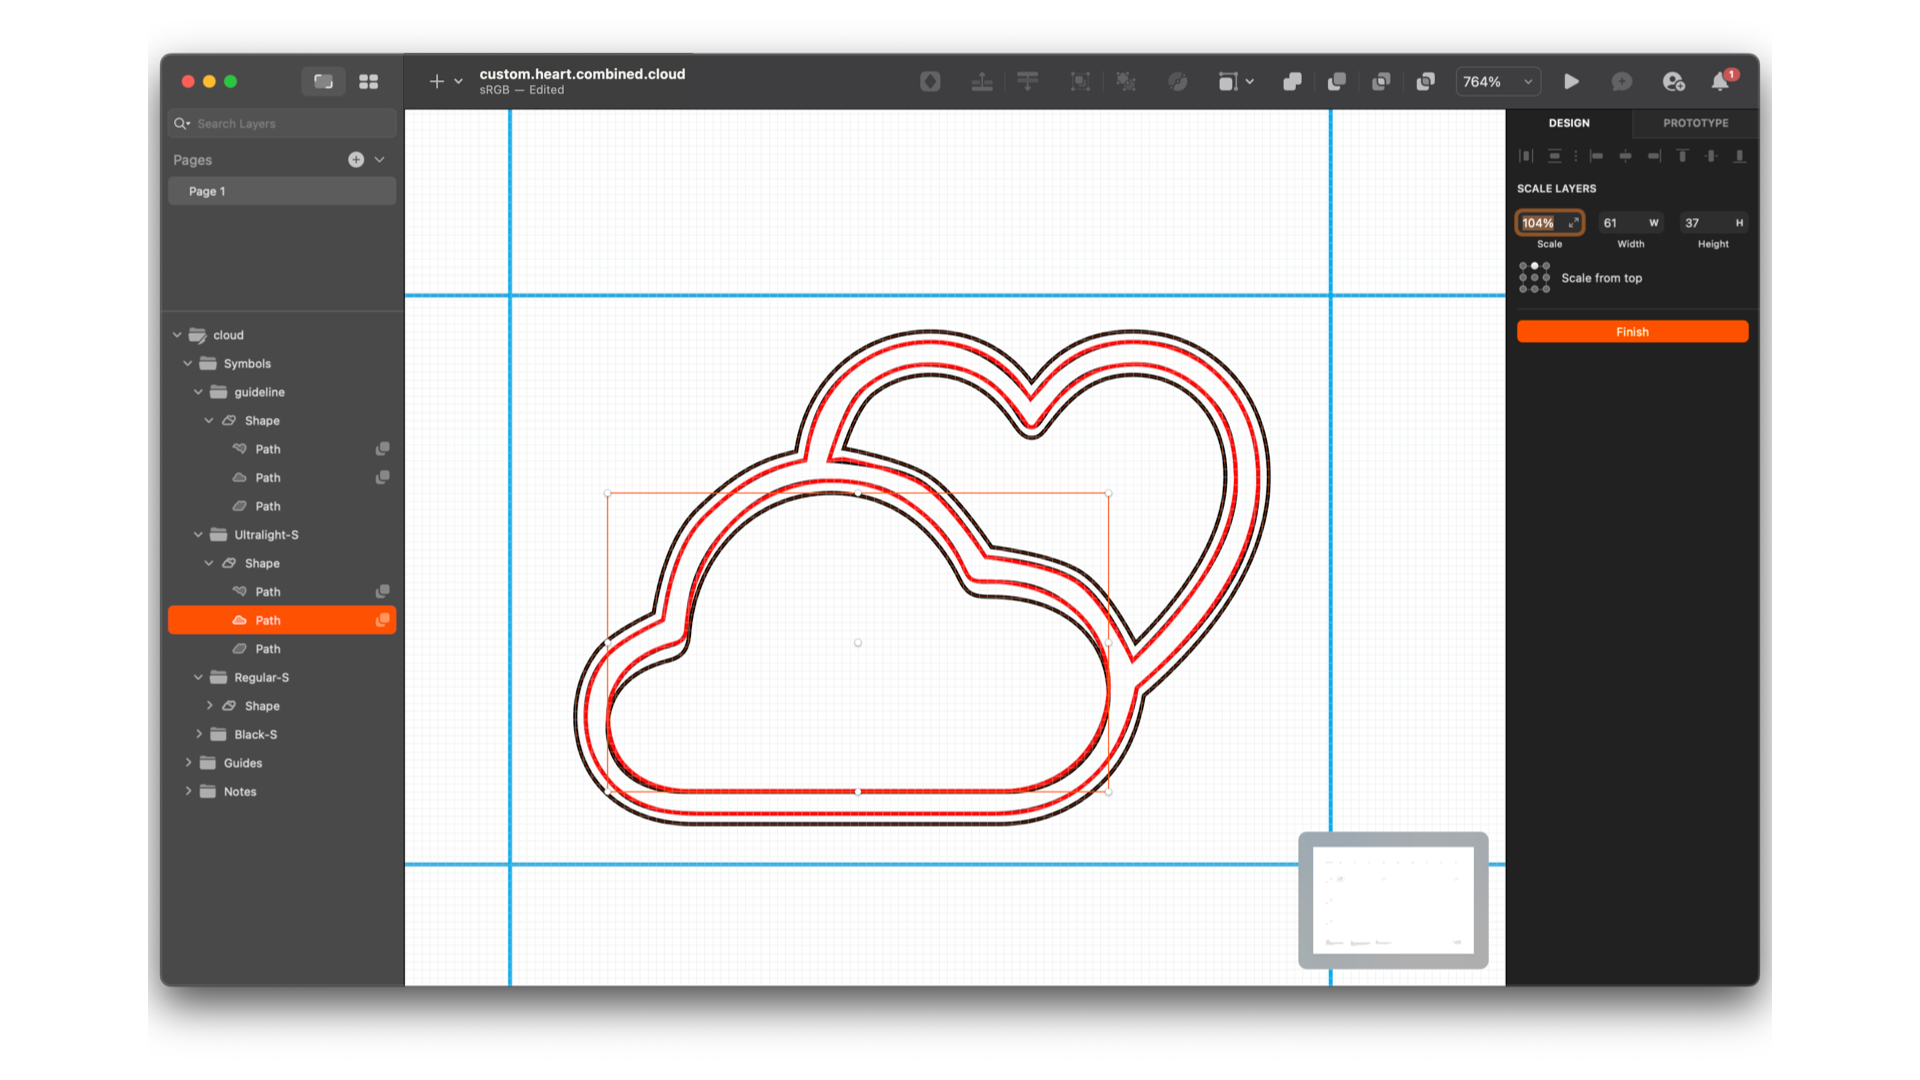
- Scale the layers of the actual icon you are working on to achieve the desired weight: in this example, a copy of the icon offset in the ultralight ideal size has been placed in the symbols folder to work as a guide, and the inner cloud shape layer has been scaled, maintaining its ratio. Repeat this process for each part of your icon that needs to be adjusted;

- Manually adjust the actual variation, node by node;
- Delete the guideline created to move the nodes around.
Validate the template
When the variations are ready, export the whole template as an SVG file and validate it in the SF Symbol app from the file menu using the Validate Templates feature.
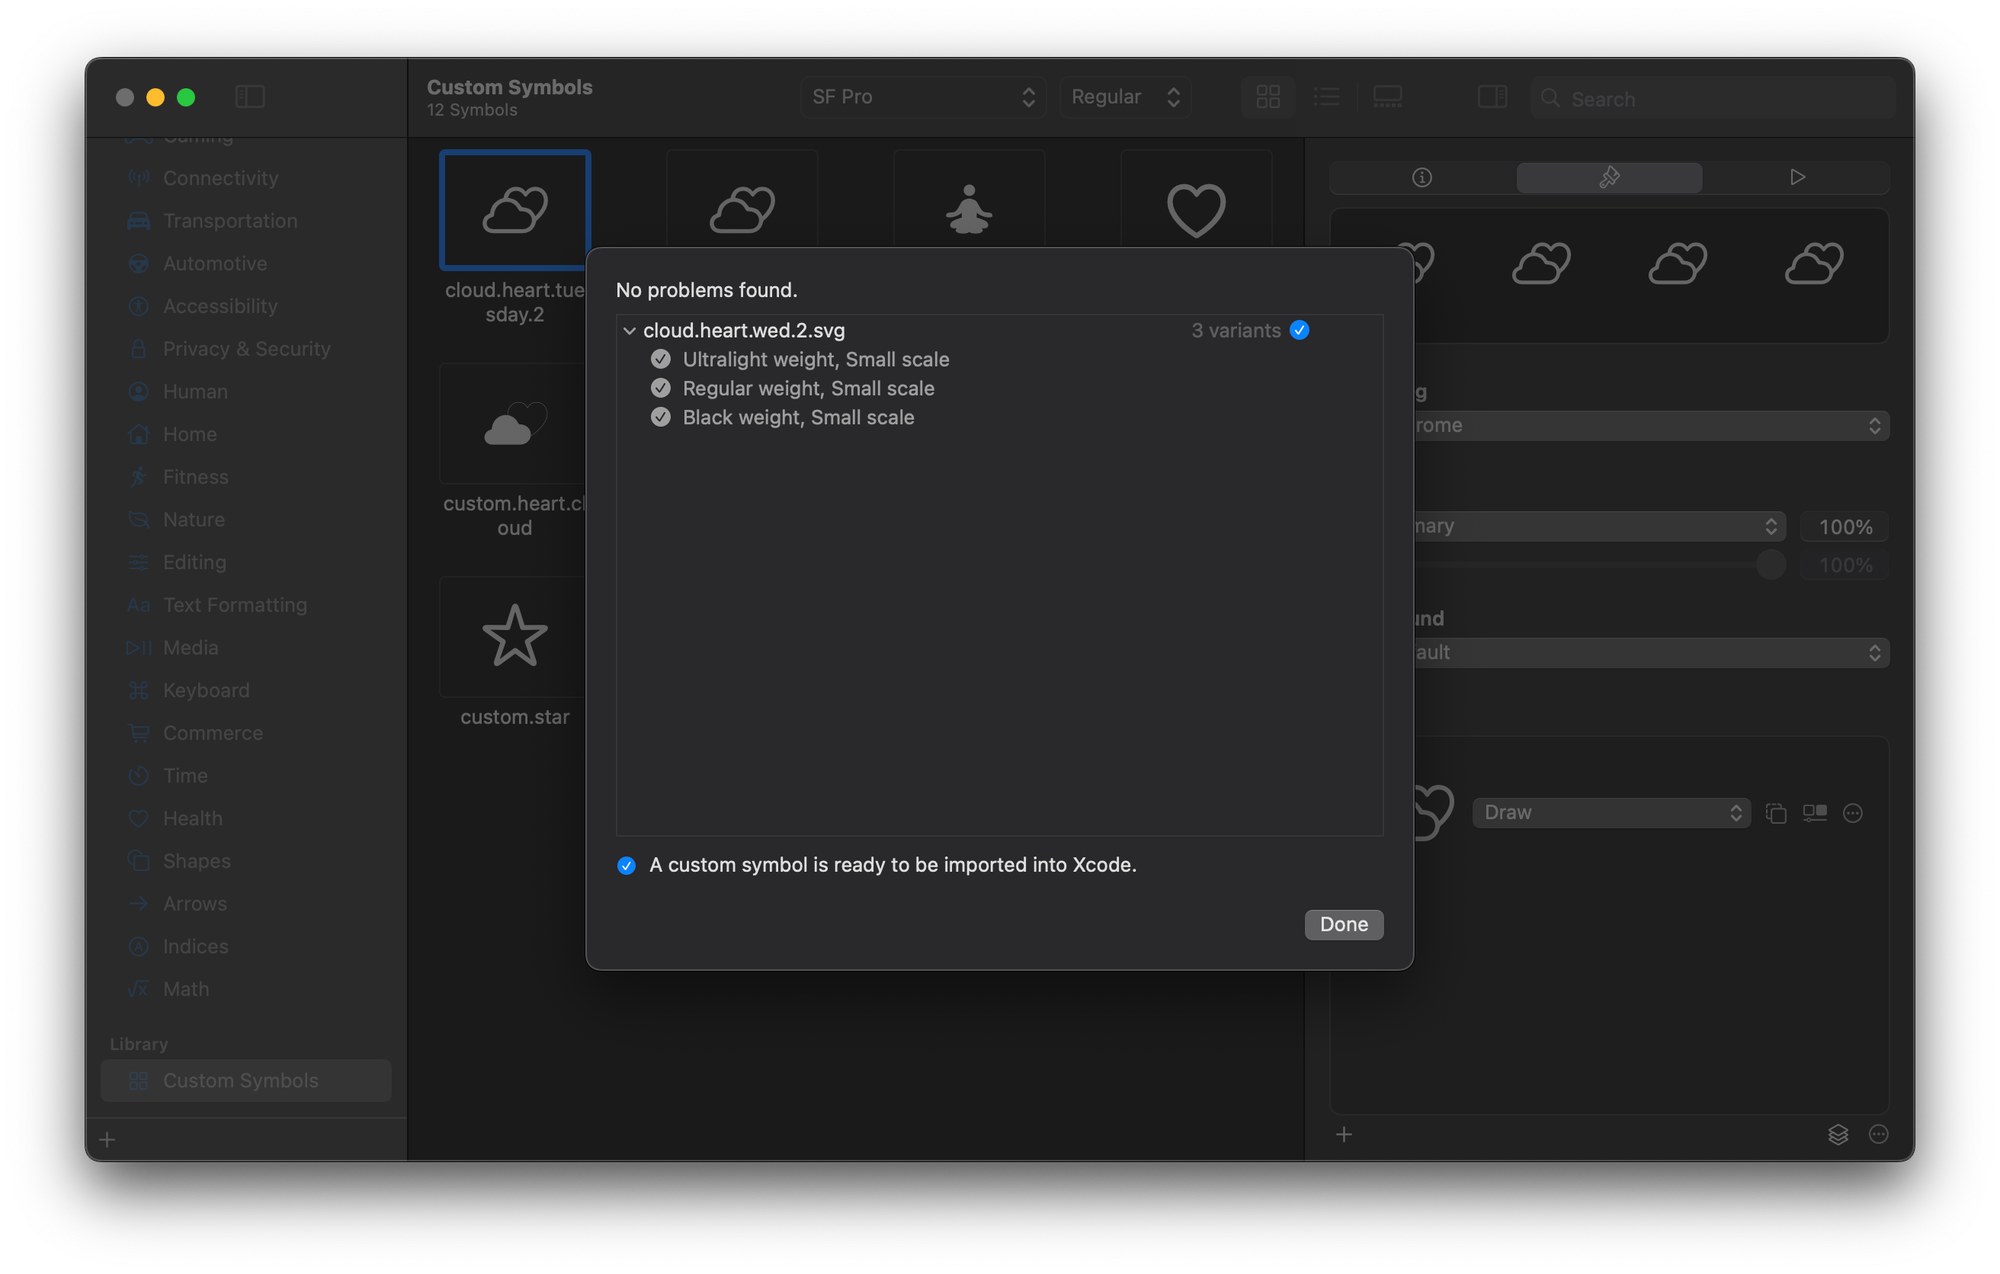
Your custom symbol can now be imported into the SF Symbol app to customize its rendering modes. Just drag and drop the SVG file into the Custom Symbols folder.

Rendering Symbol Customization
When you import the symbols template in the SF Symbols app, you can set its annotations. The annotations contain information about the symbol's rendering style behavior and enable its implementation in a view via Xcode.
A symbol can have different rendering modes, regardless of the approach used to create it. As long as the template is version 3.0+ and compatible with Xcode 14+, it will support annotations carrying information about the rendering style behavior of your symbol.
Keep in mind that if the vectors composing the variations in your template are not consistent with the layout's order, the annotations may work unexpectedly.
A symbol can be rendered in four different modes:
- Monochrome - rendering the symbol using just one color;
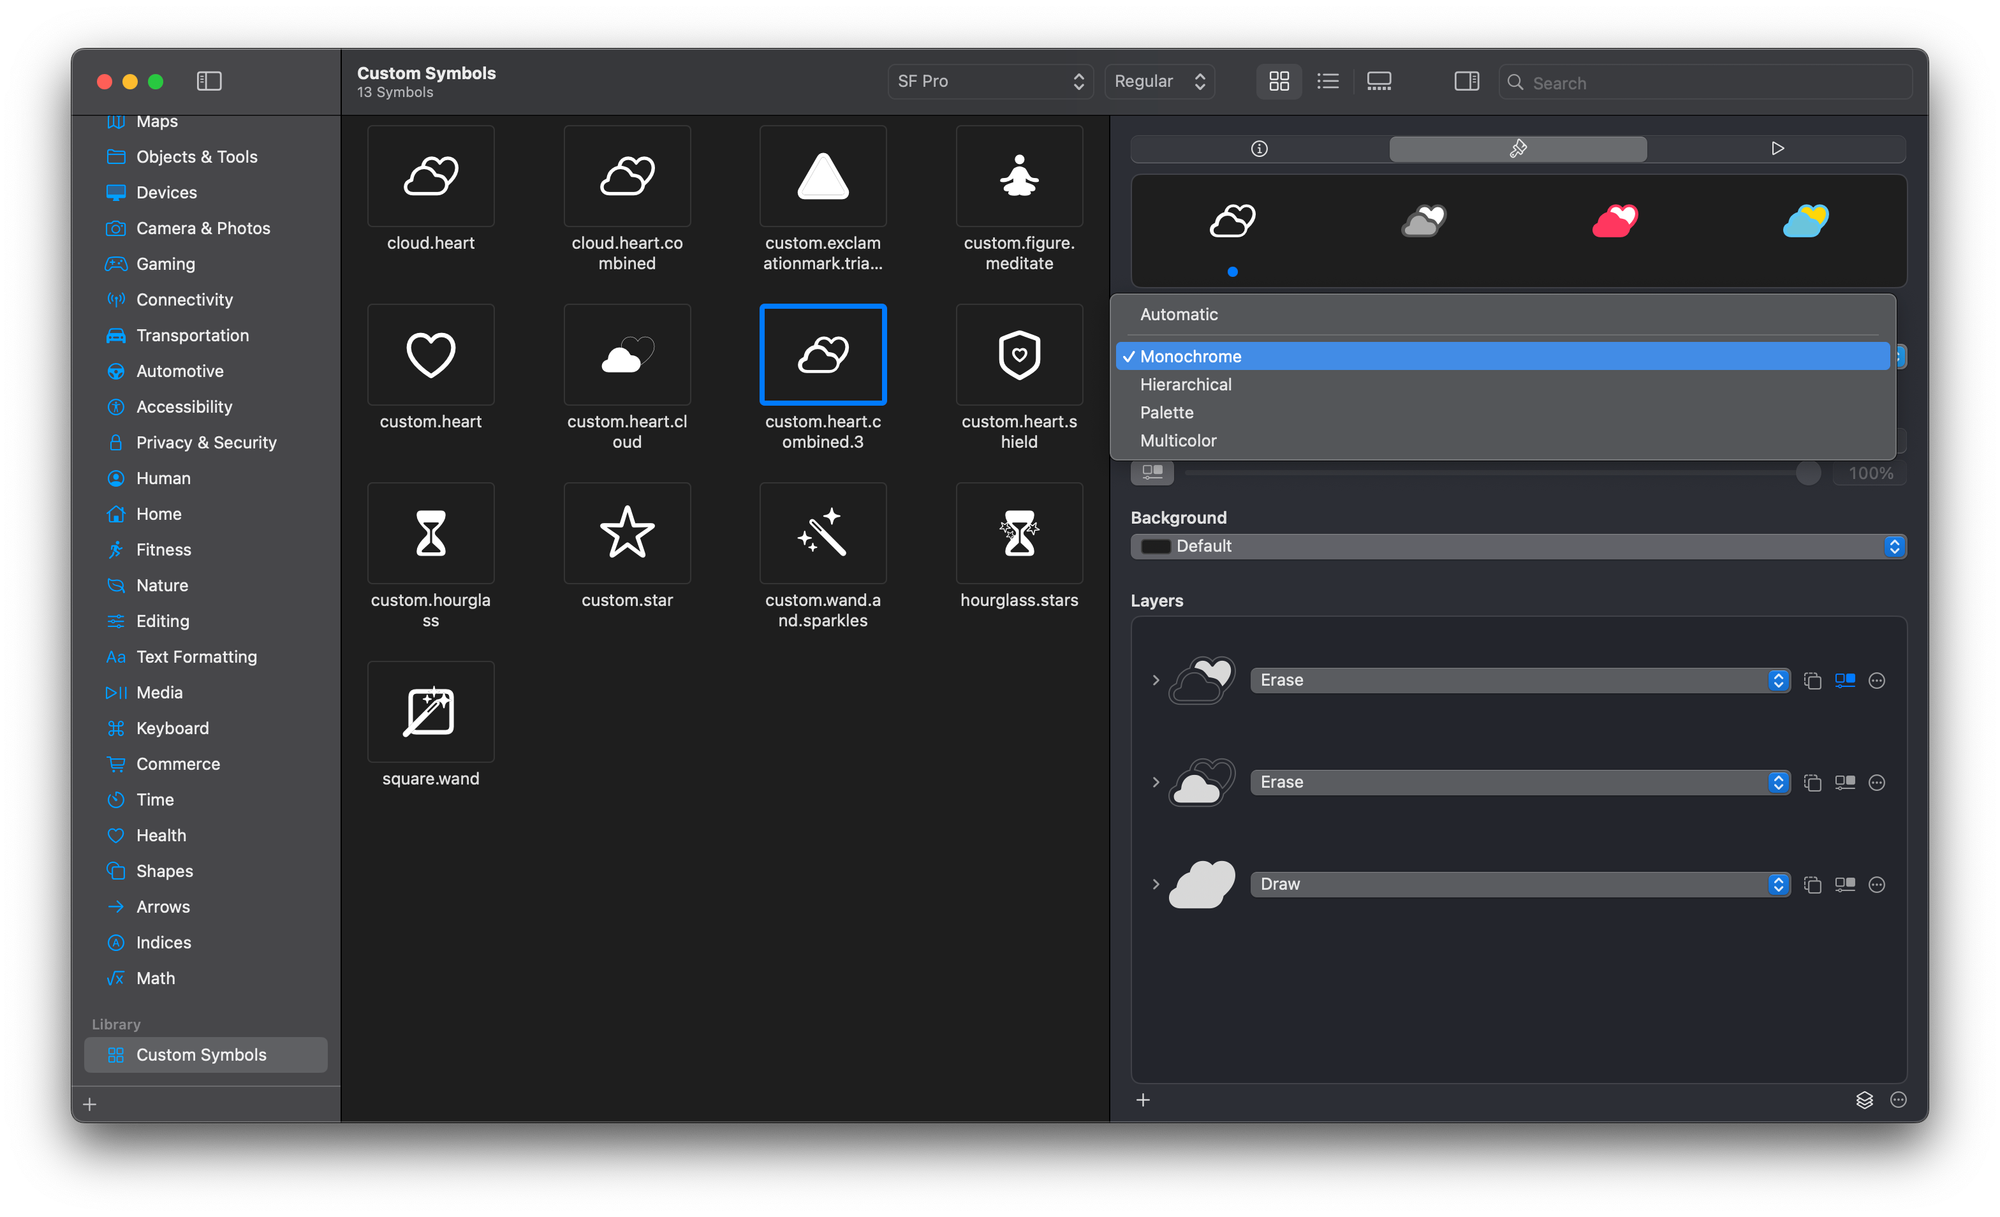
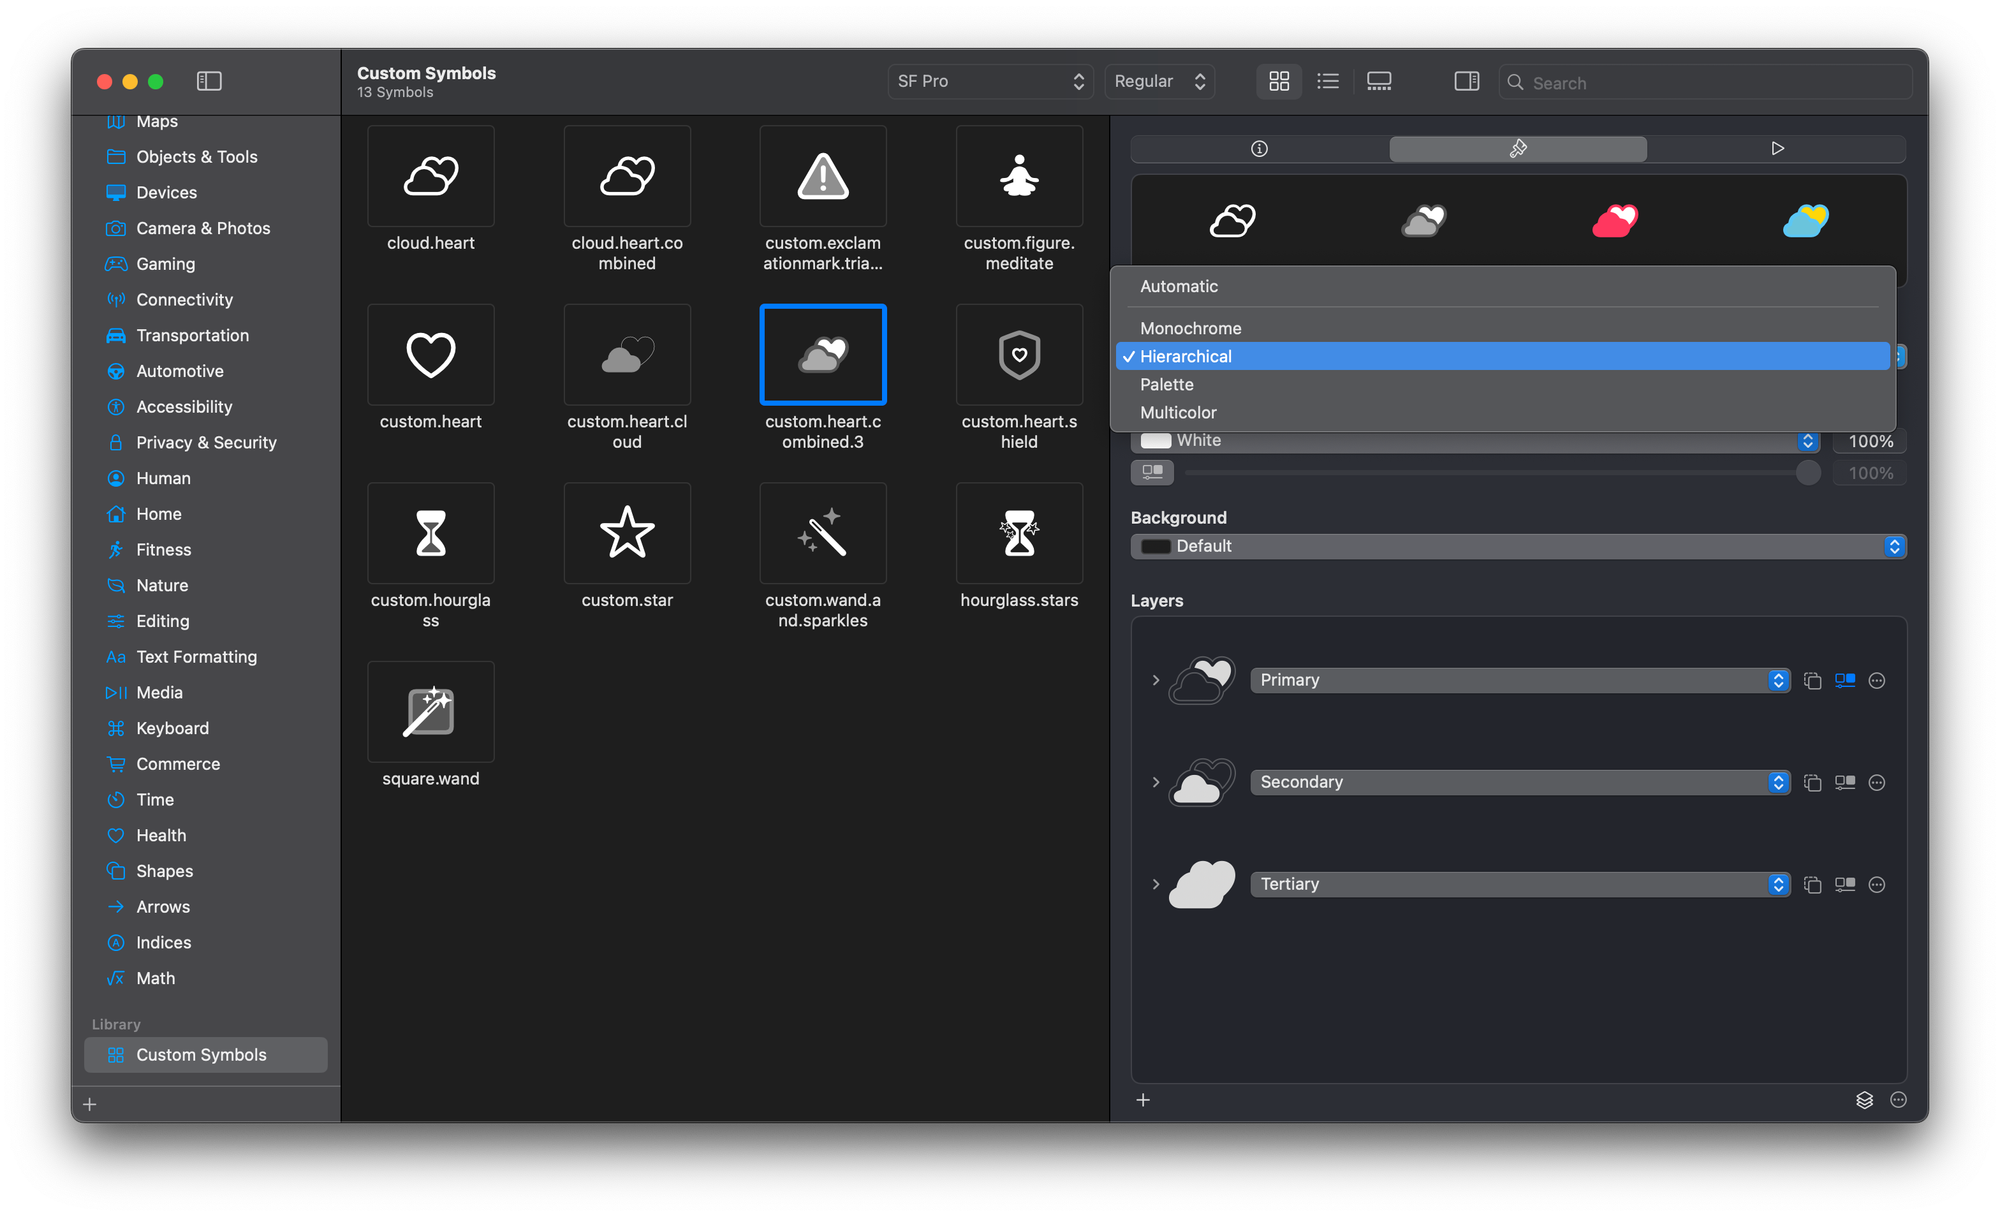
- Hierarchical - rendering the symbol using one color with different opacity values based on the assigned hierarchy of the layers;
- Palette - applying different color hierarchies to the layers;

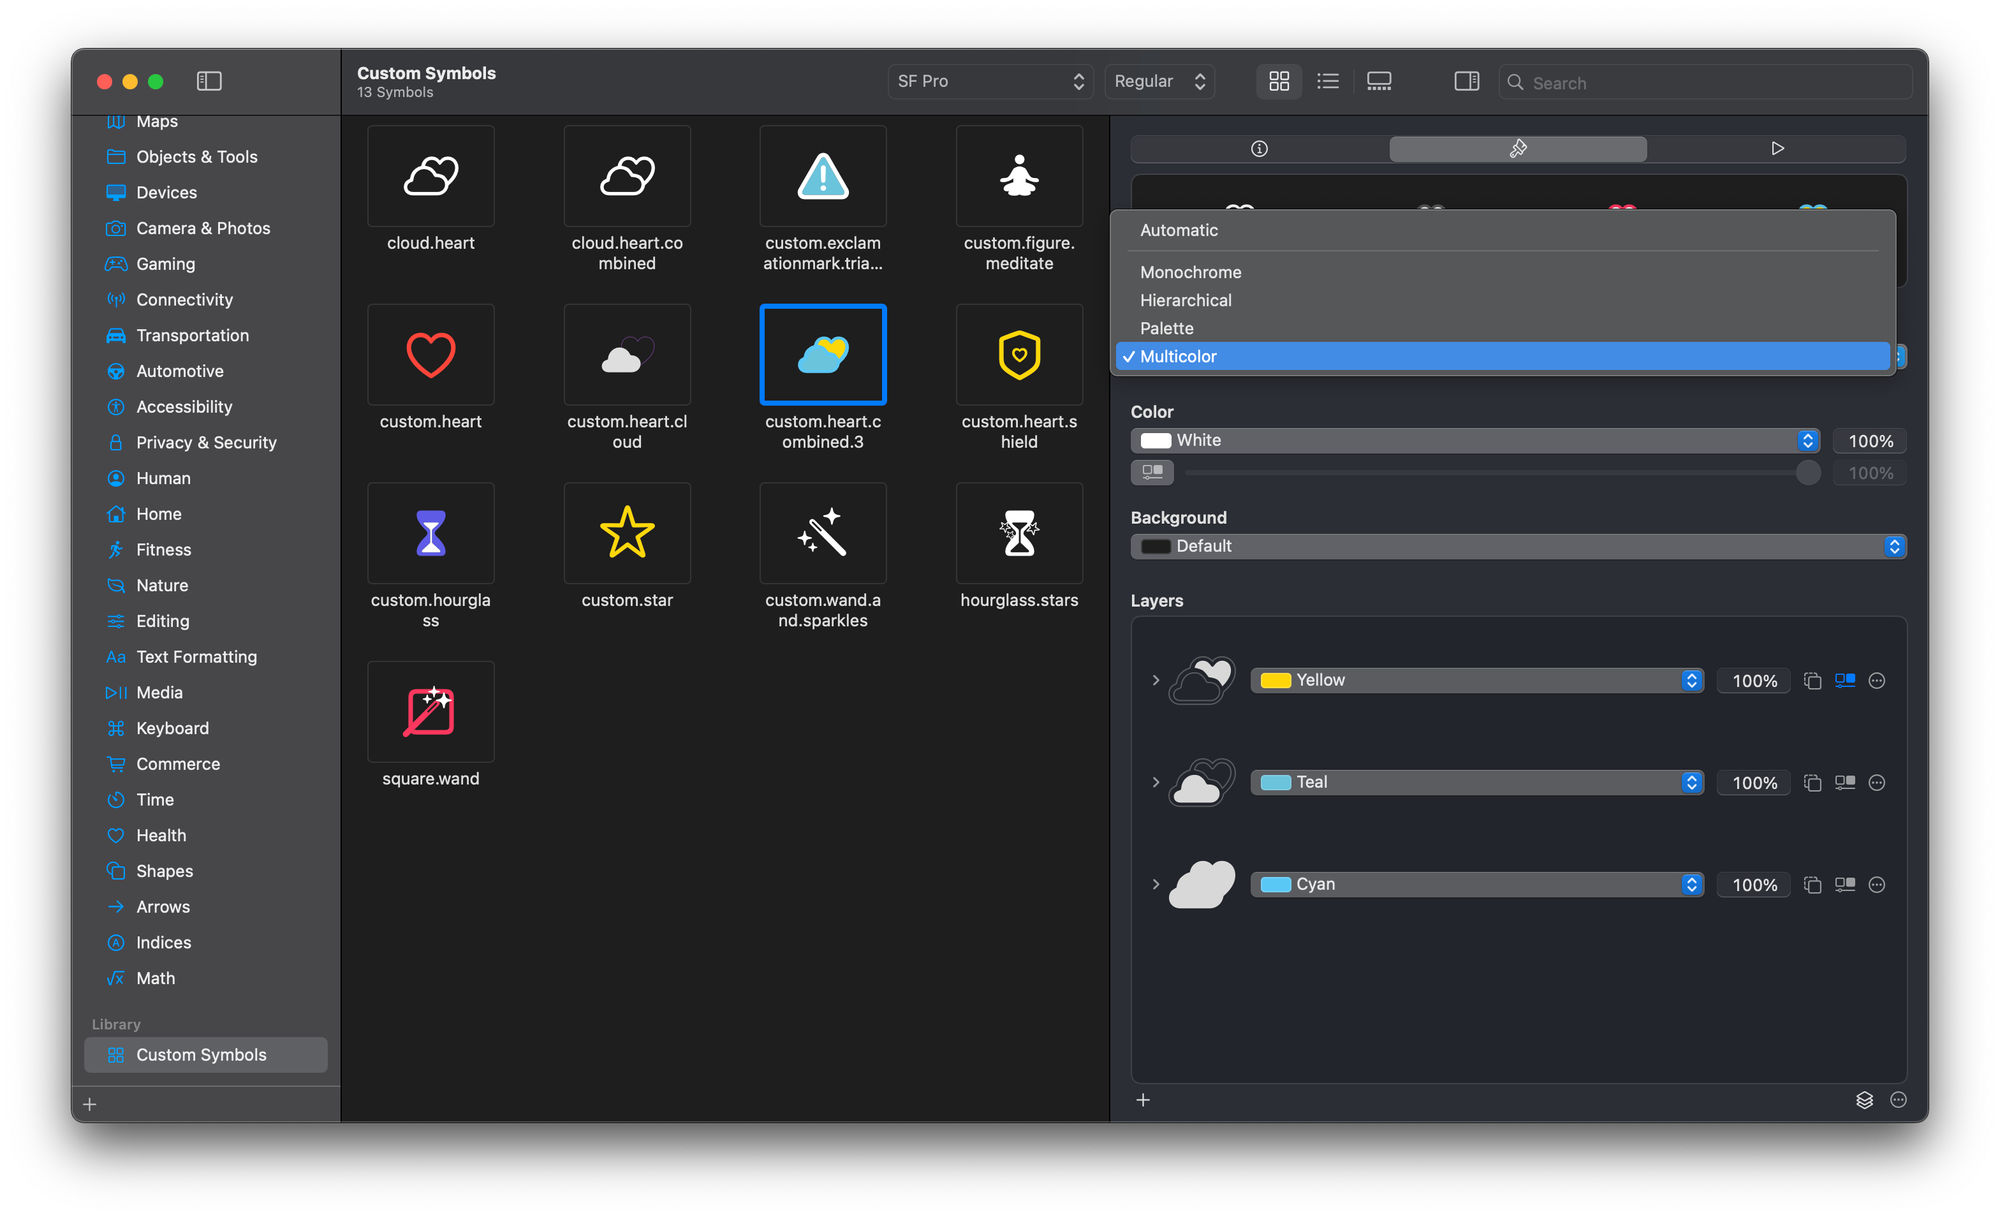
- Multicolor - applying different colors to the layers.
It’s preferable to use only system colors for rendering modes that imply colors.
When shapes overlap, take advantage of the ‘clear behind’ feature. It is particularly useful in hierarchy rendering mode, for example, when you want to have control over the way the layers blend their colors.
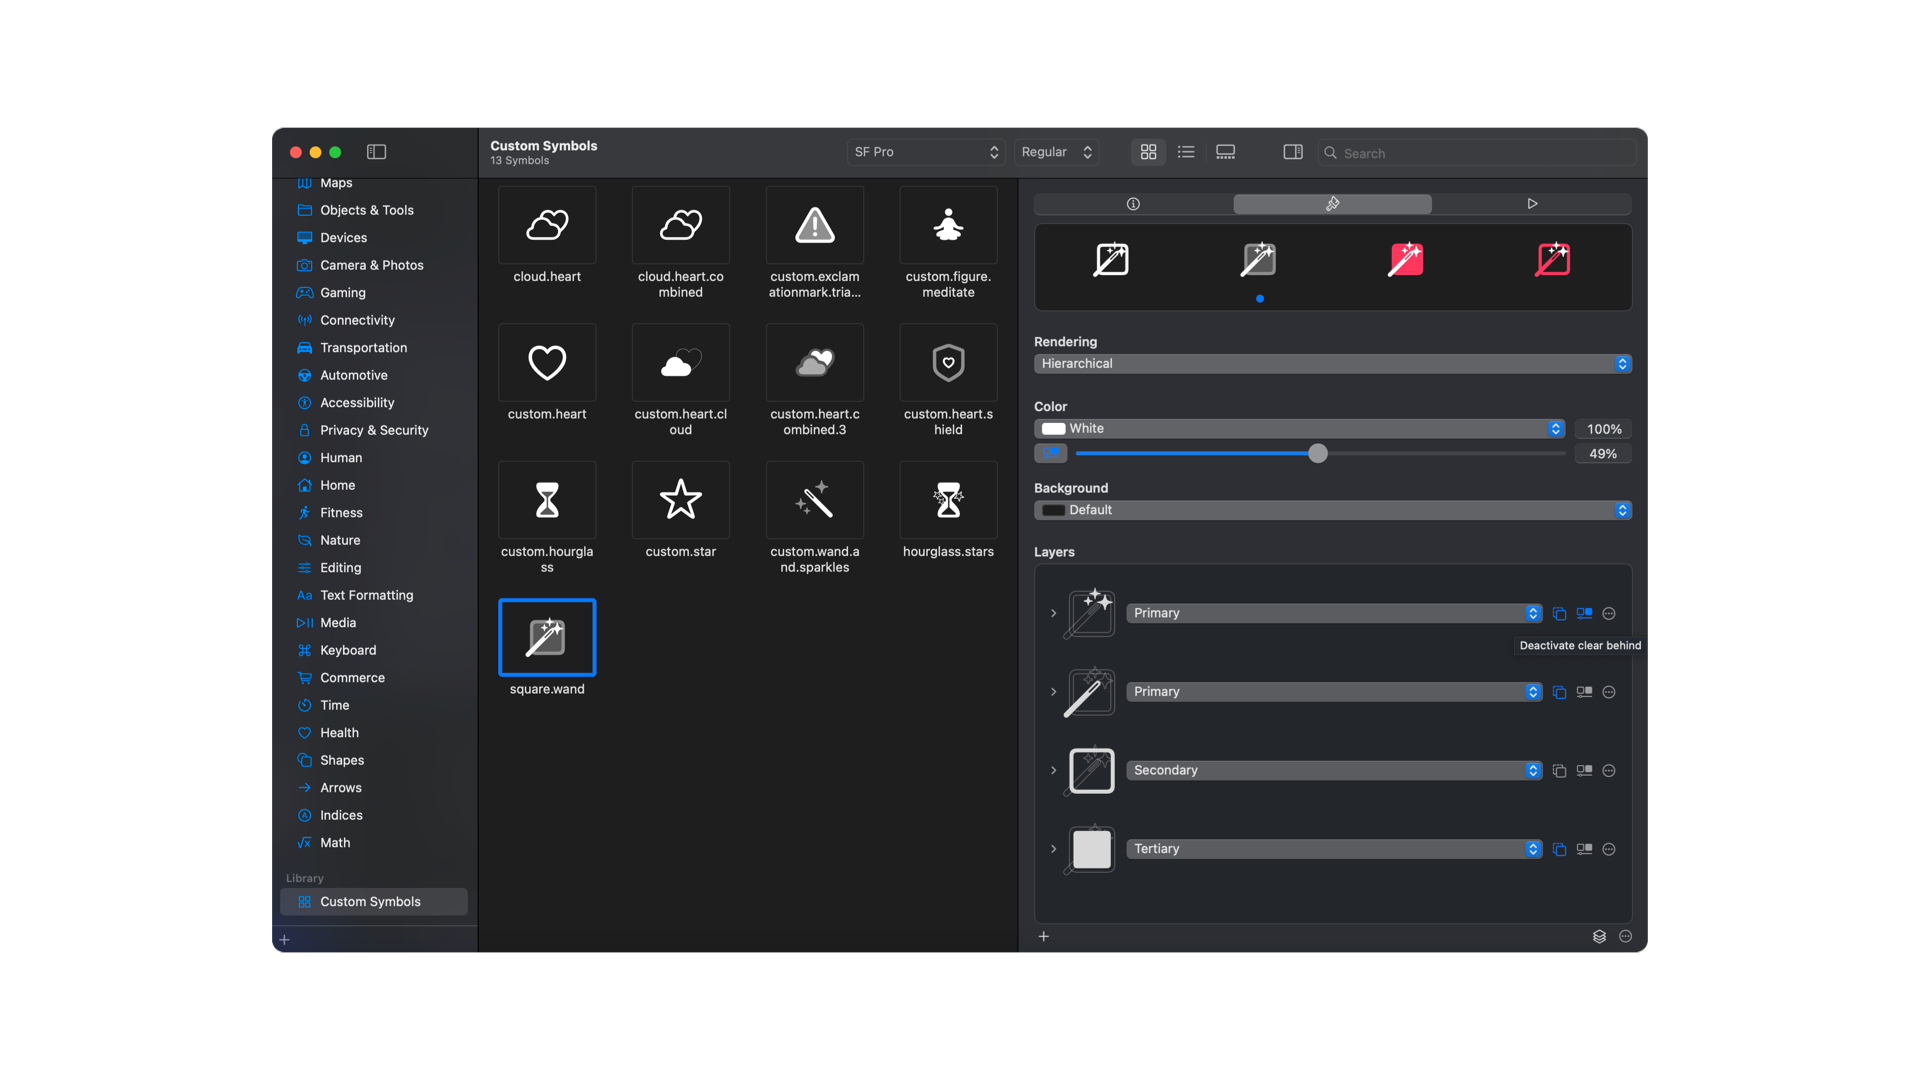
When applying different visibilities, colors or color values, think of the symbol for what it is - a combination of paths on different layers - and use this approach to create the rendering mode style that you want:
- Add as many layers as needed;
- Set which subpath is related to that layer;
- Set how the layer rendering style must behave:
- In monochrome: draw, erase or hide;
- In hierarchical: provide a hierarchy value, alternatively erase or hide them;
- In palette: define colors for the hierarchy values and link those values to each layer. Alternatively, erase or hide them;
- In multicolor: provide a color for each layer.
Setting Subpaths in layers
In the example above, each path is related to a layer. The first and second paths are set to erase to create the ‘empty’ areas, and the third is set to draw to make that stroke perception.
Distribution
To distribute the symbol, select it from your custom list and export it from the file menu.
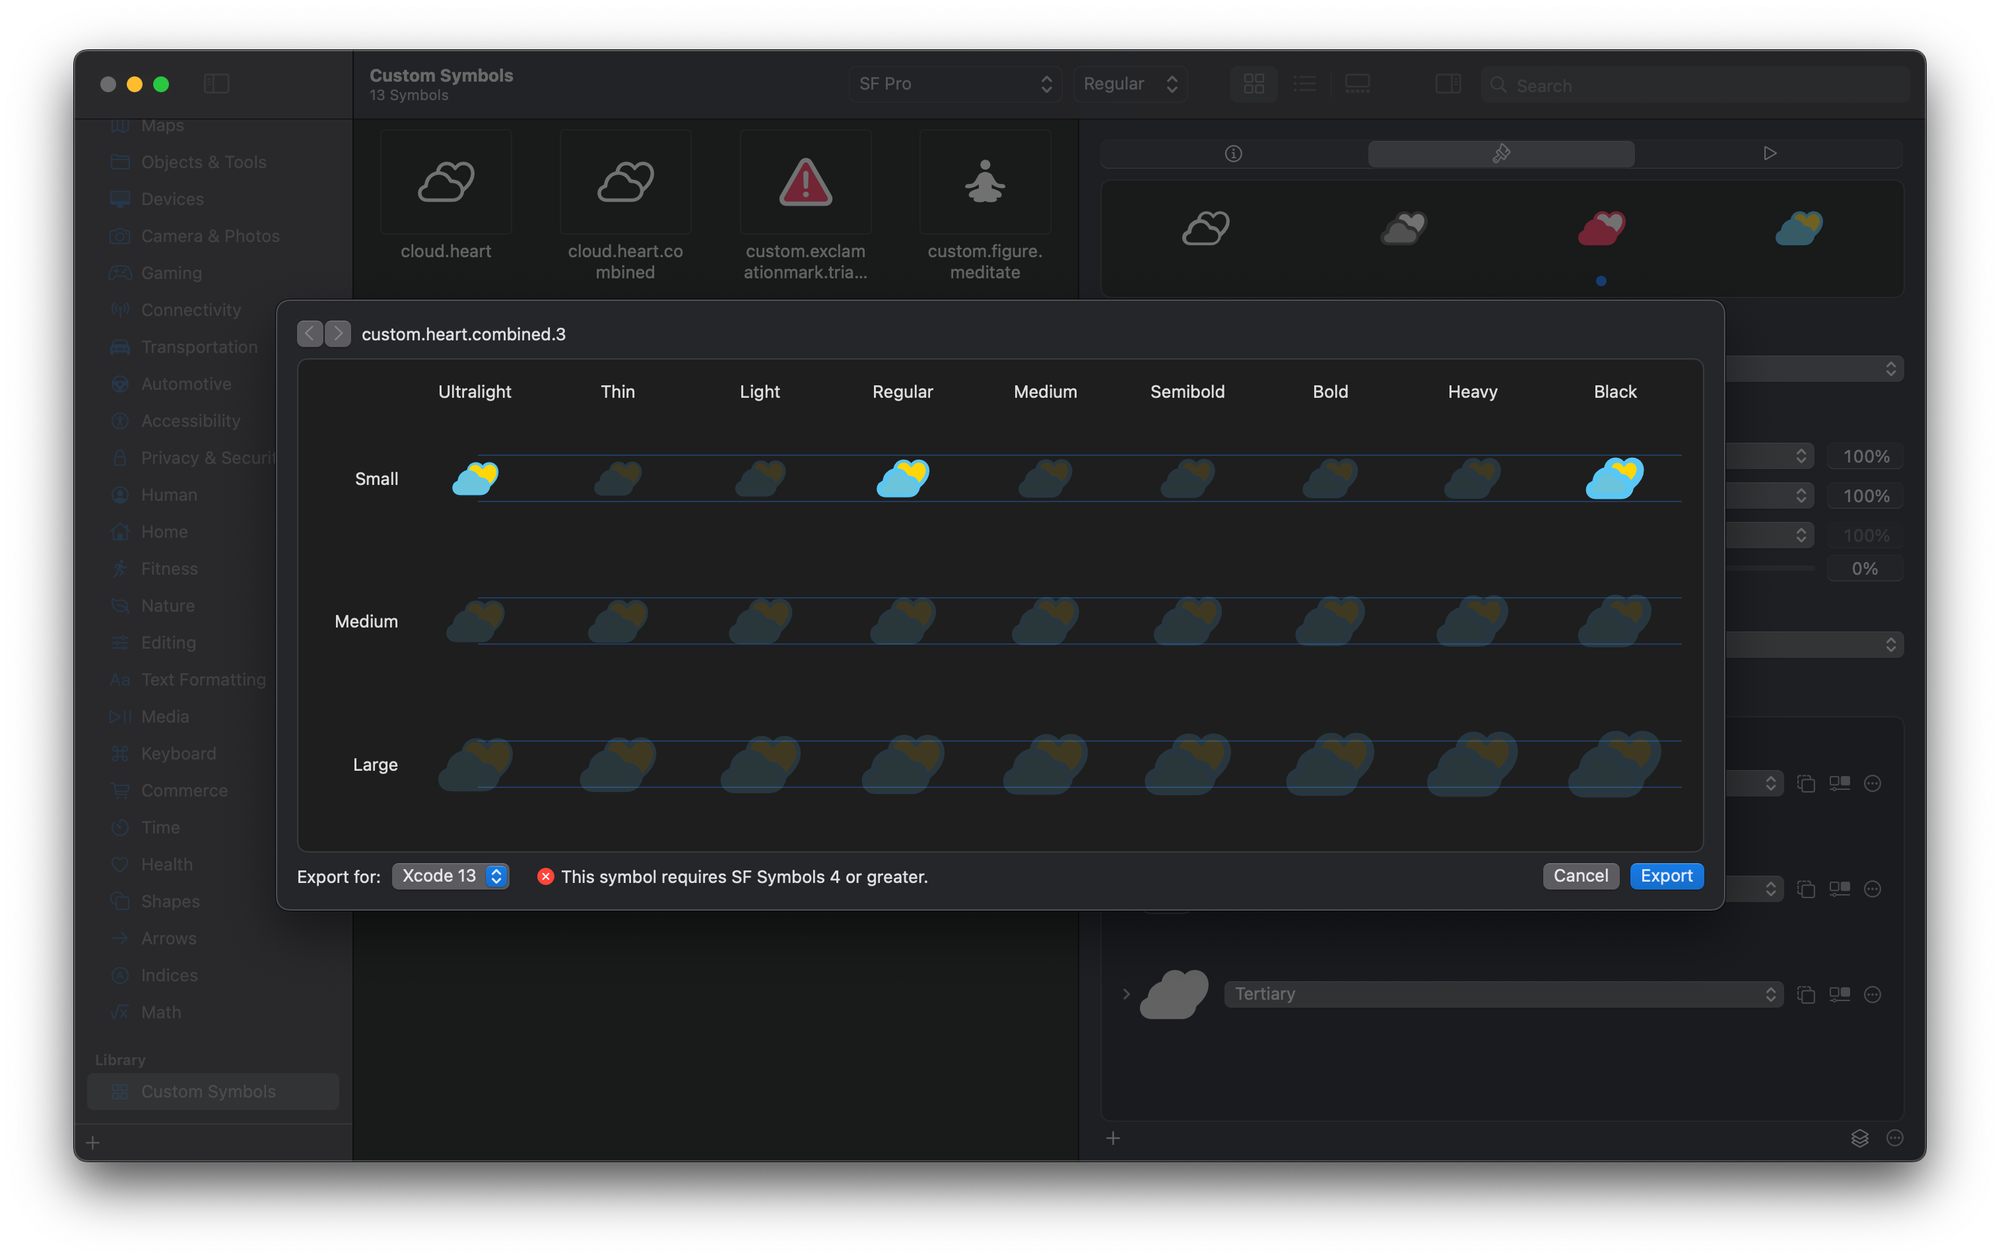
Exporting for Xcode 13 down doesn’t allow keeping the annotations. It disables the capability to define rendering modes in the implementation phase, resulting in the symbol being used only in monochrome mode.

Exporting for Xcode 14 or newer versions keeps all the annotations of the rendering modes.
Usage
In Xcode, drag and drop the exported file into the Assets folder. Then, select the symbol and use the Inspector to set the symbol properties.
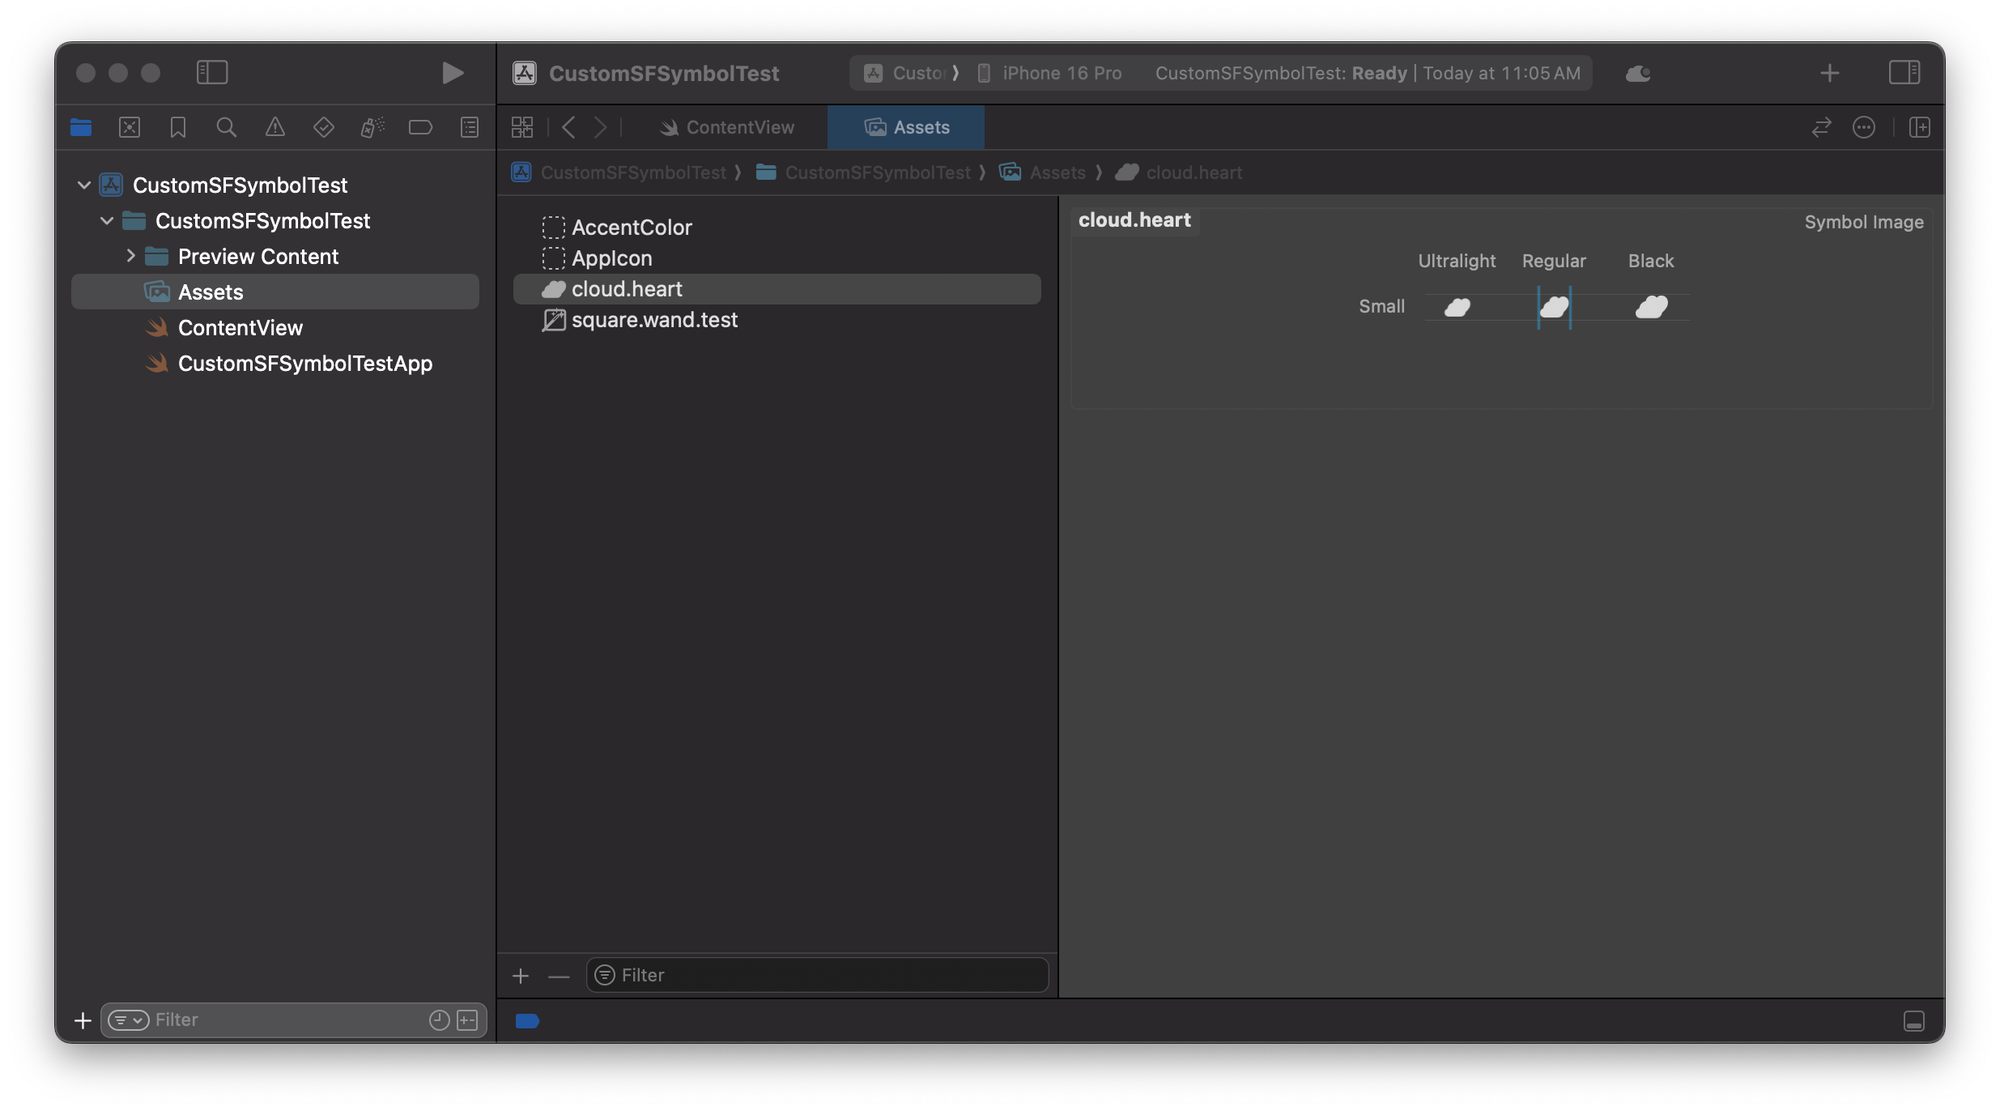
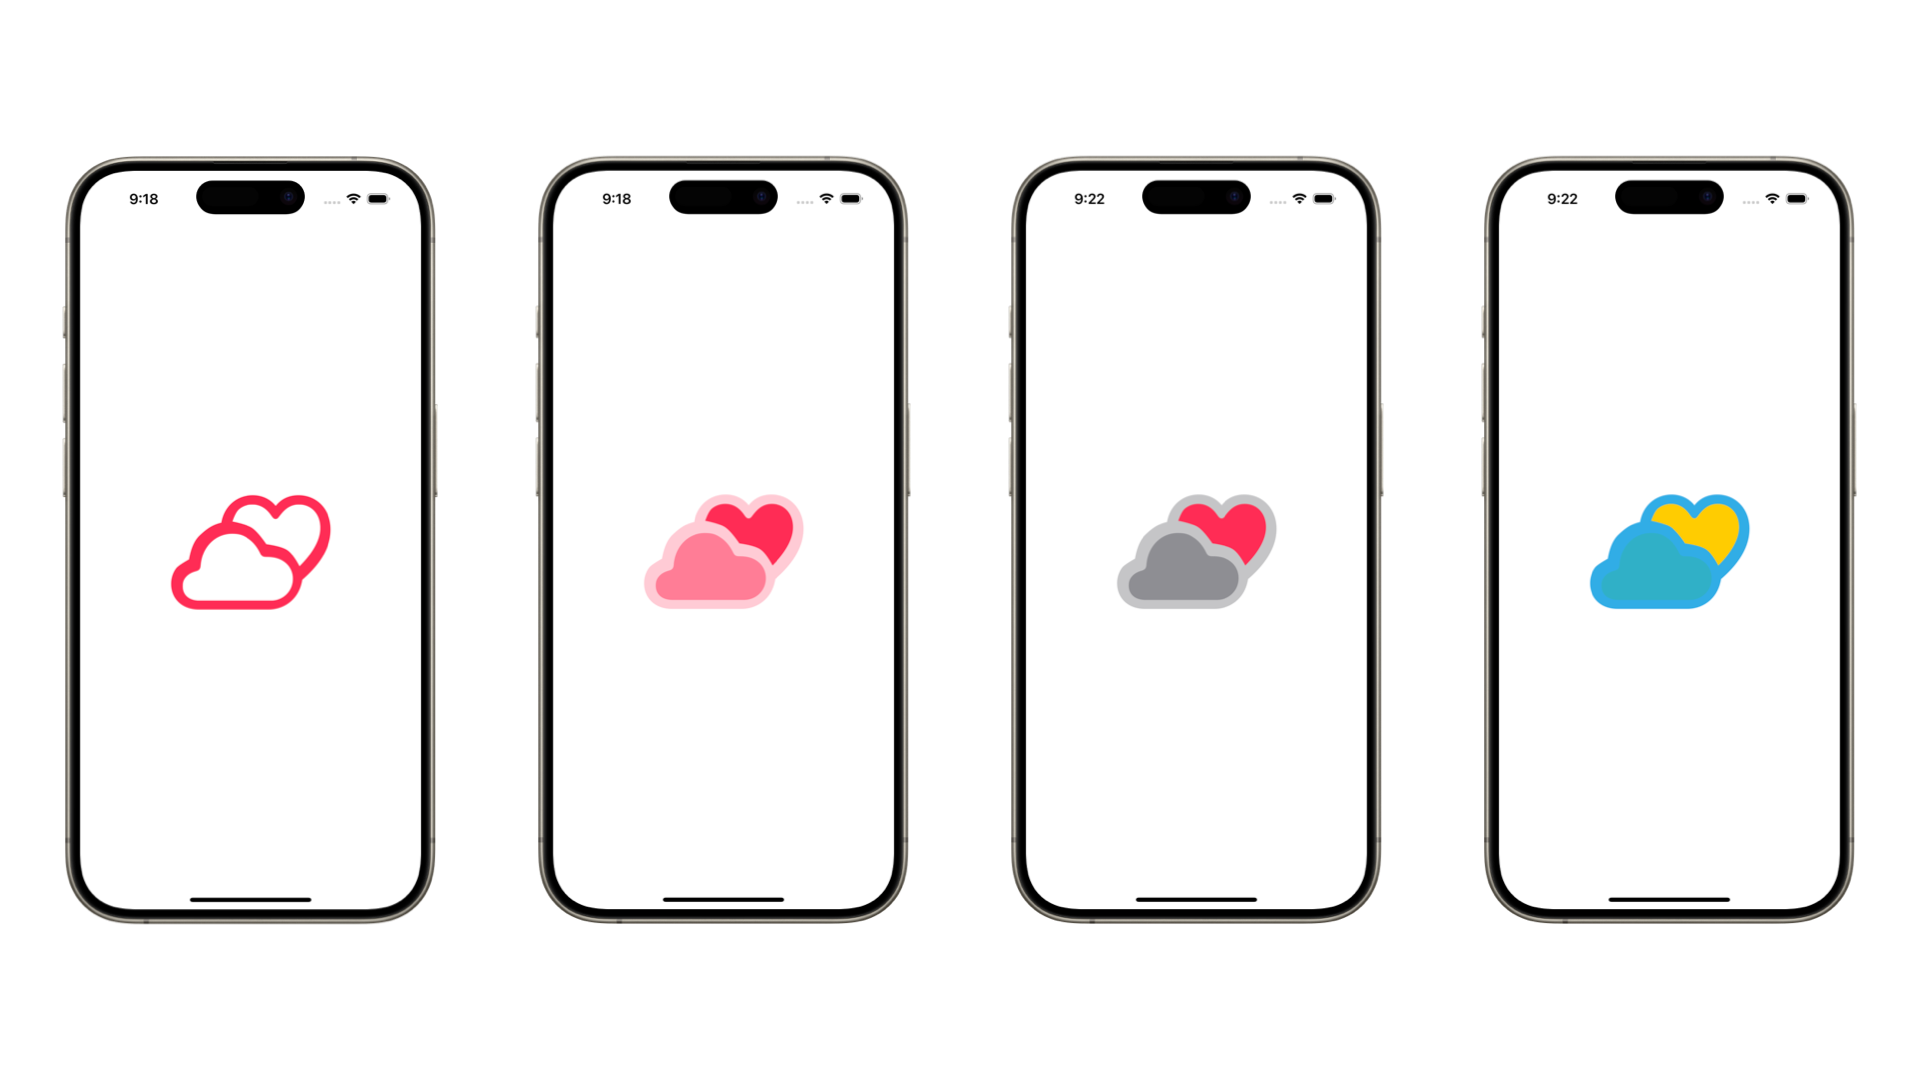
To implement the symbol in your view, use it as an Image view.
Image("cloud.heart")
    .imageScale(.large)
    .symbolRenderingMode(.hierarchical)
.foregroundStyle(.pink)- Use the
Imageinitializer that takes the name of the image as parameter; - You can choose the size of the symbol using the
imageScale(_:)modifier; - Set the rendering mode using the
symbolRenderingMode(_:)modifier; - Using the
foregroundStyle(_:)modifier you can define multiple color values for each layer of a symbol hierarchy.
Image("cloud.heart")
    .imageScale(.large)
    .symbolRenderingMode(.hierarchical)
    .foregroundStyle(.pink, .blue, .teal)
If the rendering mode is set as palette, you can pass up to 3 colors. While when on multicolor, there’s no need to pass colors as it will use those present in the symbol annotations.
With over 6000 symbols in the SF Symbols library, it's highly likely to find an icon that suits your needs.
However, there are various flexible techniques for the personalization of custom symbols. Some approaches, like combining existing symbols, are simpler and more accessible, requiring minimal graphic design work. In contrast, creating complex symbols from scratch demands a deeper understanding of vector tools and design principles. The more intricate the design, the more expertise is needed, including the ability to manage weights, layers, and interpolation.
Whether you're a developer with minimal design experience or a skilled designer, the SF Symbols app provides robust tools for creating tailored icons consistent with Apple's design system.