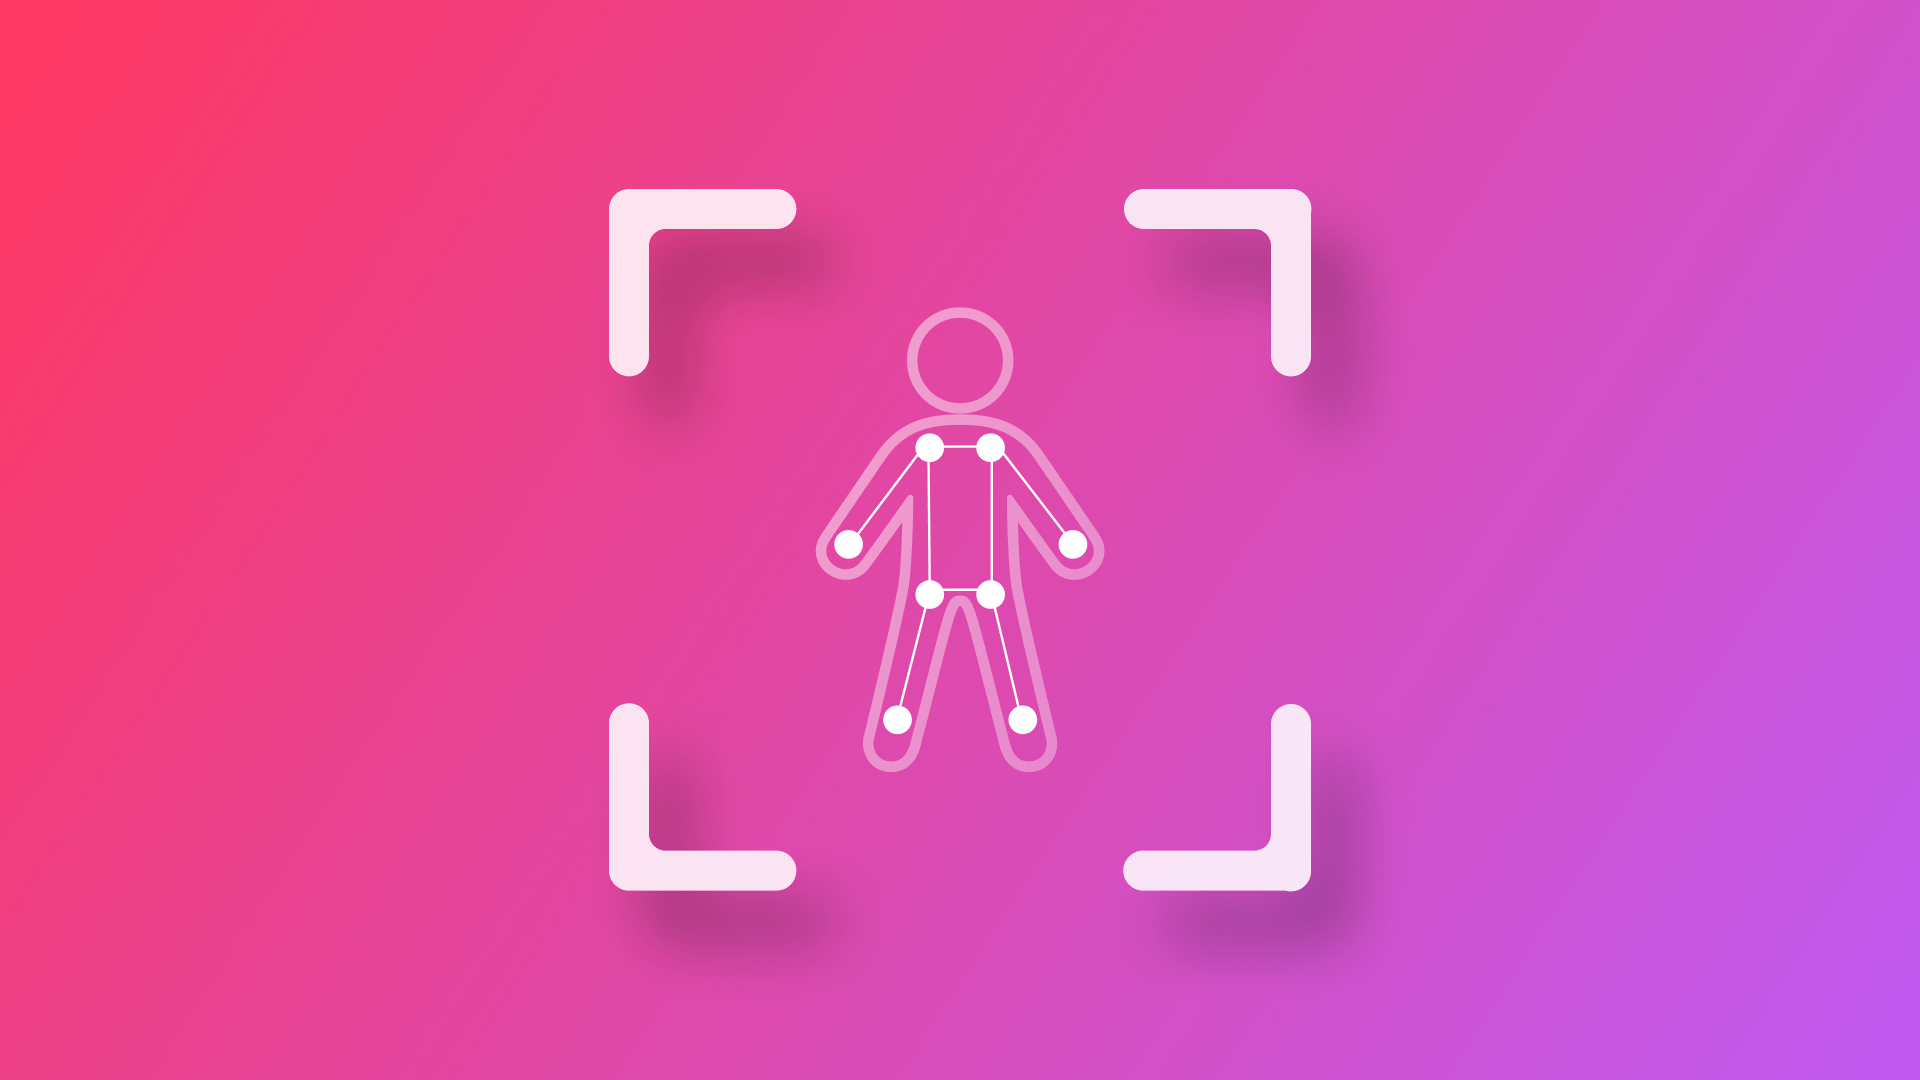
Detecting body poses in a live video feed
Learn how to use the Vision framework to track body poses from a video feed within a SwiftUI app.

One of the most interesting applications of Apple’s Vision framework is its ability to identify and track up to 19 unique body points. This allows developers to build powerful applications that can track human movement. By analyzing key body landmarks such as the head, shoulders, elbows, wrists, hips, knees, and ankles, the Vision framework opens up a wide range of possibilities in fields such as fitness tracking, augmented reality, motion analysis, and even accessibility.
In this tutorial, we will understand how we can use the HumanBodyPoseRequest from the Vision framework to detect body poses in a live video feed and show this information using graphical overlays in a SwiftUI app.
By the end of this tutorial, you will be able to take this information to create an engaging experience for your users
Before we start
To follow this tutorial, you need a basic understanding of SwiftUI and be comfortable writing code using the Swift programming language. You can download the starting project on the following link:
Step 1 - Configuring the camera session
As a first step, we need to create a class that will be responsible for defining the camera setup and how it will be used using the AVFoundation framework. Create a new file named CameraViewModel.swift in your Xcode project.
import SwiftUI
import AVFoundation
import Vision

@Observable
class CameraViewModel {

    // 1.
    let session = AVCaptureSession()
    private let sessionQueue = DispatchQueue(label: "sessionQueue")
    private let videoDataOutputQueue = DispatchQueue(label: "videoDataOutputQueue")
    private let videoDataOutput = AVCaptureVideoDataOutput()
    weak var delegate: AVCaptureVideoDataOutputSampleBufferDelegate?

    // 2.
    func checkPermission() async {
        switch AVCaptureDevice.authorizationStatus(for: .video) {
        case .authorized:
            await setupCamera()
        case .notDetermined:
            let granted = await AVCaptureDevice.requestAccess(for: .video)
            if granted {
                await setupCamera()
            }
        default:
            print("Camera permission denied")
        }
    }

    // 3.
    private func setupCamera() async {
        sessionQueue.async {
            self.session.beginConfiguration()

            guard let videoDevice = AVCaptureDevice.default(.builtInWideAngleCamera, for: .video, position: .front),
                  let videoInput = try? AVCaptureDeviceInput(device: videoDevice) else {
                print("Failed to create video input")
                self.session.commitConfiguration()
                return
            }

            if self.session.canAddInput(videoInput) {
                self.session.addInput(videoInput)
            }

            self.videoDataOutput.videoSettings = [
                kCVPixelBufferPixelFormatTypeKey as String: Int(kCVPixelFormatType_32BGRA)
            ]

            self.videoDataOutput.setSampleBufferDelegate(self.delegate, queue: self.videoDataOutputQueue)
            self.videoDataOutput.alwaysDiscardsLateVideoFrames = true

            if self.session.canAddOutput(self.videoDataOutput) {
                self.session.addOutput(self.videoDataOutput)
            }

            if let connection = self.videoDataOutput.connection(with: .video) {
                connection.videoRotationAngle = 90
                connection.isVideoMirrored = true
            }

            self.session.commitConfiguration()
            self.session.startRunning()
        }
    }
}- In the
CameraViewModelwe use anAVCaptureSessioninstance that manages the overall process of capturing video data. Then we define two different queues: one for the setup of the camera and another one to handle video frame processing efficiently. TheAVCaptureVideoDataOutputinstance is responsible for streaming raw video frames, and a weak reference to a delegate (AVCaptureVideoDataOutputSampleBufferDelegate) allows another object to process these frames. - Before accessing the camera, the app must check whether it has permission to do so. The
checkPermission()function first checks the current authorization status usingAVCaptureDevice.authorizationStatus(for: .video). If access has already been granted, the camera setup proceeds immediately. If permission has not yet been determined, the function requests access from the user. - The
setupCamera()function is responsible for initializing and configuring the camera session. Running onsessionQueueit begins by attempting to access the front camera and create anAVCaptureDeviceInput. The function then configuresvideoDataOutputto capture frames inkCVPixelFormatType_32BGRAformat, ensuring compatibility with Vision-based processing. The delegate responsible for processing each video frame is assigned tovideoDataOutput, discarding late frames to maintain performance.
Once all configurations are in place, the session commits these changes and starts running.
Step 2 - Displaying live video feed from the camera
Now that we defined an object that will handle the access and the management of the camera we can display the video feed creating a new View that will use the AVCaptureSession to display real-time capture. For doing that create a new file named CameraPreviewView and define a new struct that conforms to the UIViewRepresentable protocol.
import SwiftUI
import UIKit
import AVFoundation

struct CameraPreviewView: UIViewRepresentable {

    // 1.
    let session: AVCaptureSession

    // 2.
    func makeUIView(context: Context) -> UIView {
        let view = UIView(frame: .zero)
        let previewLayer = AVCaptureVideoPreviewLayer(session: session)

        previewLayer.videoGravity = .resizeAspectFill
        previewLayer.frame = view.bounds
        previewLayer.connection?.videoRotationAngle = 90
        view.layer.addSublayer(previewLayer)

        return view
    }

    // 3.
    func updateUIView(_ uiView: UIView, context: Context) {
        Task {
            if let previewLayer = uiView.layer.sublayers?.first as? AVCaptureVideoPreviewLayer {
                previewLayer.frame = uiView.bounds
            }
        }
    }
}- The
sessionproperty defined in the struct will act as a bridge between the ViewModel that we created in the step before and this view, allowing us to display a live video feed from the camera directly within a SwiftUI view. - The
makeUIView(context:)method is responsible for creating theUIViewthat will contain the camera preview. A newUIViewinstance is initialized, and anAVCaptureVideoPreviewLayeris created using the provided session. By setting thevideoGravityand the frame property we ensure that the video feed has the correct sizes and can be added as sublayer of theView. - The
updateUIView(_:context:)method ensures that the preview layer updates its size when the SwiftUI view’s layout changes.
Step 3 - Performing the bodypose request
The PoseEstimationViewModel class is responsible for processing video frames and detecting human body joints in real time. It conforms to the AVCaptureVideoDataOutputSampleBufferDelegate to receive camera frames. This class manages body point detection and tracking, providing real-time pose estimation.
import SwiftUI
import Vision
import AVFoundation
import Observation

// 1.
struct BodyConnection: Identifiable {
    let id = UUID()
    let from: HumanBodyPoseObservation.JointName
    let to: HumanBodyPoseObservation.JointName
}

@Observable
class PoseEstimationViewModel: NSObject, AVCaptureVideoDataOutputSampleBufferDelegate {

    // 2.
    var detectedBodyParts: [HumanBodyPoseObservation.JointName: CGPoint] = [:]
    var bodyConnections: [BodyConnection] = []

    override init() {
        super.init()
        setupBodyConnections()
    }

    // 3.
    private func setupBodyConnections() {
        bodyConnections = [
            BodyConnection(from: .nose, to: .neck),
            BodyConnection(from: .neck, to: .rightShoulder),
            BodyConnection(from: .neck, to: .leftShoulder),
            BodyConnection(from: .rightShoulder, to: .rightHip),
            BodyConnection(from: .leftShoulder, to: .leftHip),
            BodyConnection(from: .rightHip, to: .leftHip),
            BodyConnection(from: .rightShoulder, to: .rightElbow),
            BodyConnection(from: .rightElbow, to: .rightWrist),
            BodyConnection(from: .leftShoulder, to: .leftElbow),
            BodyConnection(from: .leftElbow, to: .leftWrist),
            BodyConnection(from: .rightHip, to: .rightKnee),
            BodyConnection(from: .rightKnee, to: .rightAnkle),
            BodyConnection(from: .leftHip, to: .leftKnee),
            BodyConnection(from: .leftKnee, to: .leftAnkle)
        ]
    }

    // 4.
    func captureOutput(_ output: AVCaptureOutput, didOutput sampleBuffer: CMSampleBuffer, from connection: AVCaptureConnection) {
        Task {
            if let detectedPoints = await processFrame(sampleBuffer) {
                DispatchQueue.main.async {
                    self.detectedBodyParts = detectedPoints
                }
            }
        }
    }

    // 5.
    func processFrame(_ sampleBuffer: CMSampleBuffer) async -> [HumanBodyPoseObservation.JointName: CGPoint]? {
        guard let imageBuffer = CMSampleBufferGetImageBuffer(sampleBuffer) else { return nil }

        let request = DetectHumanBodyPoseRequest()

        do {
            let results = try await request.perform(on: imageBuffer, orientation: .none)
            if let observation = results.first {
                return extractPoints(from: observation)
            }
        } catch {
            print("Error processing frame: \(error.localizedDescription)")
        }

        return nil
    }

    // 6.
    private func extractPoints(from observation: HumanBodyPoseObservation) -> [HumanBodyPoseObservation.JointName: CGPoint] {
        var detectedPoints: [HumanBodyPoseObservation.JointName: CGPoint] = [:]
        let humanJoints: [HumanBodyPoseObservation.PoseJointsGroupName] = [.face, .torso, .leftArm, .rightArm, .leftLeg, .rightLeg]

        for groupName in humanJoints {
            let jointsInGroup = observation.allJoints(in: groupName)
            for (jointName, joint) in jointsInGroup {
                if joint.confidence > 0.5 { // Ensuring only high-confidence joints are added
                    let point = joint.location.verticallyFlipped().cgPoint
                    detectedPoints[jointName] = point
                }
            }
        }
        return detectedPoints
    }
}
- The
BodyConnectionstruct represents a connection between two human body joints. Each connection consists of twoHumanBodyPoseObservation.JointNamevalues (one for the starting joint and one for the ending joint). Theidproperty, which is automatically assigned aUUID, allows each connection to be uniquely identified. - The
detectedBodyPartsdictionary stores the coordinates of recognized body joints, mapping eachHumanBodyPoseObservation.JointNameto aCGPointrepresenting its position on screen. ThebodyConnectionsarray contains predefined joint pairs that form the human body structure. - The
setupBodyConnections()method initializes thebodyConnectionsarray with predefined joint-to-joint mappings, representing key skeletal connections. These connections define how detected joints should be linked to form a visual representation of the human body. For example, the nose is connected to the neck, the shoulders to the elbows, and the hips to the knees. - The
captureOutput(_:didOutput:from:)method is called each time the camera captures a frame, calling theprocessFramemethod passing the image buffer and storing the result of the analysis in thedetectedBodyPartsproperty - The
processFramemethod will be responsible for analyzing the video buffer. First, we create an instance of theDetectHumanBodyPoseRequest()and then use theperform()method to analyze the buffer using the machine learning algorithm. The results of the analysis are stored in the observation property. This observation is then passed to the extractPoints method, which extracts the body joints from the observation. - The
extractPoints(from:)method retrieves body joint coordinates from the pose observation. It iterates through all joints defined inbodyConnections, checking whether each joint is recognized with confidence greater than 0.5. The detected points are then normalized and stored in a dictionary, mapping each joint name to its screen position. This data is then used to visually represent the detected body pose.
Step 4 - Displaying human body connection
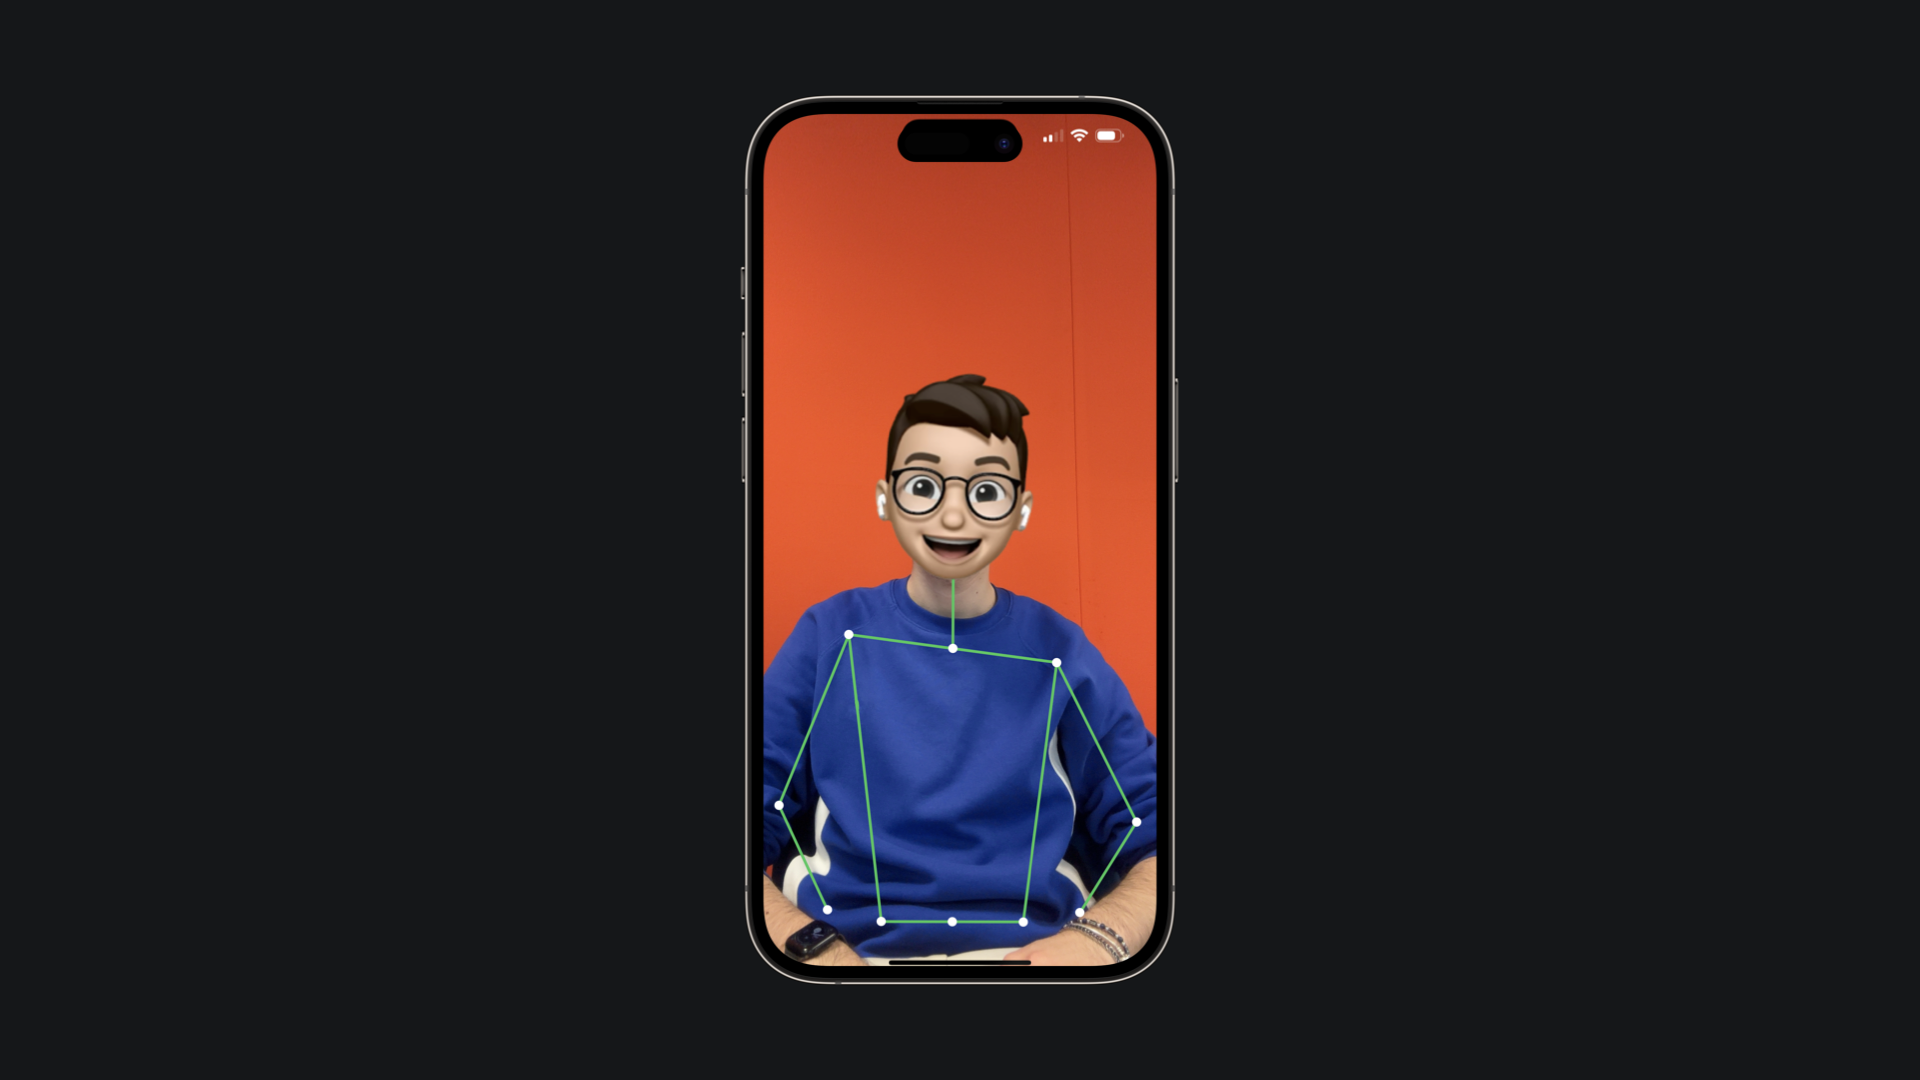
The PoseOverlayView struct is a SwiftUI view that visually represents detected human body joints and their connections on top of a live camera feed.
import SwiftUI
import Vision

struct PoseOverlayView: View {

    // 1.
    let bodyParts: [HumanBodyPoseObservation.JointName: CGPoint]
    let connections: [BodyConnection]

    var body: some View {
        GeometryReader { geometry in

            // 2.
            ZStack {
                ForEach(connections) { connection in
                    if let fromPoint = bodyParts[connection.from],
                       let toPoint = bodyParts[connection.to] {
                        Path { path in
                            let fromPointInView = CGPoint(
                                x: fromPoint.x * geometry.size.width,
                                y: fromPoint.y * geometry.size.height
                            )
                            let toPointInView = CGPoint(
                                x: toPoint.x * geometry.size.width,
                                y: toPoint.y * geometry.size.height
                            )

                            path.move(to: fromPointInView)
                            path.addLine(to: toPointInView)
                        }
                        .stroke(Color.green, lineWidth: 3)
                    }
                }
                // 3.
                ForEach(Array(bodyParts.keys), id: \.self) { jointName in
                    if let point = bodyParts[jointName] {
                        let pointInView = CGPoint(
                            x: point.x * geometry.size.width,
                            y: point.y * geometry.size.height
                        )

                        Circle()
                            .fill(.white)
                            .frame(width: 10, height: 10)
                            .position(pointInView)
                            .overlay(
                                ZStack{
                                    Circle()
                                        .stroke(Color.white, lineWidth: 1)
                                        .frame(width: 12, height: 12)


                                }
                            )
                    }
                }
            }
        }
    }
}- This
Viewtakes two inputs:bodyParts, a dictionary mapping each detected joint to aCGPoint, and `connections, an array ofBodyConnectionobjects that define how joints should be linked. This view ensures that the detected pose is accurately overlaid onto the corresponding camera frame. - Inside the
GeometryReader, aZStackis used to layer multiple visual elements. The firstForEachloop iterates over the connections array, checking if both the from and to joints of each connection have valid coordinates. If they do, a Path is drawn, mapping the detected joint positions from normalized coordinates (ranging from 0 to 1) to actual screen positions using the geometry.size values. These connections are then rendered as green lines using.stroke(Color.green, lineWidth: 3), forming the skeleton of the detected pose. - The second
ForEachloop iterates through all detected joints in bodyParts. Each joint’s coordinates are converted to screen space, and a smallCircle()is drawn at that position. This step visually highlights each detected joint, making it easier to see and track body movements.
Step 5 - Display everything
With the data gathered from the PoseEstimationViewModel and the camera video feed provided by the PoseEstimationViewModel we are ready to combine everything into a single View that will show human landmarks with lines and circles. Go in the ContentView file and modify it as follows
import SwiftUI
import AVFoundation
import Vision

// 1.
struct ContentView: View {
    @State private var cameraViewModel = CameraViewModel()
    @State private var poseViewModel = PoseEstimationViewModel()

    var body: some View {
        // 2.
        ZStack {
            // 2a.
            CameraPreviewView(session: cameraViewModel.session)
                .edgesIgnoringSafeArea(.all)
            // 2b.
            PoseOverlayView(
                bodyParts: poseViewModel.detectedBodyParts,
                connections: poseViewModel.bodyConnections
            )
        }
        .task {
            await cameraViewModel.checkPermission()
            cameraViewModel.delegate = poseViewModel
        }
    }
}- The
ContentViewstruct serves as the main entry point for the SwiftUI app. It initializes two@Stateproperties:cameraViewModelandposeViewModel. TheCameraViewModelhandles camera permissions and video capture, while thePoseEstimationViewModelprocesses the camera frames to detect body joints. - The body property defines the user interface, using a
ZStackto layer the camera preview and pose overlay on top of each other:CameraPreviewView(session: cameraViewModel.session): displays the live camera feed by using theAVCaptureSessionmanaged byCameraViewModel. The.edgesIgnoringSafeArea(.all)modifier ensures the camera fills the entire screen.PoseOverlayView(bodyParts: poseViewModel.detectedBodyParts, connections: poseViewModel.bodyConnections): renders detected body joints and their connections as an overlay on top of the camera feed. ThedetectedBodyPartsdictionary andbodyConnectionsarray fromPoseEstimationViewModelprovide the necessary data for drawing the skeleton.
- The
.taskmodifier ensures that necessary setup tasks run when the view first appears:cameraViewModel.checkPermission(): Requests camera access if needed and starts the video session.cameraViewModel.delegate = poseViewModel: AssignsPoseEstimationViewModelas the delegate ofCameraViewModel, allowing it to receive real-time video frames for processing.
Final Result
In this tutorial, we built a SwiftUI app that performs real-time human body pose detection using DetectHumanBodyPoseRequest from Apple’s Vision framework. We structured our app into modular components:
CameraViewModelfor handling live video capture;PoseEstimationViewModelfor processing frames and extracting body joints;PoseOverlayViewfor rendering the detected skeleton over the camera feed.
By layering these elements together at the ContentView, we created a responsive and interactive experience where users can see their body poses detected in real-time.