
Exploring immersive spaces in visionOS
Learn how to create immersive spaces with SwiftUI for a visionOS app
visionOS facilitates a symbiotic interaction between users' surroundings and immersive digital content. Among the three presentation methods offered by visionOS apps, we already explored how to implement windows and volumes.
This article delves into spaces that, differently from windows and volumes, don't present content within specific boundaries allowing the creation of fully immersive experiences with a 360-degree digital environment surrounding the user.
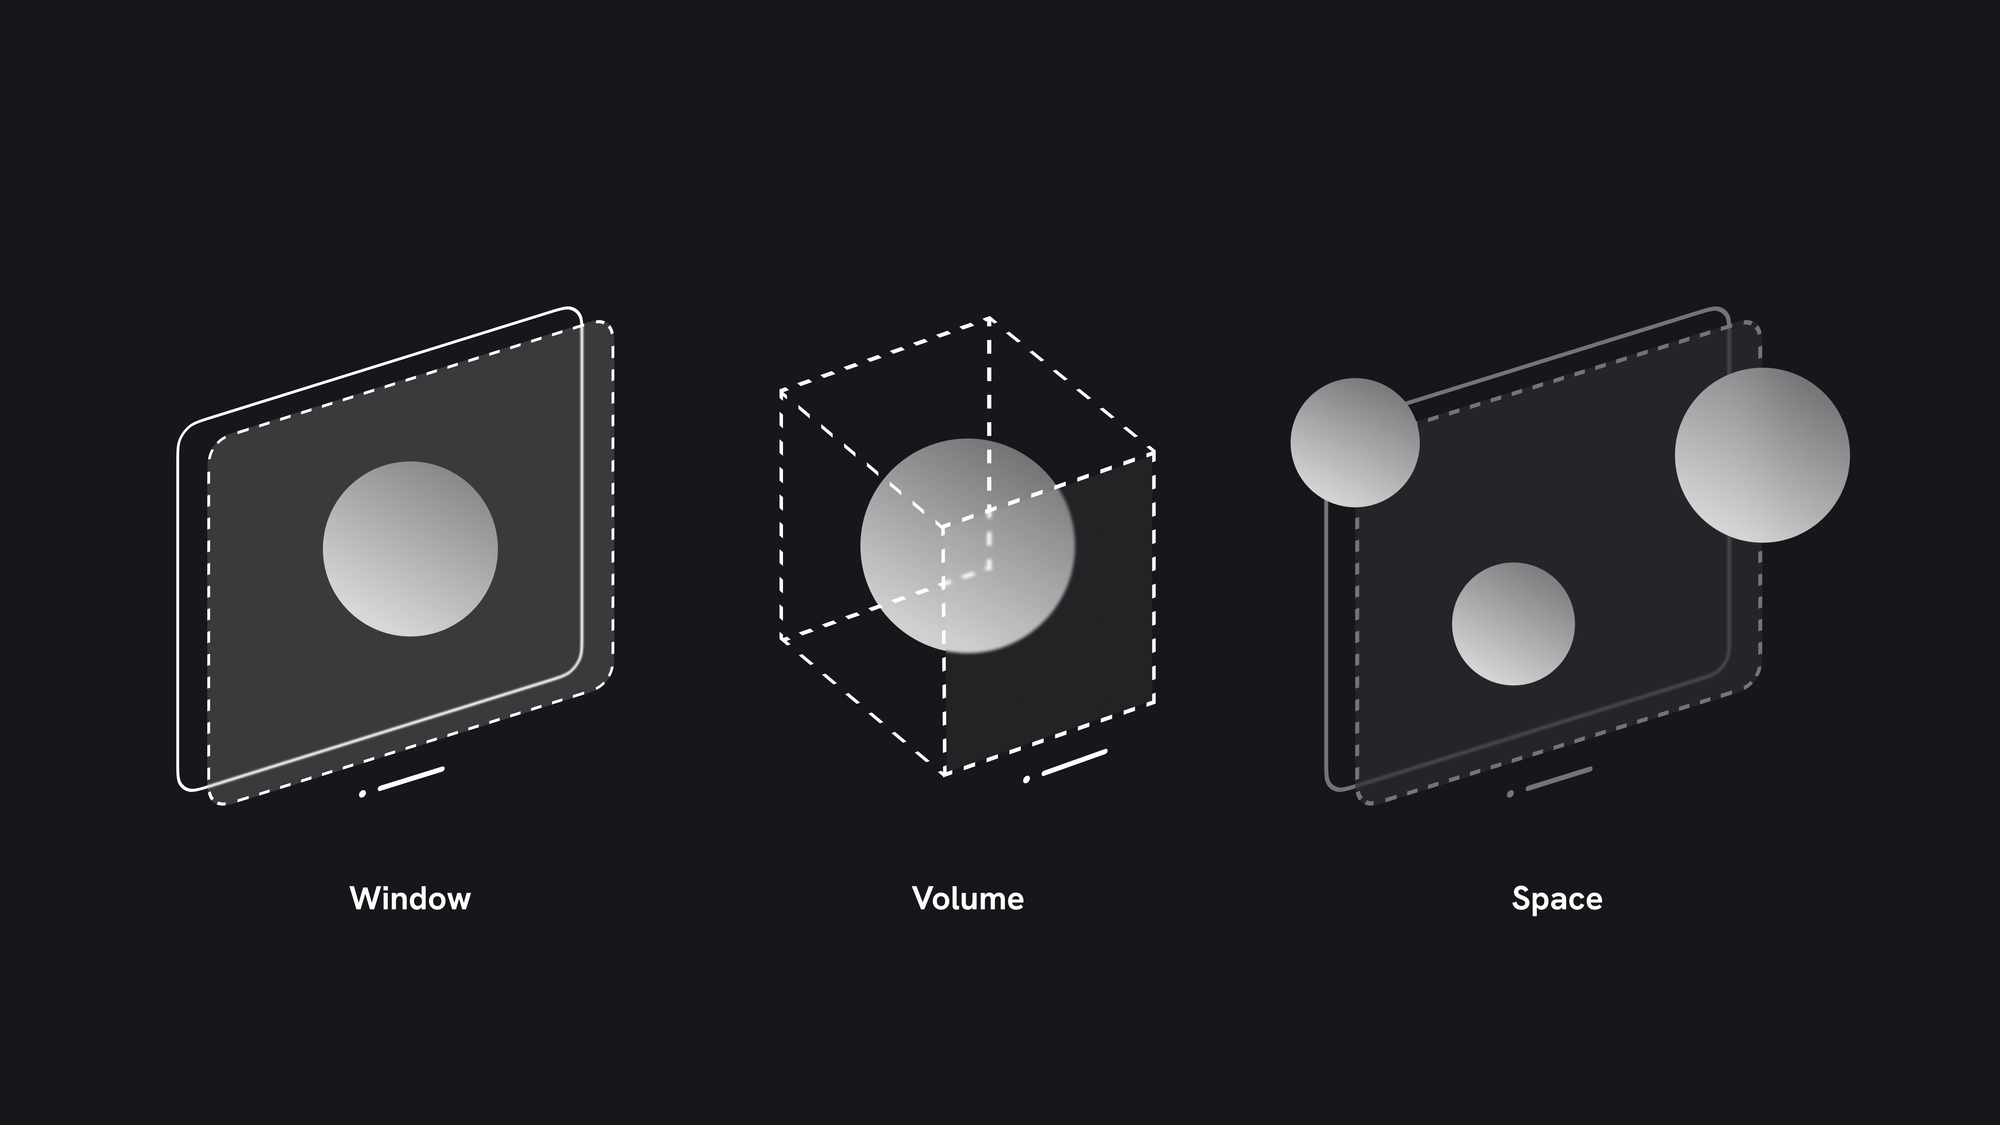
Immersive space
In visionOS, apps have the option to display their content within windows or volumes in the Shared Space along with other apps, or in the Full Space, where a single app dominates the user's field of view.
Unlike windows and volumes where content is confined to specific containers, immersive spaces allow you to position content anywhere in the user's surroundings, offering a Fully Immersive experience. This effectively hides other apps, presenting only the current immersive space for the user's exclusive focus.
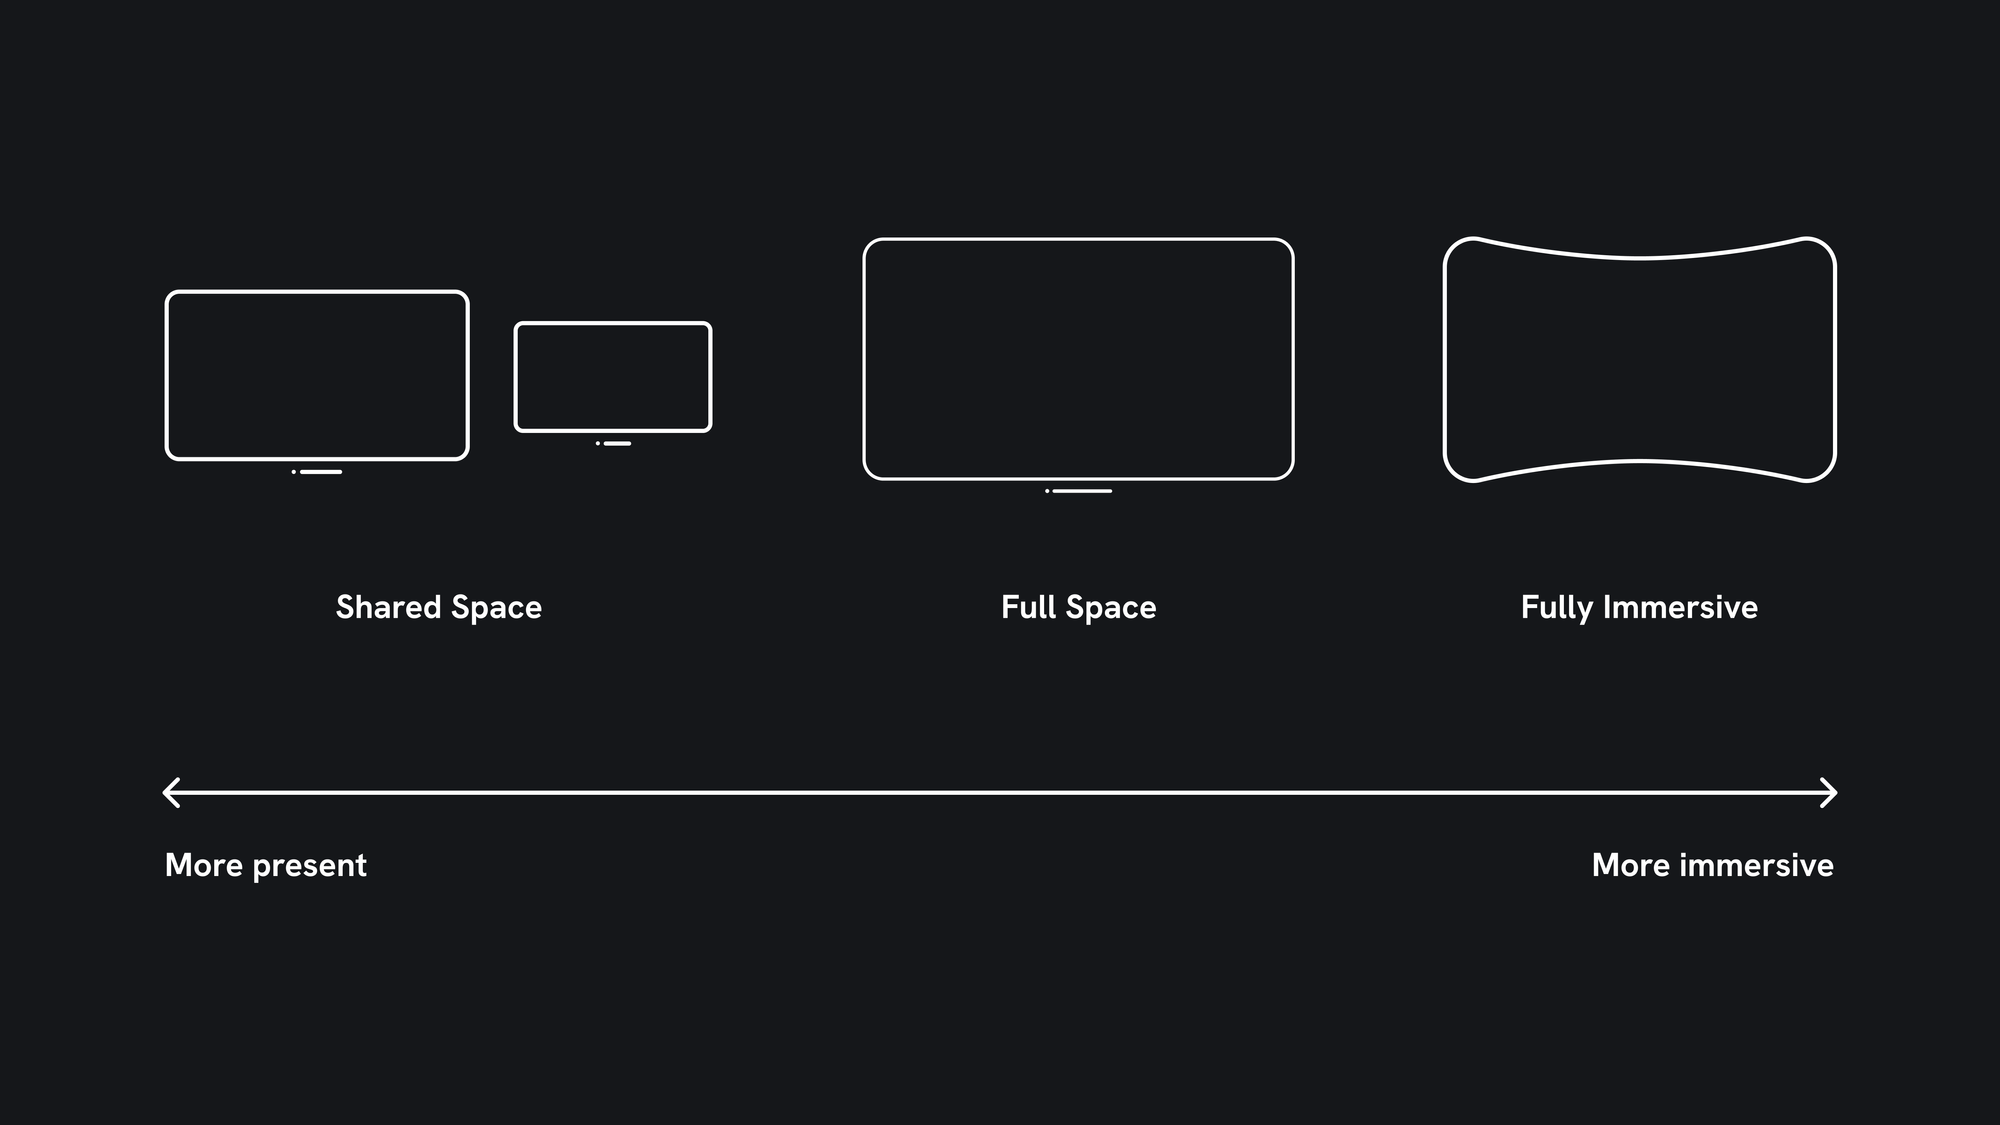
For a deeper understanding of spatial awareness and the immersion spectrum, check this article:

To bring an immersive space to life, you first need to define a new Scene of type ImmersiveSpace in your app's main file.
@main
struct ImmersiveSpacesApp: App {

    var body: some Scene {
        WindowGroup() {
            MainView()
        }


        // Definition of the Immersive Space.
        ImmersiveSpace(id: "MyImmersiveSpaceID") {
            ImmersiveSpaceView()
        }
    }

}
This defined an immersive space with a specific id assigned to it. The code example showcases an app with a main window and a fully immersive space. You can define multiple immersive spaces but be aware that only one space can be displayed on the screen at any given time across all apps.
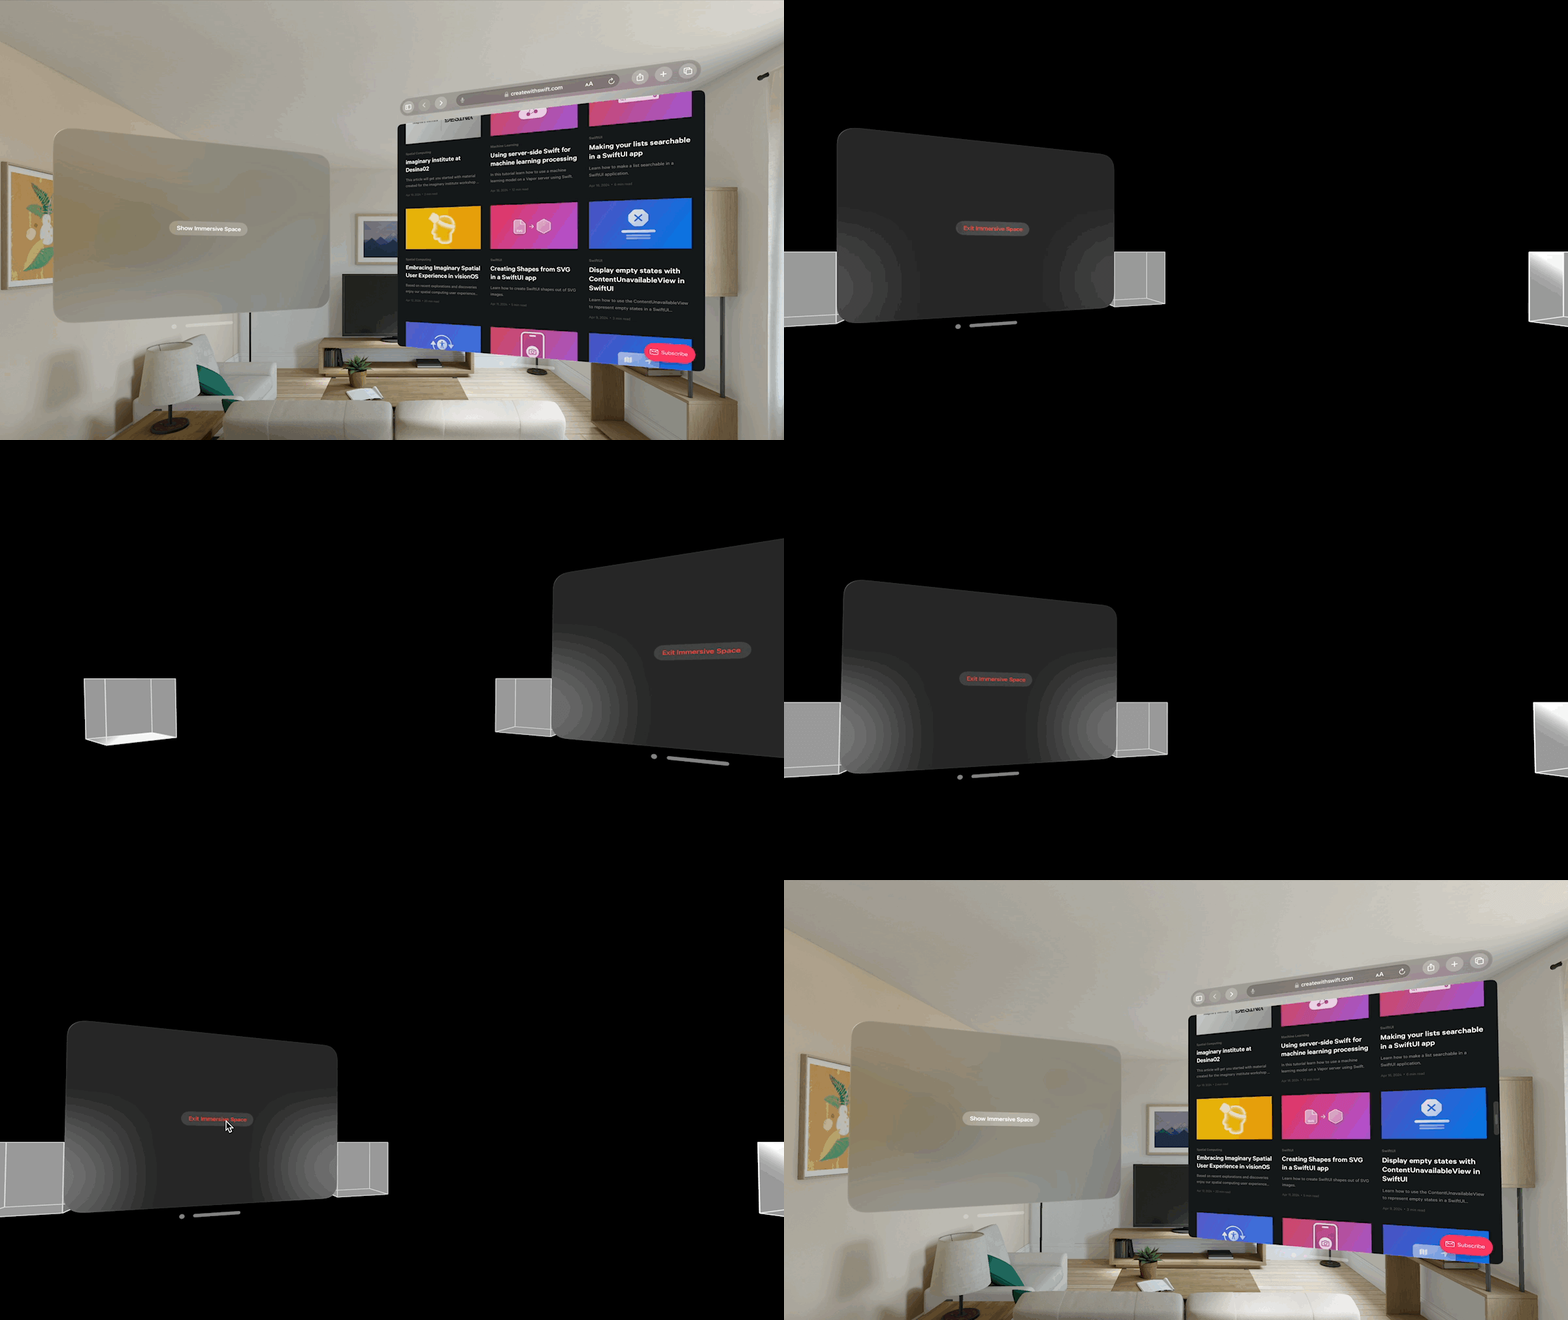
When the app launches, the window appears first but controls to seamlessly transition users into the immersive space need to be implemented. When presented, the space displays the content of a new view called ImmersiveSpaceView in which you can display the 3D content needed for your experience.
For crafting visually engaging immersive experiences, you can leverage the new Model3D and RealityView APIs within visionOS to load your 3D assets asynchronously. To learn more about how to use Model3D check this article:

Opening and dismissing an immersive space
The Human Interface Guidelines recommend launching your app always within the Shared Space using windows or volumes giving the user the freedom to enter the immersive space and choose their preferred level of immersion.
To open your immersive space, SwiftUI provides the openImmersiveSpace action that when triggered by the user for example with a tap of a button asynchronously presents the immersive space based on the provided id meaning that it won't block your app's execution while searching for the immersive space.
struct ContentView: View {

    @State private var isImmersiveSpaceOpened = false

    @Environment(\.openImmersiveSpace) var openImmersiveSpace

    var body: some View {
        Button("Show Immersive Space") {
            Task {
                let result = await openImmersiveSpace(id: "MyImmersiveSpaceID")
                if result == .opened {
                    isImmersiveSpaceOpened = true
                }
            }
        }
    }
}
The openImmersiveSpace action returns OpenImmersiveSpaceAction.Result. You should check for all the possible cases and handle them properly because the call may return an error if there is no immersive space with the specified id or if an immersive space is already opened.
When it's time to return to the Shared Space, utilize the dismissImmersiveSpace action. This action closes the immersive space, allowing users to see the Shared Space again.
struct ContentView: View {

    @State private var isImmersiveSpaceOpened = false

    @Environment(\.openImmersiveSpace) var openImmersiveSpace
    @Environment(\.dismissImmersiveSpace) var dismissImmersiveSpace

    var body: some View {
        Button(isImmersiveSpaceOpened ? "Exit Immersive Space" : "Show Immersive Space", role: isImmersiveSpaceOpened ? .destructive : .none) {
            Task {
                if isImmersiveSpaceOpened {
                    await dismissImmersiveSpace()
                    isImmersiveSpaceOpened = false
                } else {
                    let result = await openImmersiveSpace(id: "ImmersiveSpace")
                    if result == .opened {
                        isImmersiveSpaceOpened = true
                    }
                }
            }
        }
    }
}
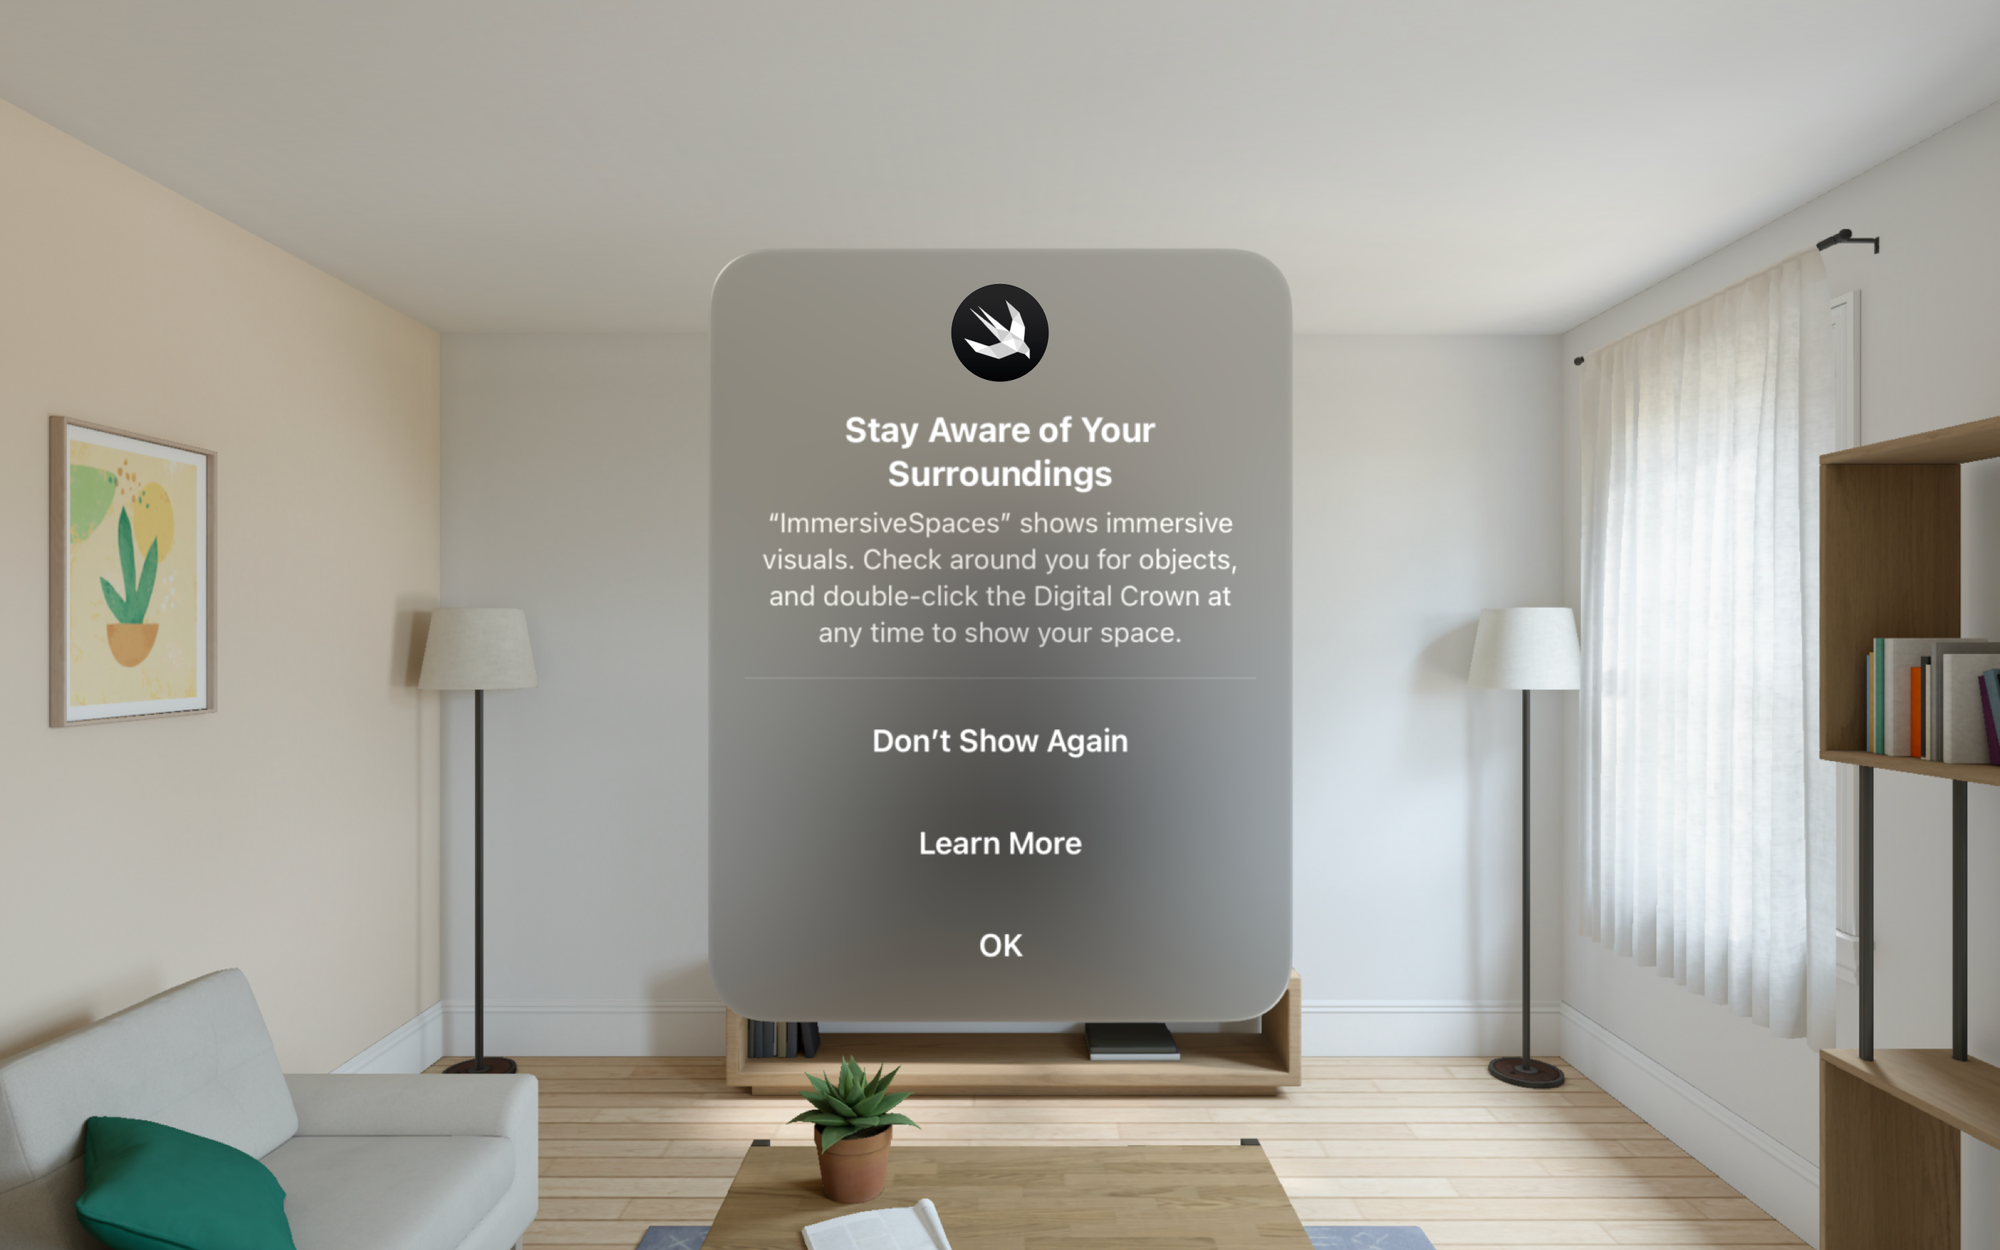
In an immersive space, you can have complete control over what users see on the screen, the system will only display the user's hands when they are visible. That’s why you should always provide the user with an easy way to exit the immersive space. For the same reason, when navigating from the Shared Space to the Full Space or Fully Immersive, a pop-up appears to ensure user safety encouraging the user to stay mindful of their surroundings and providing instructions on how to show the real environment back.
Immersion styles
As mentioned earlier, in an immersive space you can have complete control over what users see on the screen. This allows you to tailor the level of immersion, ranging from seamlessly blending virtual elements with the real world to transporting users entirely into a virtual environment.
visionOS offers different immersion styles to choose from depending on your application's nature and the desired user experience.
The mixed style blends the virtual content seamlessly with the user's physical surroundings through Passthrough. It's ideal for placing virtual objects within a real-world context.
In mixed immersion styles, it is important to keep a clear view of the physical space to help users in navigating it. The 3d content should not block the user's view. In these cases it is better to opt for full or progressive immersion styles instead.
The full style replaces physical space with virtual content, immersing users in a new environment in which they cannot see the surroundings.
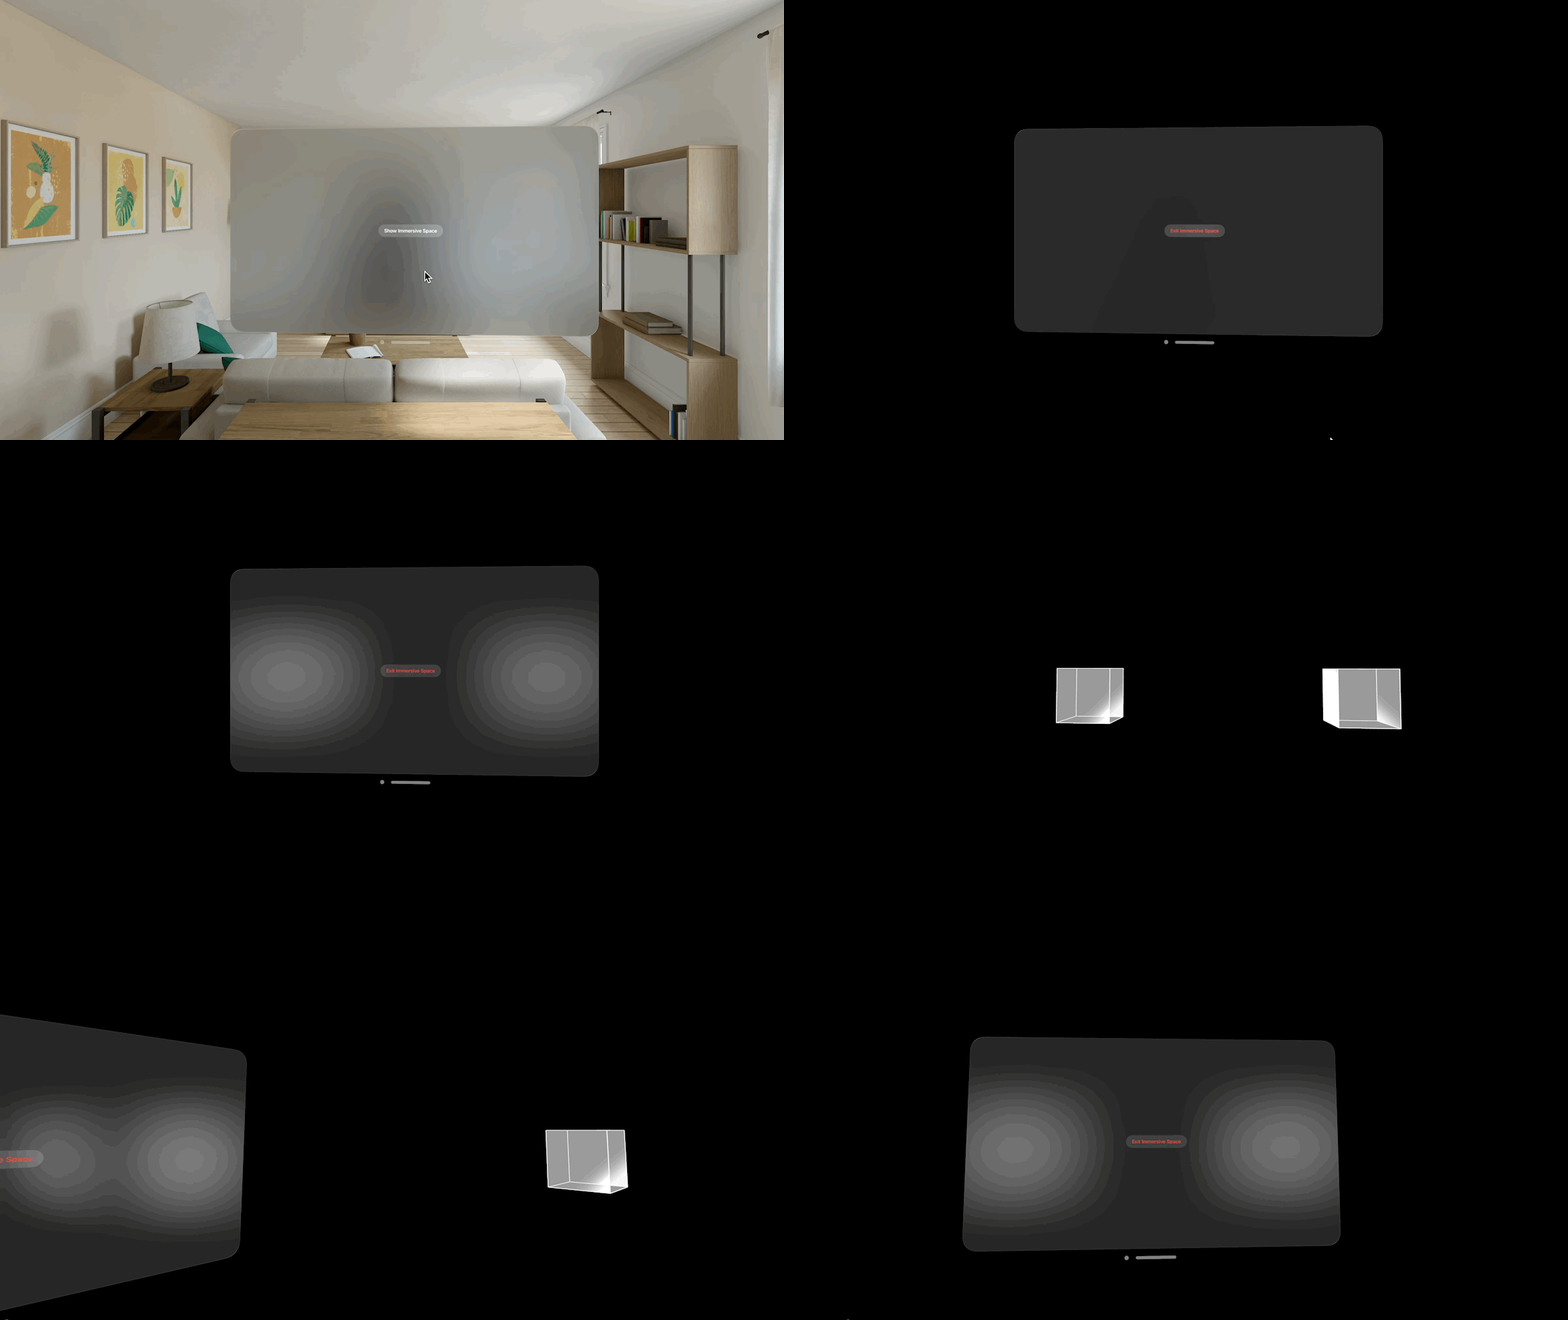
The progressive style replaces a portion of the user's view with virtual content while maintaining some visibility of the real world through Passthrough. The user is still aware of the surroundings while presenting virtual content and being able to move to a fully immersive experience when desired.
It is basically a mix of the previous two.
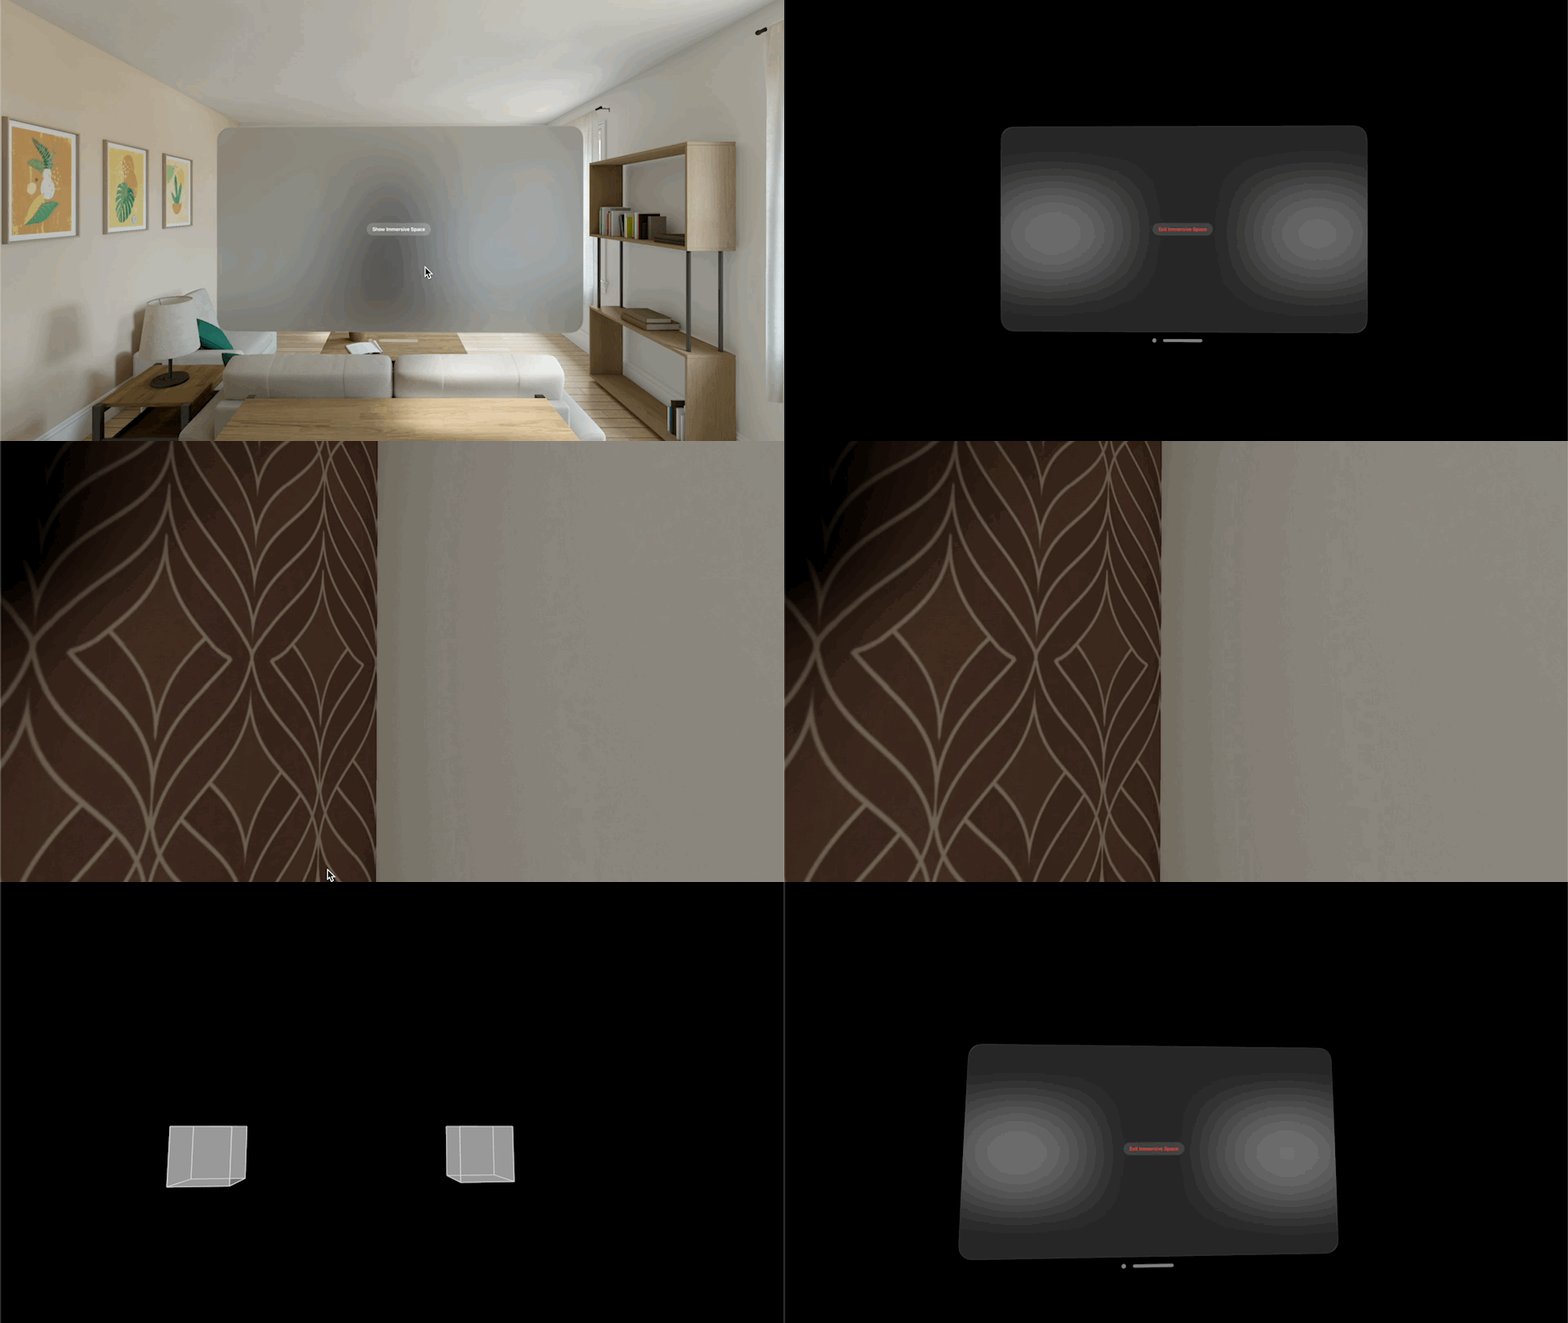
To define the available immersion styles in your immersive space, you can use the immersionStyle(selection:in:) modifier. This allows users to adjust the passthrough level to either stay aware of their surroundings or fully immerse themselves in the virtual content, based on their preference and the type of experience they want to create.
@main
struct ImmersiveSpaceApp: App {

    @State private var currentStyle: ImmersionStyle = .progressive

    var body: some Scene {
        WindowGroup {
            ContentView()
        }

        ImmersiveSpace(id: "ImmersiveSpace") {
            ImmersiveView()
        }
        .immersionStyle(selection: $currentStyle, in: .mixed, .progressive, .full)
    }
}
Conclusion
By mastering the design and implementation of immersive spaces within visionOS, you unlock the potential to create groundbreaking user experiences. Craft immersive experiences that prioritize user comfort, safety, and control. Utilize the power of clear transitions, user-centric design principles, and the built-in safety features of visionOS to ensure a truly engaging and secure experience for your users.
To learn more about spatial computing, you can take a look at our collection of articles:


