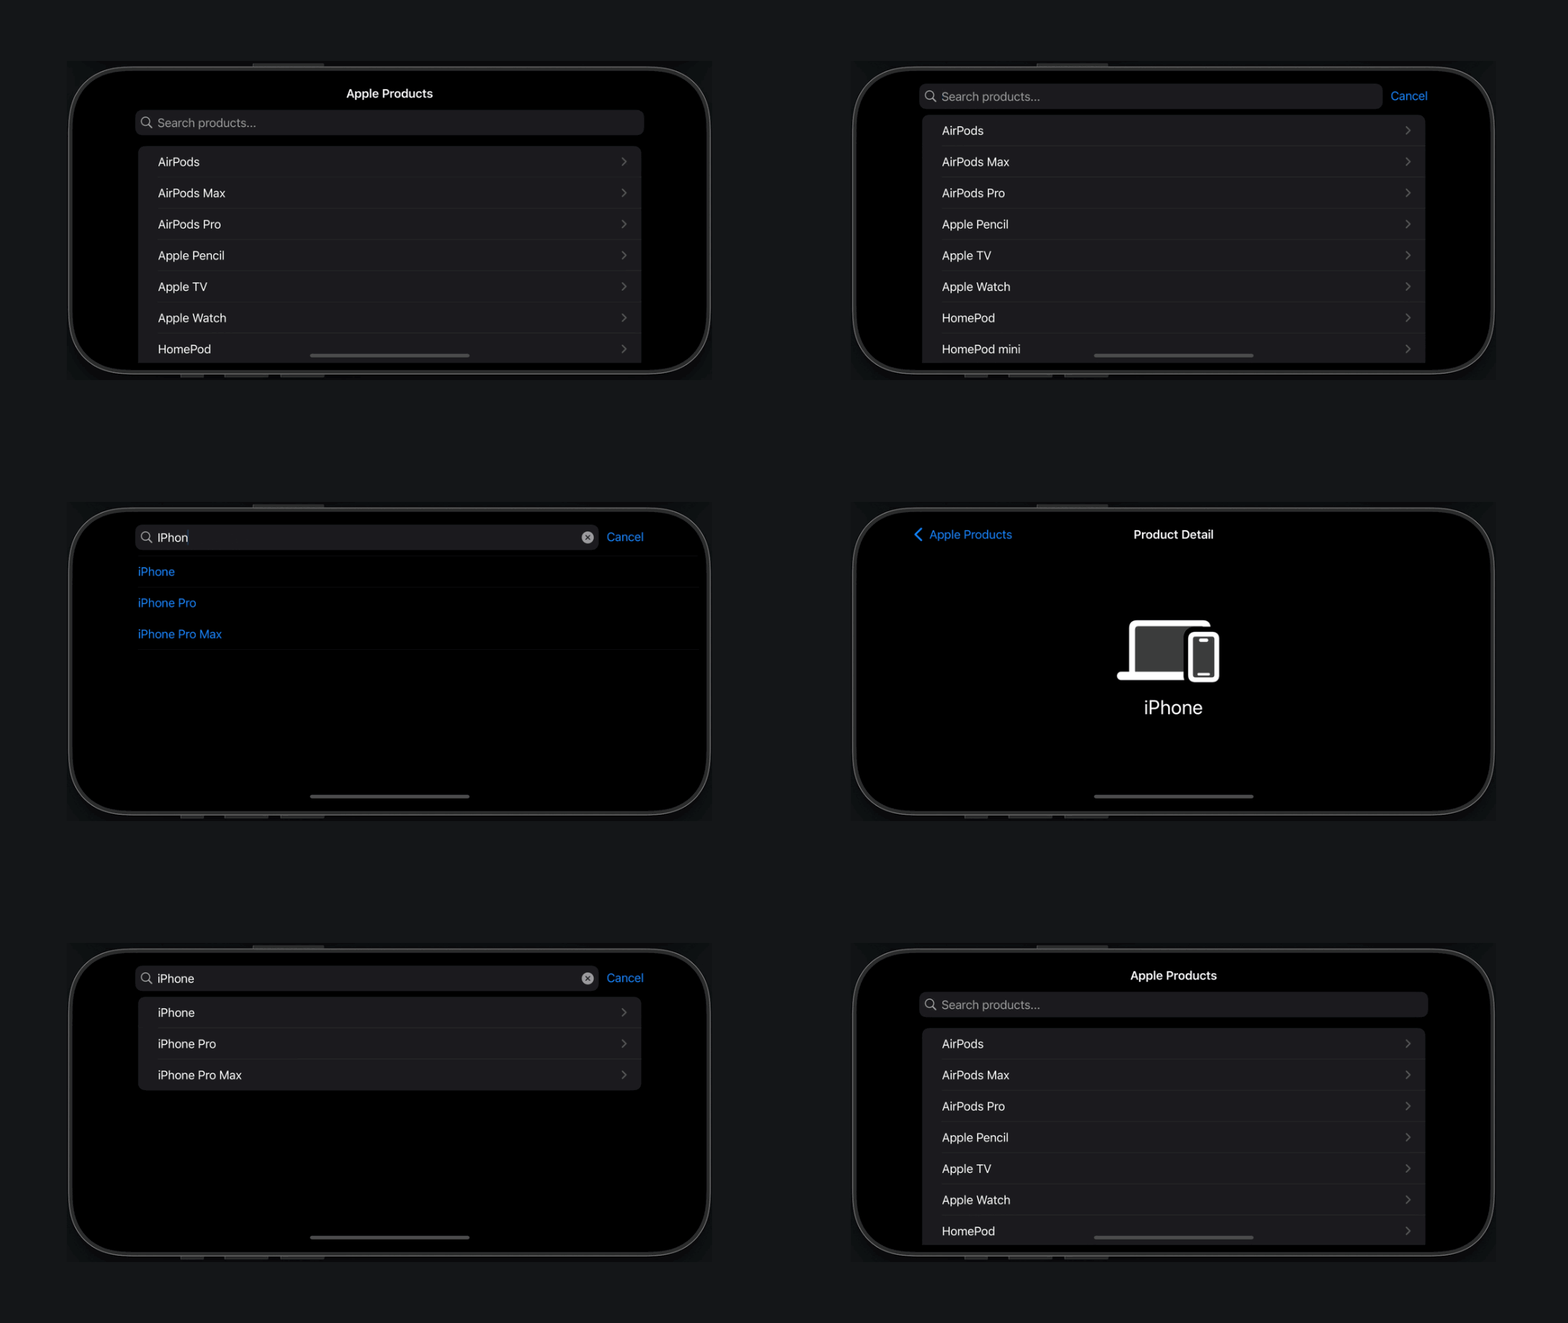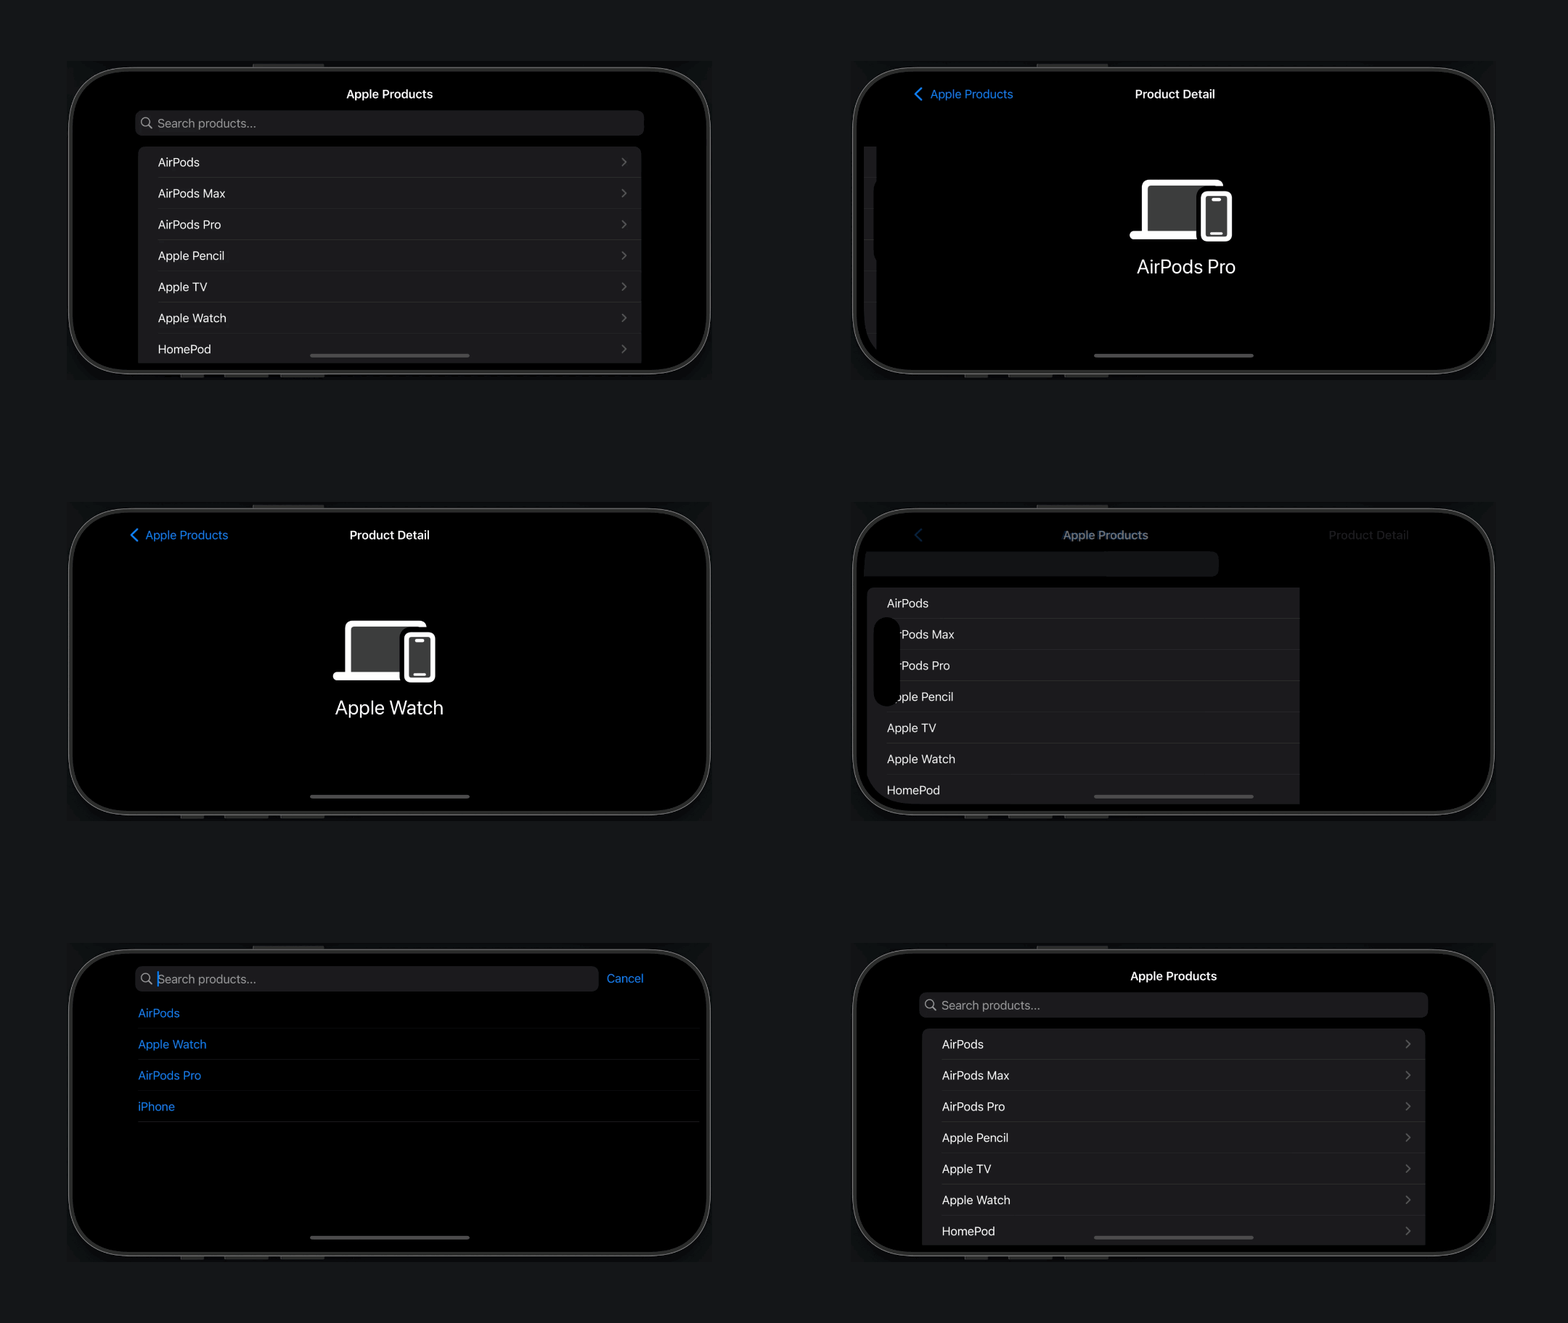
Implementing search suggestions in SwiftUI
Learn how to provide suggestions when searching in a SwiftUI app by building an example app with real-time filtering, search suggestions, and recent search tracking.
SwiftUI's searchSuggestions(_:) modifier is a powerful feature that enhances the search experience in iOS applications. When combined with the tracking of recent searches, it creates an intuitive interface that helps users quickly find what they're looking for and easily return to previously viewed items.
Let’s create an Apple Products catalog app that showcases SwiftUI's search capabilities. We'll implement a smart search system that not only filters products in real-time but also provides search suggestions and keeps track of recently viewed items.
By the end of this tutorial, you'll learn how to:
- Implement real-time search filtering
- Display dynamic search suggestions
- Track and show recent searches
- Create a seamless navigation experience
Before we start
To follow along with this tutorial, you'll need:
- Basic understanding of SwiftUI's navigation and state management
- Familiarity with the MVVM pattern
Building the Search Interface
Step 1: Setting up the view model
We'll start by creating a ViewModel that manages our product data and search functionality. This forms the foundation of our search system:
class ProductViewModel: ObservableObject {
    // 1.
    let products = ["AirPods", "AirPods Max", "AirPods Pro", "Apple Pencil", "Apple TV", "Apple Watch", "HomePod", "HomePod mini", "iMac", "iMac Pro", "iPad", "iPad Air", "iPad mini", "iPad Pro", "iPhone", "iPhone Pro", "iPhone Pro Max", "iPod", "iPod classic", "iPod mini", "iPod nano", "iPod shuffle", "iPod touch", "Mac mini", "Mac Pro", "MacBook", "MacBook Air", "MacBook Pro", "Macintosh", "Magic Keyboard", "Magic Mouse", "Magic Trackpad", "Studio Display", "Vision Pro"]
.sorted { $0 < $1 }

    // 2.
    func filteredProducts(searchText: String) -> [String] {
        if searchText.isEmpty { return products }
        return products.filter { $0.localizedCaseInsensitiveContains(searchText) }
    }
}
- Create a sorted array of product names;
- The
filteredProducts(searchText:)method provides real-time filtering based on user input.
The ProductViewModel class is the backbone of our search functionality. It manages our product data and handles the filtering logic. We keep the products in a sorted array for consistent presentation and implement a simple filtering method that responds to user input in real-time.
Step 2: Creating a product row
Next, we'll build a reusable view component that displays individual products with an icon and name:
struct ProductRow: View {
    // 1.
    let product: String

    var body: some View {
        // 2.
        HStack {
            Image(systemName: "\(product.first!.lowercased()).circle.fill")
                .symbolRenderingMode(.hierarchical)
                .imageScale(.large)
            Text(product)
        }
    }
}
- Declare the product name as property;
- Create a horizontal layout with a dynamic SF Symbol based on the product's name first letter.
The ProductRow view is a simple reusable component that displays each product in our list. We use SF Symbols to create dynamic icons based on the product's first letter, providing visual interest with minimal code.
Step 3: Building a Detail View
For this tutorial, we'll create a simple detail view with placeholder content. While the actual product details aren't crucial for demonstrating search suggestions, we will need this view to showcase the recent search tracking later.
struct DetailView: View {
    // 1.
    let product: String
    @ObservedObject var viewModel: ProductViewModel

    var body: some View {
        // 2.
        VStack {
            Image(systemName: "macbook.and.iphone")
                .resizable()
                .aspectRatio(contentMode: .fit)
                .frame(width: 160)

            Text(product)
                .font(.title)
        }
        .navigationTitle("Product Detail")
    }
}
- Declare the product data and a reference to the view model as properties;
- Display a product image and name in a vertical layout
Step 4: Implementing a ProductsListView with search
This is where we bring everything together. The ProductsListView combines our ProductRow component with SwiftUI's native search functionality. The searchable(text:placement:prompt:) modifier adds the search field, while searchSuggestions(_:) enables the suggestions popup to appear as a user type.
struct ProductsListView: View {
    // 1.
    @StateObject private var viewModel = ProductViewModel()
    @State private var searchText = ""

    var body: some View {
        NavigationStack {
            // 2.
            List(viewModel.filteredProducts(searchText: searchText), id: \.self) { product in
                NavigationLink(destination: DetailView(product: product, viewModel: viewModel)) {
                    ProductRow(product: product)
                }
            }
            .navigationTitle("Apple Products")
            // 3.
            .searchable(text: $searchText, prompt: "Search products...")
            // 4.
            .searchSuggestions {
                Section {
                    ForEach(viewModel.filteredProducts(searchText: searchText).prefix(5), id: \.self) { suggestion in
                        Text(suggestion)
                            .searchCompletion(suggestion)
                    }
                }
            }
        }
    }
}
- Set up state management for the search functionality;
- Create a filtered list of products with navigation;
- Add the search bar with a custom prompt;
- Implement search suggestions that appear as users type;
At this point, the app has a working search interface with suggestions integrated into it.
In a normal application, you might want to implement separate functions for list filtering and search suggestions to provide smarter, contextual suggestions. However, for this tutorial, we kept it simple by using the same filtering function for both, while limiting suggestions to five items.

Enhancing search with history tracking
Step 5: Adding recent searches tracking
Let’s enhance our view model to track recently viewed products. By maintaining a small array of recent items, we can provide quick access to previously viewed products when users begin a new search. The addToRecents(_:) method ensures we don't store duplicates and keep only the five most recent items:
class ProductViewModel: ObservableObject {

    let products = [ ... ].sorted { $0 < $1 }

    func filteredProducts(searchText: String) -> [String] { ... }

    // 1.
    @Published var recentSearches: [String] = []

    // 2.
    func getSuggestions(for searchText: String) -> [String] {
        if searchText.isEmpty {
            return recentSearches.reversed()
        }

        return products.filter { $0.localizedCaseInsensitiveContains(searchText) }
    }

    // 3.
    func addToRecents(_ product: String) {
        recentSearches.removeAll { $0 == product }
        recentSearches.append(product)
        recentSearches = recentSearches.suffix(5)
    }
}
- Add a published property to store recent searches;
- Show recent searches when the search field is empty, otherwise show filtered suggestions;
- Manage recent searches with a maximum of 5 items.
Step 6: Updating the ProductsListView search suggestions
After adding recent searches to our view model, we need to update ProductsListView to use the new getSuggestions(for:) method instead of filteredProducts(searchText:) for suggestions. This change allows us to display recent searches when the search field is empty:
struct ProductsListView: View {
    @StateObject private var viewModel = ProductViewModel()
    @State private var searchText = ""

    var body: some View {
        NavigationStack {
            List(viewModel.filteredProducts(searchText: searchText), id: \.self) { product in
                NavigationLink(destination: DetailView(product: product, viewModel: viewModel)) {
                    ProductRow(product: product)
                }
            }
            .navigationTitle("Apple Products")

            .searchable(text: $searchText, prompt: "Search products...")
            .searchSuggestions {
                Section {
                    ForEach(viewModel.getSuggestions(for: searchText), id: \.self) { suggestion in
                        Text(suggestion)
                            .searchCompletion(suggestion)
                    }
                }
            }
        }
    }
}
The key change here is using getSuggestions(for: searchText) instead of filteredProducts(searchText: searchText).prefix(5). This enables our search suggestions to show either recent searches or filtered results based on the search field's state.
Step 7: Finalizing the Detail View
Update the DetailView to trigger the recent search tracking. By using SwiftUI's onAppear(perform:) modifier, we automatically add products to the recent search list whenever users view their details. This creates a seamless experience where search suggestions become more personalized over time:
struct DetailView: View {
    let product: String
    @ObservedObject var viewModel: ProductViewModel

    var body: some View {
        VStack {
            Image(systemName: "macbook.and.iphone")
                .resizable()
                .aspectRatio(contentMode: .fit)
                .frame(width: 160)
            Text(product)
                .font(.title)
        }
        .navigationTitle("Product Detail")

        // Add tracking when view appears
        .onAppear {
            viewModel.addToRecents(product)
        }
    }
}

This tutorial demonstrated how to build a search interface in SwiftUI using the searchSuggestions(_:) modifier. By combining real-time filtering with recent search tracking, we created an intuitive search experience that adapts to user behavior.

