Lexical classification with the Natural Language framework
Learn how to identify nouns, adjectives, and more with the Natural Language framework in a SwiftUI app.
Natural Language is a powerful framework designed by Apple that helps developers analyze and understand human language easily. It allows text processing, splitting it into segments, and analyzing each segment to retrieve information such as part of speech, lexical class, lemma, script, and language.
Let's explore lexical classification, identifying whether each word composing a text is a noun, a verb, an adjective, or any other part of speech.
Analyze natural language text
The NLTagger segments the text into units such as paragraphs, sentences, or words, and tags each of these with some linguistic information.
import NaturalLanguage

func getLexicalClass(from text: String) -> [String] {
    // 1. Array to store the lexical classes of the text units
    var lexicalClasses = [String]()

    // 2. Tagger to be used
    let tagger = NLTagger(tagSchemes: [.lexicalClass])

    // 3. Tokens to be omitted in the analisys
    let options: NLTagger.Options = [
        .omitPunctuation,
        .omitWhitespace
    ]

    // 4. String to be analyzed
    tagger.string = text

    // 5. Iterating through the tokens
    tagger.enumerateTags(
        in: text.startIndex..<text.endIndex,
        unit: .word,
        scheme: .lexicalClass,
        options: options
    ) { tag, range in
        if let word = tag {
            lexicalClasses.append("\(text[range]): \(word.rawValue)")
        }
        return true
    }

    return lexicalClasses
}
To start processing a text, first, we need to import the Natural Language framework.
- Create an array to store the results of the analysis;
- Create a new instance of an
NLTaggerobject. As a parameter specify the tag scheme to belexicalClass, indicating that you want it to classify tokens according to their class (part of speech, type of punctuation, or whitespace); - Define which types we would like to omit from the classification. By setting the tagger options with the
omitPunctuationandomitWhitespaceoptions punctuation and whitespace will be omitted from the final results. CheckNLTagger.Optionsfor an overview of all the options available; - Set the tagger
stringproperty with the text to be analyzed; - With the
enumerateTags(in:unit:scheme:options:using:)method, the tagger will analyze the text according to the parameters passed to it. The range of the segments it has to process, the kind of token the text has to be segmented into, the scheme the tagger uses to tag each unit, and optionally what to omit. After checking if the tag was created we are storing it as a string.
Integrating in a SwiftUI view
To integrate it in a SwiftUI view let's make some changes to our function so we are able to reuse it with different NLTagScheme.
Start by creating a type to store our tagged units of text:
struct TaggedUnit: Identifiable {
    let id = UUID()
    let unit: String
    let tag: NLTag
}
Now rewrite the function from before so it gets the tag scheme and the tagger options as parameters:
func getTaggedUnits(text: String,
                    tagScheme: NLTagScheme,
                    options: NLTagger.Options = []) -> [TaggedUnit] {

    var taggedUnits: [TaggedUnit] = []

    // 1. The tagger to be used
    let tagger = NLTagger(tagSchemes: [tagScheme])

    // 2. String to be analyzed
    tagger.string = text

    // 3. Iterating through the tokens
    tagger.enumerateTags(
        in: text.startIndex..<text.endIndex,
        unit: .word,
        scheme: tagScheme,
        options: options) { tag, range in
            if let tag = tag {
                let unit = String(text[range])
                taggedUnits.append(TaggedUnit(unit: unit, tag: tag))
            }
            return true
        }

    return taggedUnits
}
The returning object is an array of TaggedUnit, which stores the tagged unit as a String and the tag as NLTag.
Here is how you can use it in a SwiftUI view:
import SwiftUI
import NaturalLanguage

struct ContentView: View {

    @State var text = "Can't wait to see what's next on Create with Swift"
    @State var lexicalClasses = [TaggedUnit]()
    @State var verbs = 0
    @State var nameTypes = 0
    let options: NLTagger.Options = [.omitWhitespace, .omitPunctuation, .joinContractions]

    var body: some View {
        NavigationStack {
            VStack {
                TextEditor(text: $text)
                    .frame(height: 200)
                    .padding(5)
                    .overlay(RoundedRectangle(cornerRadius: 14).stroke(Color.blue, lineWidth: 1))
                    .padding()

                Button("Analyze the text") {
                    self.analyzeText()
                }
                .buttonStyle(.borderedProminent)

                List {
                    if lexicalClasses.isEmpty {
                        ContentUnavailableView(
                            "Text wasn't analyzed yet",
                            systemImage: "doc.text.magnifyingglass"
                        )
                    } else {
                        Section {
                            ForEach(lexicalClasses) { item in
                                HStack {
                                    Text("\(item.unit)")
                                    Spacer()
                                    Text("\(item.tag.rawValue)")
                                        .bold()
                                }
                            }
                        } header: {
                            Text("The text contains \(lexicalClasses.count) text units, \(verbs) \(verbs == 1 ? "verb" : "verbs"), and \(nameTypes) \(nameTypes == 1 ? "name" : "names").")
                        }
                    }
                }

            }
            .navigationTitle("Text Tagger")
        }
    }

    private func analyzeText() {
        lexicalClasses = getTaggedUnits(text: text, tagScheme: .lexicalClass, options: options)

        verbs = lexicalClasses.filter({$0.tag == .verb}).count

        nameTypes = getTaggedUnits(text: text, tagScheme: .nameType, options: options)
            .filter({$0.tag != .otherWord})
            .count
    }
}
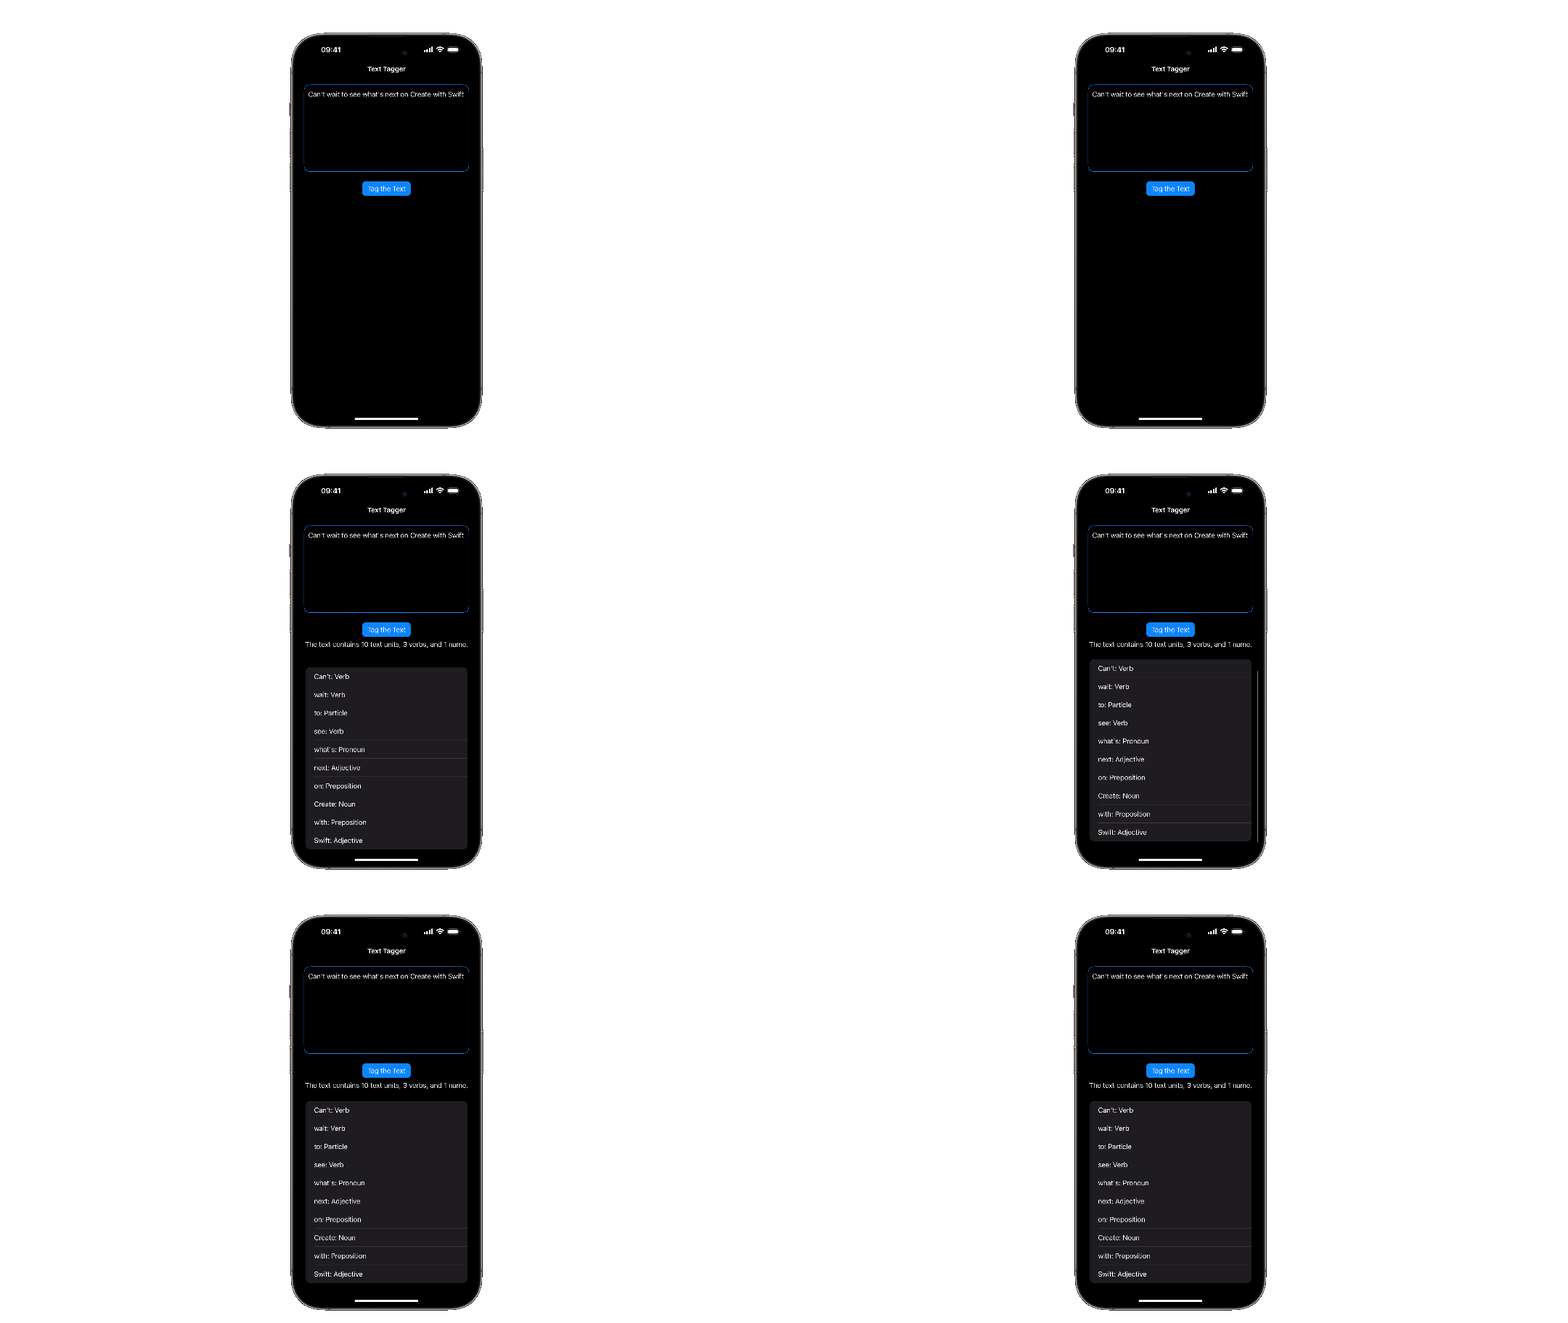
In this example, a button triggers the lexical classification of an input text, and filters the results to only count its verbs; and a second function is called to identify the name types. Then all the results are displayed in a list.


