
Mastering blend modes in SwiftUI
Learn how to implement blend modes with practical examples for crafting unique, eye-catching designs.

In this article, we are going to dive deep into the world of blend modes in SwiftUI. We'll explore what blend modes are, why they're crucial for creating visually stunning user interfaces, and how to implement them effectively in your SwiftUI projects. Whether you're a beginner looking to understand the basics or an experienced developer aiming to enhance your design skills, you will be provided with the knowledge and practical examples you need to master blend modes in SwiftUI.
Blend modes are a powerful tool in digital design, allowing developers to create complex visual effects like overlays and textures with ease. They're essential for tasks such as photo manipulation, creating lighting effects, and adding depth to images.
Understanding Blend Modes
Blend modes, as the name suggests, blend the colors of multiple layers of pixels using mathematical formulas to determine each pixel's influence on the final image. At a minimum, you need two layers to create a blend mode effect: a base layer and a blend layer.
Color blending involves combining two or more colors to create a new color. The most common blending mode is called "alpha blending" or "normal blending".
Technical Explanation of Color Blends
- Color Representation: In digital systems, colors are often represented using the RGB (Red, Green, Blue) color model. Each color channel typically uses 8 bits, allowing values from 0 to 255.
- Alpha Blending Formula: For two colors A and B, with A being placed over B, the resulting color R is calculated as:
R = A * alpha + B * (1 - alpha), where alpha is a value between 0.0 (fully transparent) and 1.0 (fully opaque). - Channel-wise Calculation: This formula is applied to each color channel (R, G, B) independently.
Implementing Blend Modes in SwiftUI
SwiftUI provides the blendMode(_:) modifier to apply blend modes to views.
func blendMode(_ blendMode: BlendMode) -> some ViewThis modifier sets the blend mode for compositing the view with overlapping views. The BlendMode enumeration defines various effects you can apply.
SwiftUI Color Representation
SwiftUI uses a normalized color space, where color values range from 0.0 to 1.0 instead of 0 to 255. To convert, divide the 0-255 value by 255.
You can create colors using various initializers:
let red = Color(.sRGB, red: 1, green: 0, blue: 0, opacity: 1)
let blue = Color(.sRGB, red: 0, green: 0, blue: 1, opacity: 1)
Available Blend Modes in SwiftUI
SwiftUI supports a wide range of blend modes, each with its unique effect. Let's explore these blend modes categorized by their primary functions:
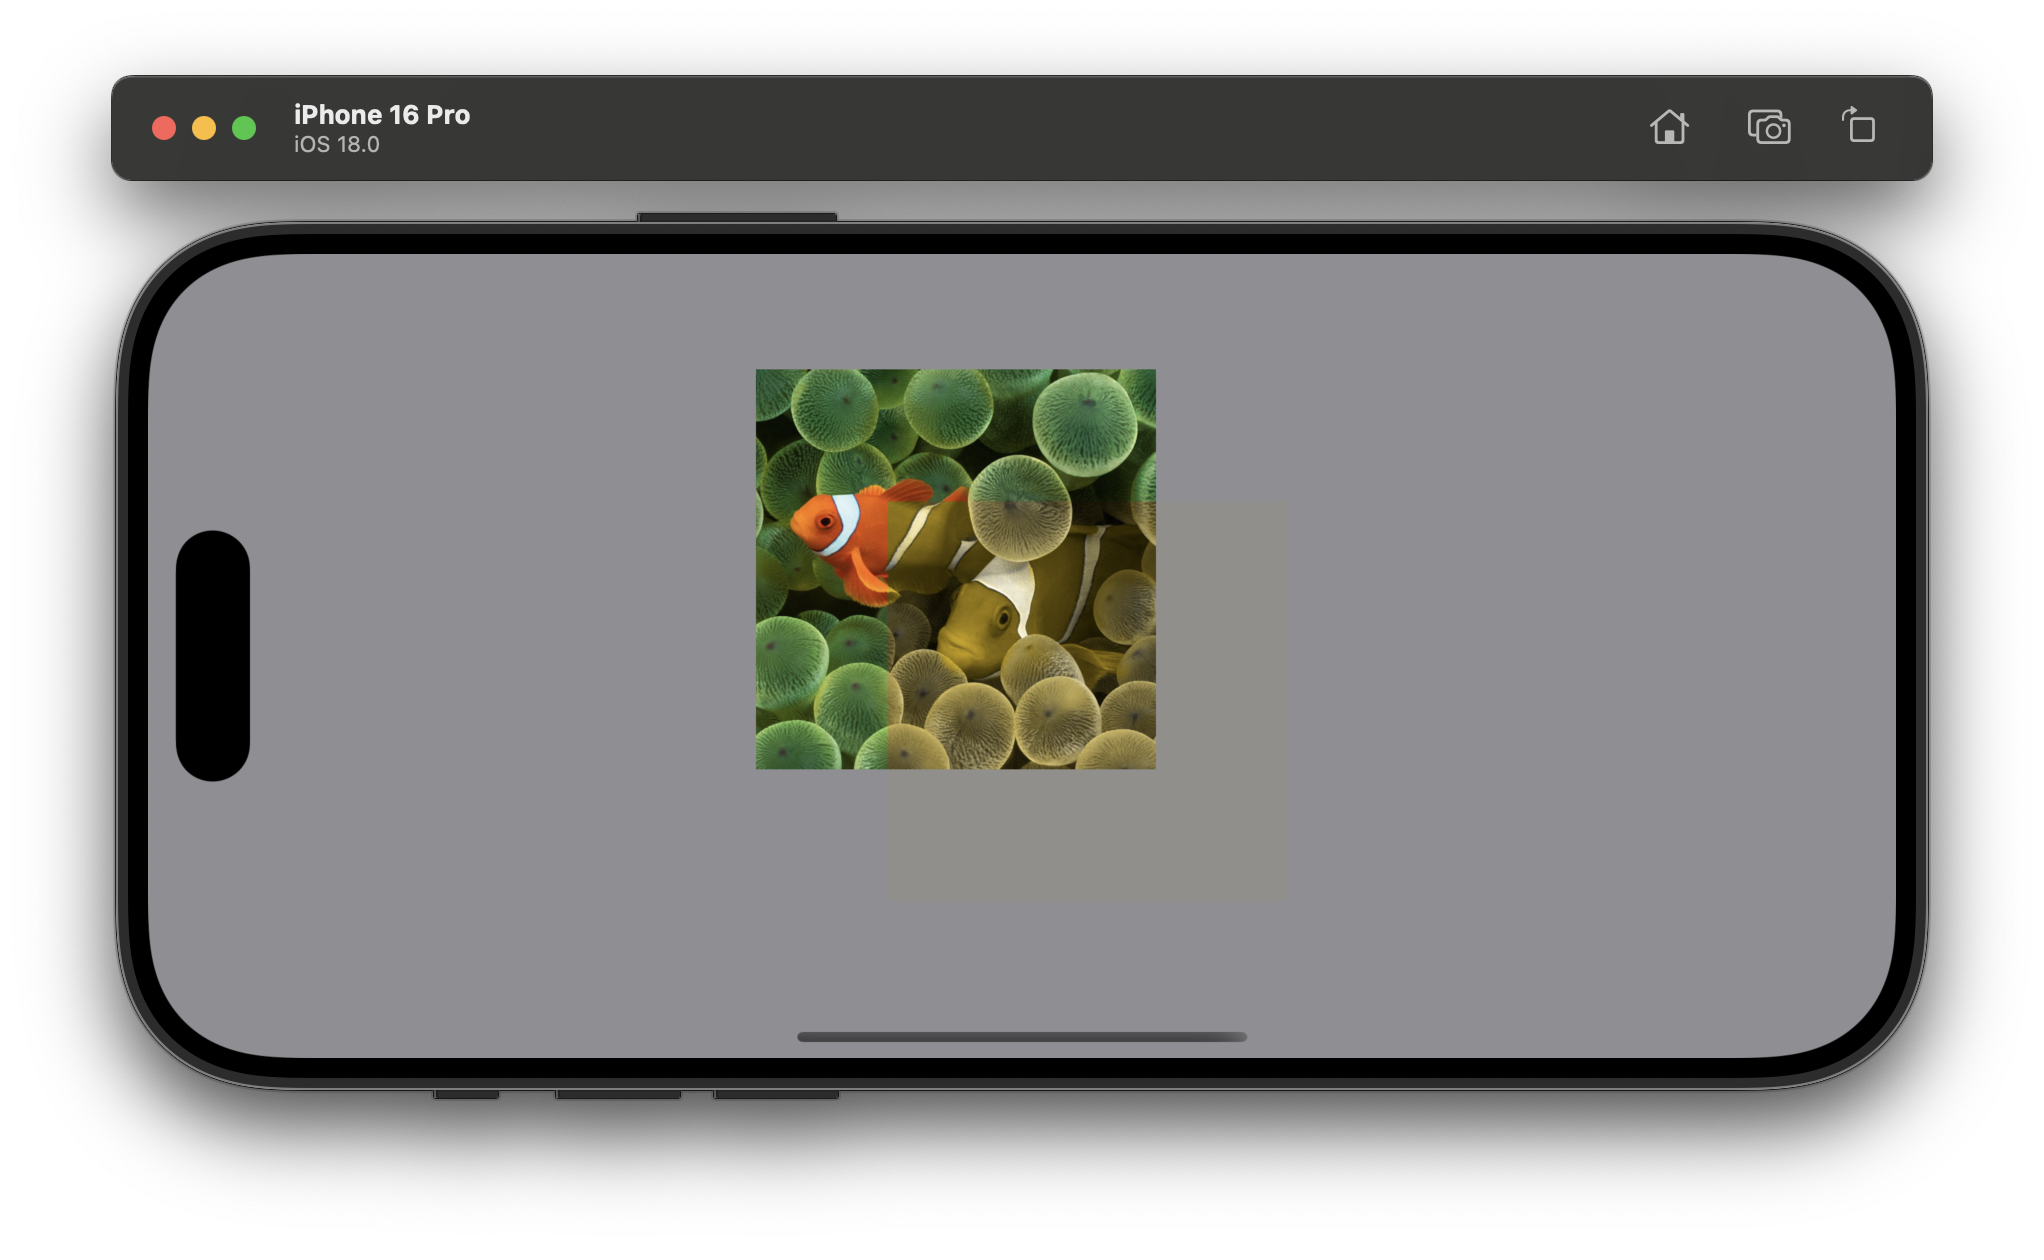
Getting the Default
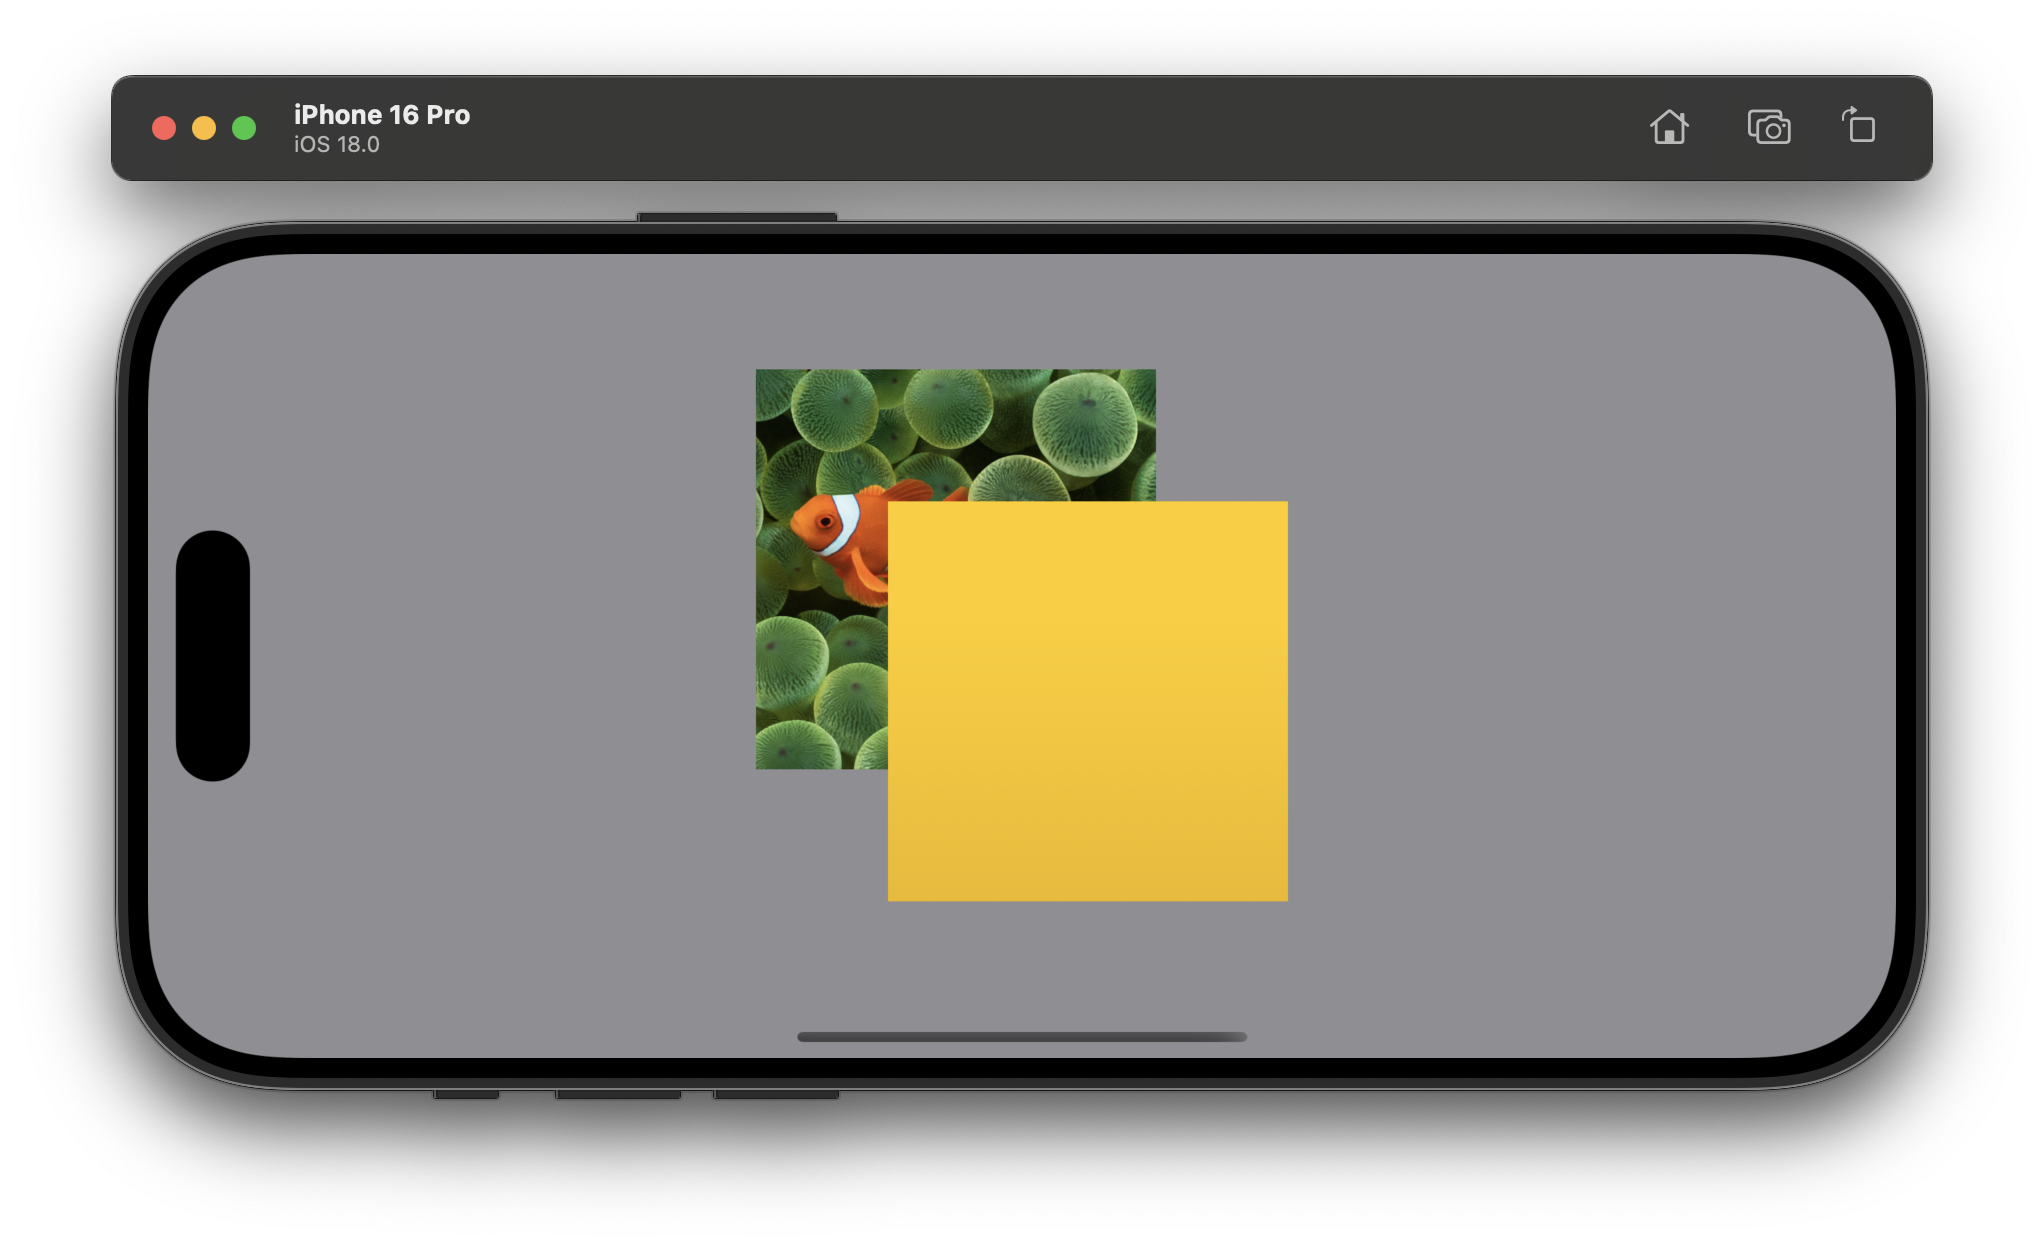
.normal: This is the standard blend mode where the top layer is simply placed over the bottom layer without any special blending. It's the default mode when no blend mode is specified.
ZStack {
    Image("background")
        .resizable()
        .aspectRatio(contentMode: .fit)
        .frame(width: 200, height: 200)
        .offset(x: -33, y: -33)
    Rectangle()
        .fill(Color.yellow.gradient)
        .frame(width: 200, height: 200)
        .offset(x: 33, y: 33)
        .blendMode(.normal)
}
Darkening
These blend modes generally result in darker colors:
.darken: Selects the darker of the blend and base colors.
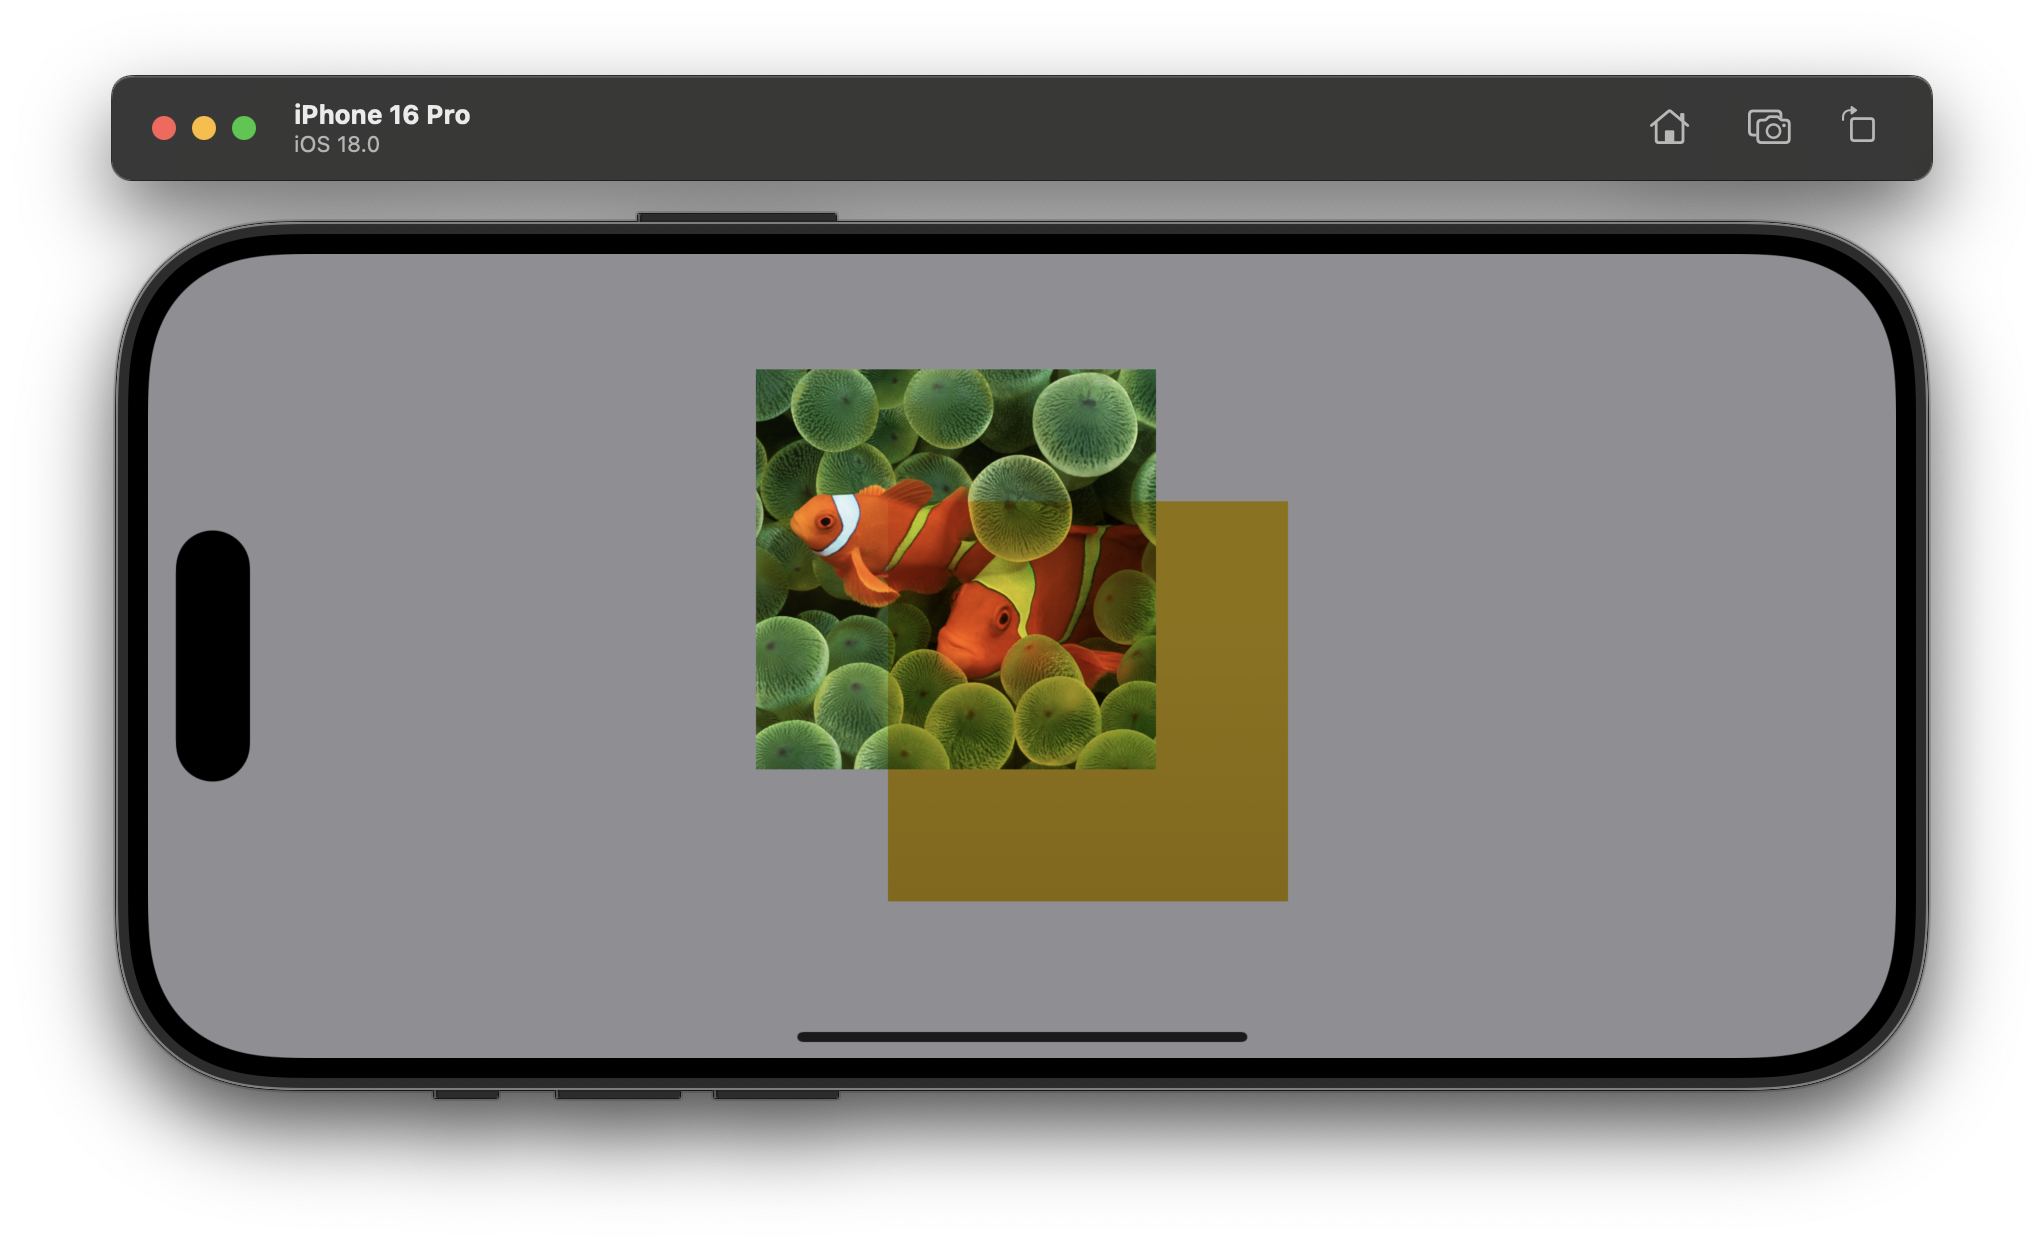
.multiply: Multiplies the blend and base colors, resulting in a darker color. This is great for creating shadows and depth.
.colorBurn: Darkens the base color to reflect the blend color by increasing contrast.
.plusDarker: Compares the blend and base colors, and uses the darker color value for each channel.
ZStack {
    Image("background")
        .resizable()
        .aspectRatio(contentMode: .fit)
        .frame(width: 200, height: 200)
        .offset(x: -33, y: -33)
    Rectangle()
        .fill(Color.yellow.gradient)
        .frame(width: 200, height: 200)
        .offset(x: 33, y: 33)
        .blendMode(.multiply)
}
Lightening
These blend modes generally result in lighter colors:
.lighten: Selects the lighter of the blend and base colors.
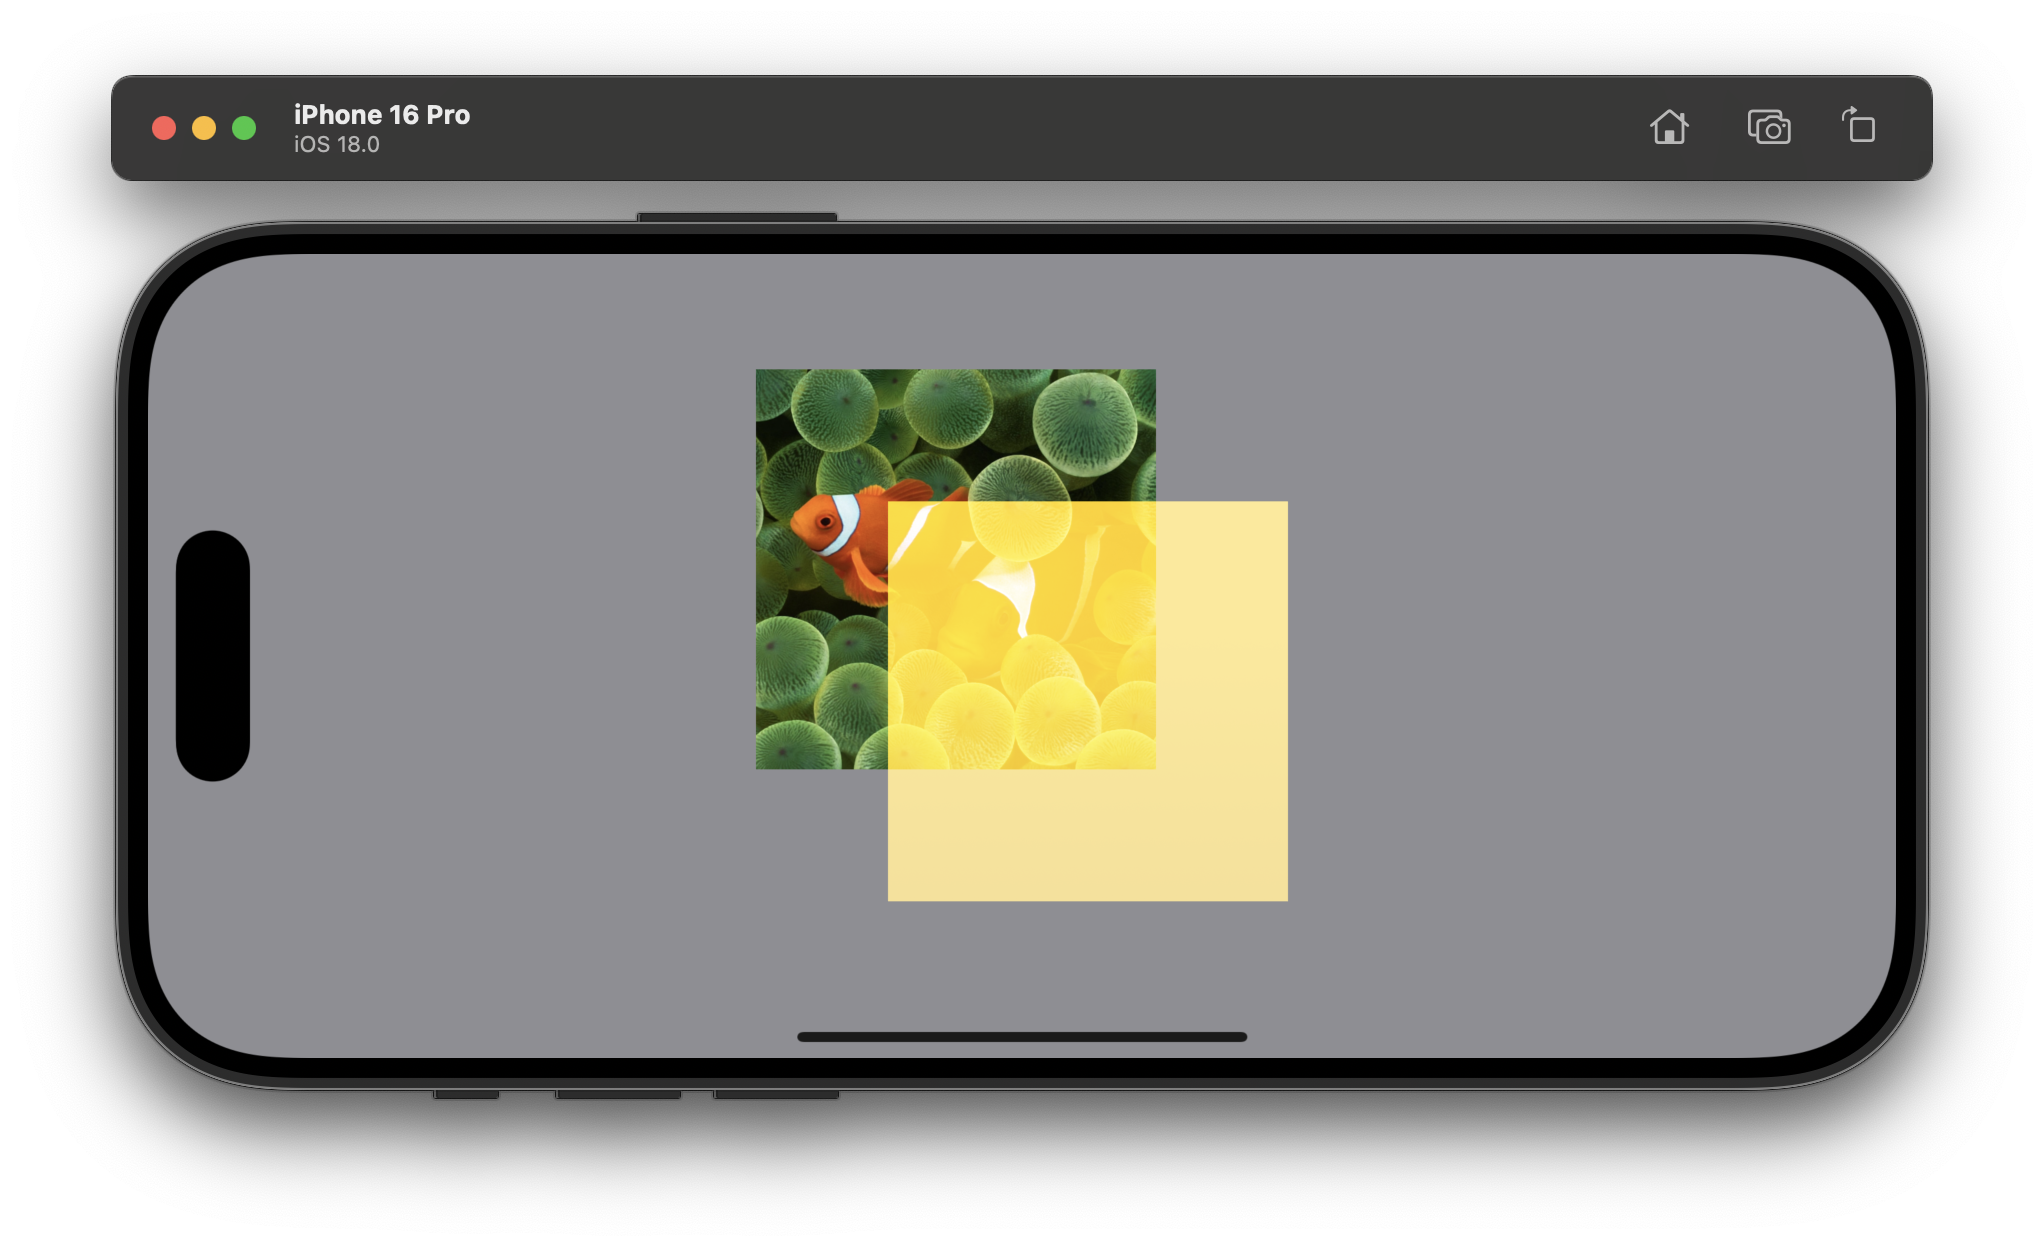
.screen: Multiplies the inverse of the blend and base colors, resulting in a lighter color. This is excellent for creating highlights.
.colorDodge: Brightens the base color to reflect the blend color by decreasing contrast.
.plusLighter: Compares the blend and base colors, and uses the lighter color value for each channel.
ZStack {
    Image("background")
        .resizable()
        .aspectRatio(contentMode: .fit)
        .frame(width: 200, height: 200)
        .offset(x: -33, y: -33)
    Rectangle()
        .fill(Color.yellow.gradient)
        .frame(width: 200, height: 200)
        .offset(x: 33, y: 33)
        .blendMode(.screen)
}
Adding Contrast
These blend modes increase the contrast between the blend and base colors:
.overlay: Multiplies or screens the colors, depending on the base color. This enhances contrast and saturation.
.softLight: Darkens or lightens the colors, depending on the blend color. The effect is similar to shining a diffused spotlight on the image.
.hardLight: Multiplies or screens the colors, depending on the blend color. The effect is similar to shining a harsh spotlight on the image.
ZStack {
    Image("background")
        .resizable()
        .aspectRatio(contentMode: .fit)
        .frame(width: 200, height: 200)
        .offset(x: -33, y: -33)
    Rectangle()
        .fill(Color.yellow.gradient)
        .frame(width: 200, height: 200)
        .offset(x: 33, y: 33)
        .blendMode(.overlay)
}

Inverting
These blend modes create inverted or negative-like effects:
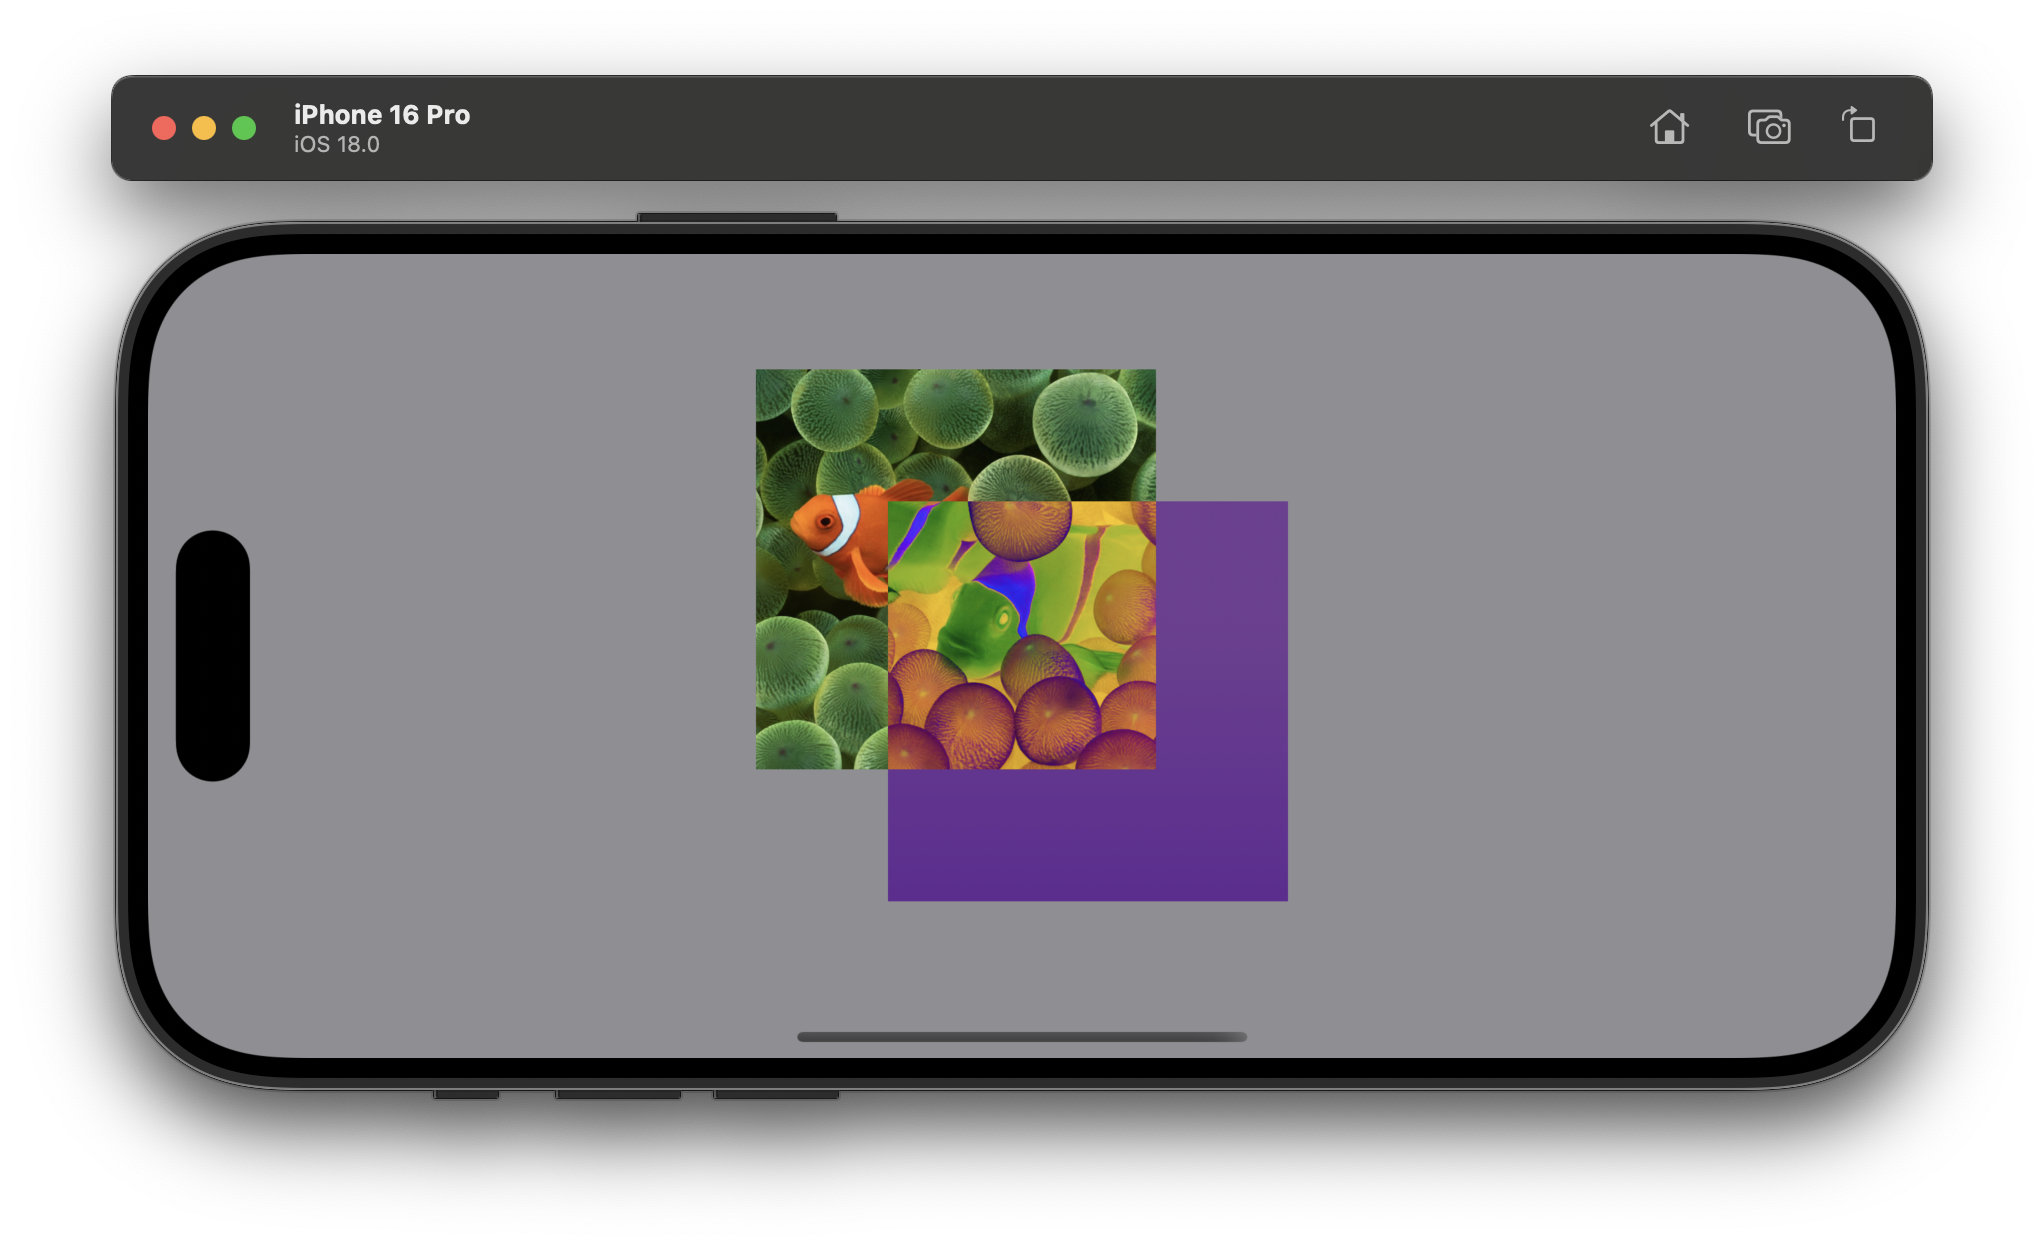
.difference: Subtracts the darker of the two colors from the lighter color.
.exclusion: Creates an effect similar to difference, but with lower contrast.
ZStack {
    Image("background")
        .resizable()
        .aspectRatio(contentMode: .fit)
        .frame(width: 200, height: 200)
        .offset(x: -33, y: -33)
    Rectangle()
        .fill(Color.yellow.gradient)
        .frame(width: 200, height: 200)
        .offset(x: 33, y: 33)
        .blendMode(.difference)
}
Mixing Color Components
These blend modes mix specific components of the colors:
.hue: Uses the hue of the blend color with the saturation and luminosity of the base color.
.saturation: Uses the saturation of the blend color with the hue and luminosity of the base color.
.color: Uses the hue and saturation of the blend color with the luminosity of the base color.
.luminosity: Uses the luminosity of the blend color with the hue and saturation of the base color.
ZStack {
    Image("background")
        .resizable()
        .aspectRatio(contentMode: .fit)
        .frame(width: 200, height: 200)
        .offset(x: -33, y: -33)
    Rectangle()
        .fill(Color.yellow.gradient)
        .frame(width: 200, height: 200)
        .offset(x: 33, y: 33)
        .blendMode(.hue)
}
Accessing Porter-Duff Modes
These are advanced compositing modes based on the Porter-Duff model:
.sourceAtop: Places the blend layer on top of the base layer, but only where the base layer has content.
.destinationOver: Places the blend layer behind the base layer.
.destinationOut: Removes the parts of the base layer that overlap with the blend layer.
ZStack {
    Image("background")
        .resizable()
        .aspectRatio(contentMode: .fit)
        .frame(width: 200, height: 200)
        .offset(x: -33, y: -33)
    Rectangle()
        .fill(Color.yellow.gradient)
        .frame(width: 200, height: 200)
        .offset(x: 33, y: 33)
        .blendMode(.sourceAtop)
}
Conclusion
Blend modes in SwiftUI offer a powerful way to create visually appealing interfaces and effects. By understanding and experimenting with different blend modes, you can significantly enhance your app's visual appeal and create unique designs that stand out.
Color blending in SwiftUI allows for creating rich, layered user interfaces with depth and visual interest. It's particularly useful for creating custom UI elements, backgrounds, and visual effects.
Remember, the key to mastering blend modes is experimentation. Try combining different shapes, colors, and blend modes to see what interesting effects you can create!