Positioning volumes in space in a visionOS app
Learn how to make a volumetric window and its ornaments consistently face the user in an app for visionOS.
With the introduction of visionOS 2.0, Apple made several updates that refined how users interact with augmented reality objects in their environment, particularly volumetric objects. To help developers take full advantage of these enhancements, Apple released new APIs designed to implement these new features in our apps.
In this article, we'll explore how to make a volumetric window and its ornaments consistently face the user, regardless of their position in the space.
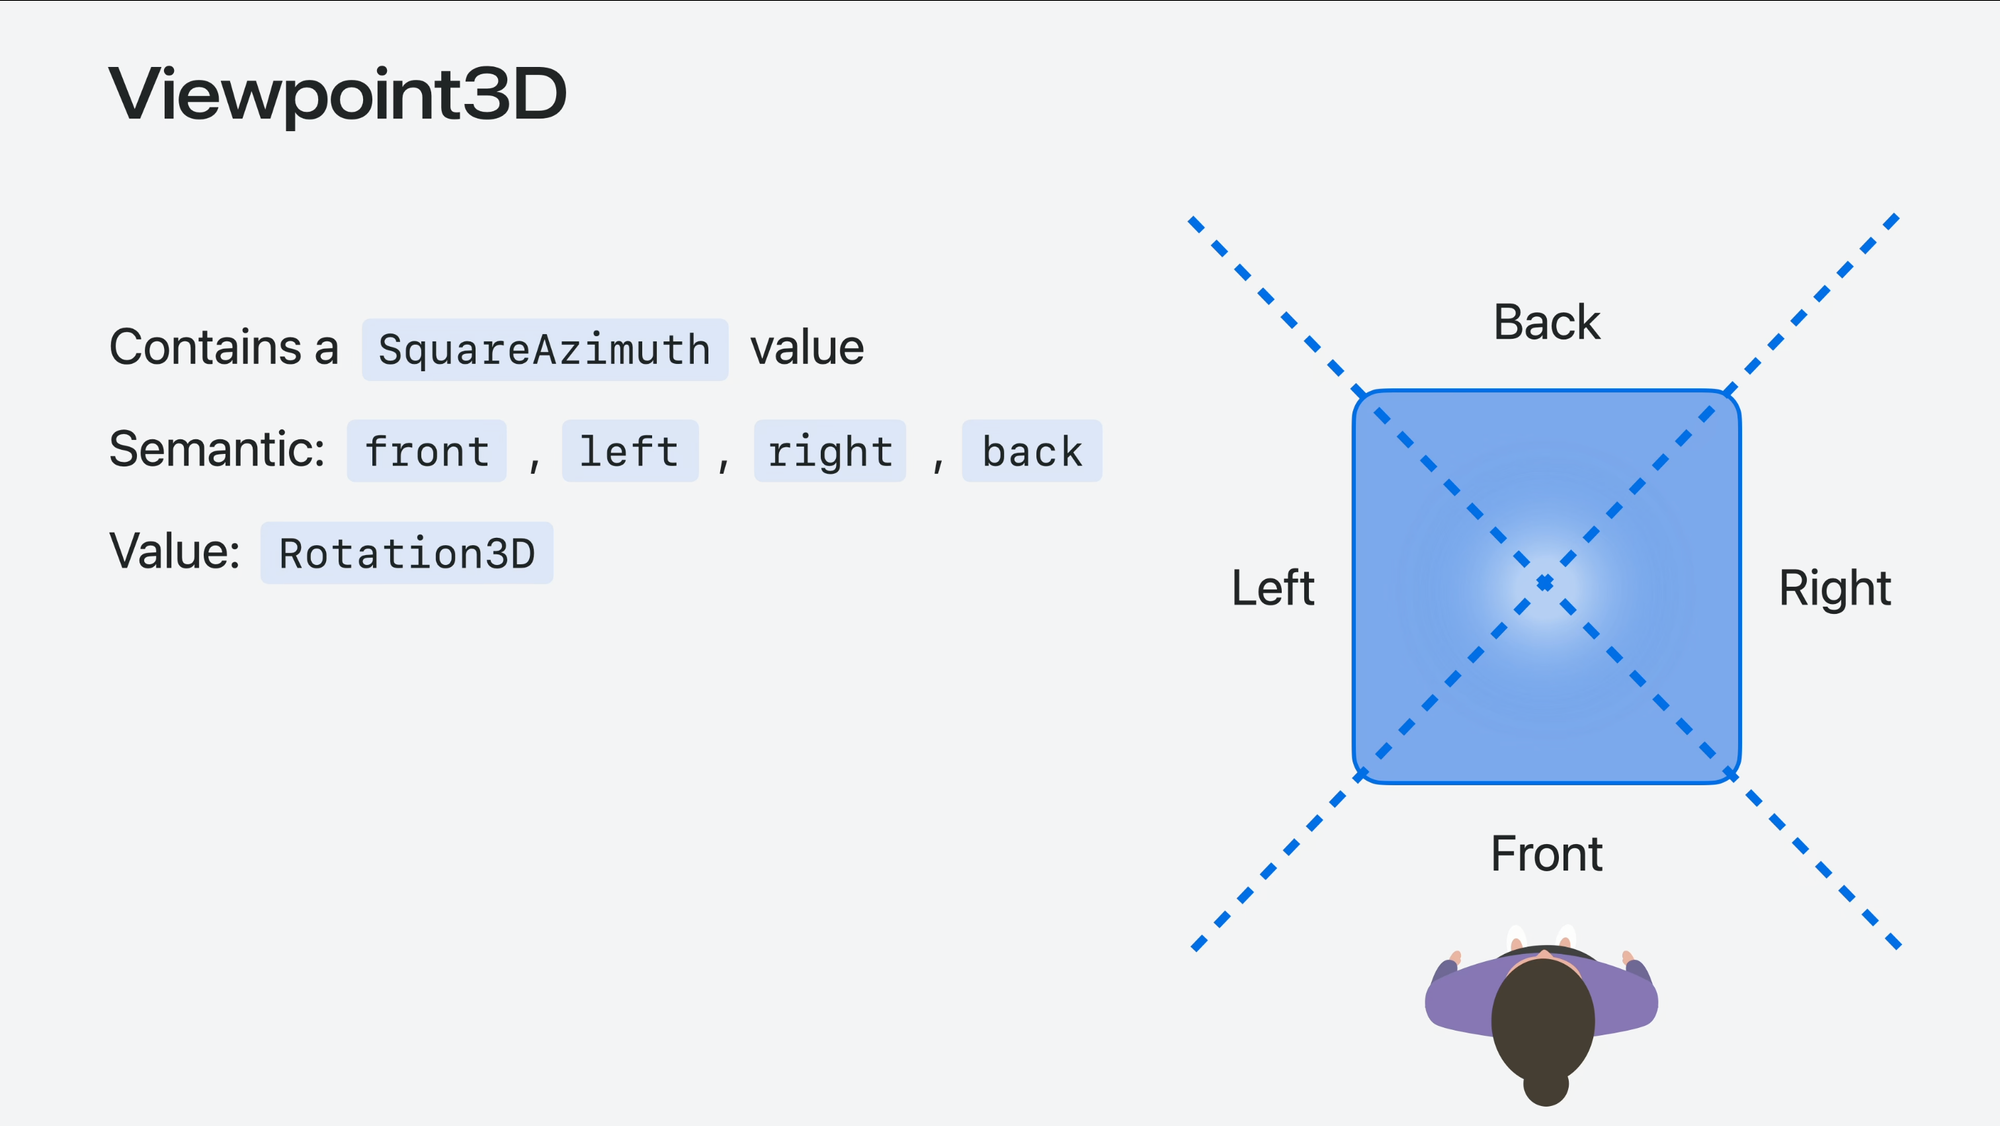
By using the onVolumeViewpointChange(updateStrategy:initial:_:) modifier, we can access the current ViewPoint3D.squareAzimuth property that describes what direction something is being viewed from.

import SwiftUI
import RealityKit
import RealityKitContent

struct ContentView: View {

    @State var rotation: Rotation3D = .identity

    var body: some View {

        Model3D(named: "GlassCube")
            .rotation3DEffect(rotation)
            .animation(.easeInOut, value: rotation)

            .onVolumeViewpointChange { _, newRotation in
                rotation = newRotation.squareAzimuth.orientation
            }

            .ornament(attachmentAnchor: .scene(.bottomFront)) {
                Text("Create with Swift")
                    .padding()
                    .glassBackgroundEffect()
            }

    }
}
In the example above, we use the onVolumeViewpointChange(updateStrategy:initial:_:) modifier to access the current ViewPoint object, which represents the user’s viewpoint.
By assigning this ViewPoint object to a rotation value of type Rotation3D, we trigger the rotation3DEffect(_:anchor:). Combined with the animation modifier, it creates a smooth transition between different orientations whenever the volume rotation value changes.
We can even specify the rotation path using the slerp(from:to:t:along:) method that returns the liner interpolation between two Rotation3D values:
import SwiftUI
import RealityKit
import RealityKitContent

struct ContentView: View {

    @State var rotation: Rotation3D = .identity

    var body: some View {

        Model3D(named: "GlassCube")
            .rotation3DEffect(rotation)
            .animation(.easeInOut, value: rotation)

            .onVolumeViewpointChange { _, newRotation in
                    rotation = Rotation3D.slerp(
                        from: rotation,
                        to: newRotation.squareAzimuth.orientation,
                        t: 1.0,
                        along: .longest
                    )
            }

            .ornament(attachmentAnchor: .scene(.bottomFront)) {
                Text("Create with Swift")
                    .padding()
                    .glassBackgroundEffect()
            }

    }
}
The along parameter determines whether the interpolation follows the shortest or longest path between the two rotations.
In both examples, by default, the action within the onVolumeViewpointChange(updateStrategy:initial:_:) will take place only if the viewpoint is one of the SquareAzimuth values. Anyway we can trigger the action every time the value changes setting the update strategy value to all.
import SwiftUI
import RealityKit
import RealityKitContent

struct ContentView: View {
    @State var volumeRotation: Rotation3D = .identity

    var body: some View {

        Model3D(named: "GlassCube")
            .rotation3DEffect(volumeRotation)
            .animation(.easeInOut, value: volumeRotation)

            .onVolumeViewpointChange(updateStrategy: .all) { _, viewPoint in
                volumeRotation = Rotation3D.slerp(
                    from: volumeRotation,
                    to: viewPoint.squareAzimuth.orientation,
                    t: 1.0,
                    along: .shortest
                )

                print(viewPoint)
            }

            .ornament(attachmentAnchor: .scene(.bottomFront)) {
                Text("Create with Swift")
                    .padding()
                    .glassBackgroundEffect()
            }

    }
}
