Prevent screenshot capture of sensitive SwiftUI views
Learn to build a SwiftUI modifier that hides sensitive content from screenshots and screen recordings, which is ideal for apps prioritizing user privacy.
This short tutorial will guide you through implementing a privacy feature in SwiftUI to prevent sensitive content from appearing in both screenshots and screen recordings. Such a feature is valuable for apps handling private user data, like financial, healthcare, or messaging apps.
Before we start
To follow this tutorial, familiarity with SwiftUI view composition and basic UIKit concepts is recommended. We will integrate a SwiftUI modifier with UIKit to hide views during screenshots. If you're unfamiliar with UIKit, Apple’s UIKit documentation provides helpful resources.
The goal of this tutorial is to demonstrate how to create a SwiftUI custom modifier that can be applied to any view to prevent it from being captured in a screenshot. This will be achieved using UIKit’s UITextField with isSecureTextEntry to obscure content. We will cover the following steps:
- Set Up the Main View Structure: We'll create the
ScreenshotPreventViewas the foundation to prevent content from being captured in screenshots and recordings. - Create a Custom View Modifier: We'll define the
HideWithScreenshotmodifier to apply screenshot protection to specific views easily. - Integrate into Your App's Content: Finally, we'll demonstrate applying the
hideWithScreenshot()modifier to protect sensitive content selectively within a sampleContentView.
These steps will provide a reusable, flexible way to prevent content in your SwiftUI app from appearing in screenshots and screen recordings.
Step 1.1: Setting up ScreenshotPreventView
Create ScreenshotPreventView.swift to define the main view structure that will prevent screenshots.
import SwiftUI

struct ScreenshotPreventView<Content: View>: View {
    var content: Content

    init(@ViewBuilder content: @escaping () -> Content) {
        self.content = content()
    }

    @State private var hostingController: UIHostingController<Content>?

    var body: some View {
        _ScreenshotPreventHelper(hostingController: $hostingController)
            .overlay(
                GeometryReader { geometry in
                    let size = geometry.size
                    Color.clear
                        .preference(key: SizeKey.self, value: size)
                        .onPreferenceChange(SizeKey.self) { newValue in
                            if hostingController == nil {
                                hostingController = UIHostingController(rootView: content)
                                hostingController?.view.backgroundColor = .clear
                                hostingController?.view.frame = CGRect(origin: .zero, size: size)
                            }
                        }
                }
            )
    }
}
The ScreenshotPreventView setup uses a secure method that not only prevents screenshots but also hides the view during screen recordings, ensuring a higher level of privacy.
content: This struct receives content as a parameter, defining the view hierarchy to prevent screenshots.GeometryReaderoverlay: Monitors the size of the view and overlays an invisible layer, ensuring the content matches its parent’s size.UIHostingControllersetup: Embeds the SwiftUI content in aUIHostingController, allowing UIKit control over SwiftUI views.
Step 1.2: Adding Helper Structures
Add the SizeKey and _ScreenshotPreventHelper structures, which are essential to the ScreenshotPreventView.
fileprivate struct SizeKey: PreferenceKey {
    static var defaultValue: CGSize = .zero

    static func reduce(value: inout CGSize, nextValue: () -> CGSize) {
        value = nextValue()
    }
}
SizeKey: ThisPreferenceKeystruct tracks the size of the view, passing it to the parent as needed to ensure proper sizing.
fileprivate struct _ScreenshotPreventHelper<Content: View>: UIViewRepresentable {
    @Binding var hostingController: UIHostingController<Content>?

    func makeUIView(context: Context) -> UIView {
        let secureField = UITextField()
        secureField.isSecureTextEntry = true
        if let textLayoutView = secureField.subviews.first {
            return textLayoutView
        }
        return UIView()
    }

    func updateUIView(_ uiView: UIView, context: Context) {
        // Adding hosting view as a Subview to the TextLayout View
        if let hostingController, !uiView.subviews.contains(where: { $0.tag == 100 }) {
            uiView.addSubview(hostingController.view)
        }
    }
}
_ScreenshotPreventHelper: ThisUIViewRepresentablestruct uses a secureUITextFieldto prevent screenshots. It adds theUIHostingController’s view as a subview to theTextLayoutview, which inherits the secure properties ofUITextField.
Step 2.1: Creating the HideWithScreenshot ViewModifier
In HideWithScreenshotCustomModifier.swift, start by defining the custom view modifier HideWithScreenshot:
import SwiftUI

struct HideWithScreenshot: ViewModifier {
    @State private var size: CGSize?

    func body(content: Content) -> some View {
        ScreenshotPreventView {
            ZStack {
                content
                    .background(
                        GeometryReader { proxy in
                            Color.clear
                                .onAppear {
                                    size = proxy.size
                                }
                        }
                    )
            }
        }
        .frame(width: size?.width, height: size?.height)
    }
}
ViewModifierdefinition: TheHideWithScreenshotstruct conforms to theViewModifierprotocol, making it a reusable SwiftUI modifier.- State Management: A
@Statevariable,size, tracks the size of the view to ensure the modifier adjusts the frame correctly. - ScreenshotPreventView Wrapper: Embeds the
contentinScreenshotPreventView, preventing it from being captured in screenshots. - GeometryReader Background: Measures the content's size and updates
sizeaccordingly. By usingGeometryReader, we ensure the modifier correctly adapts to the size of the view it wraps.
Step 2.2: Adding a Convenient View Extension
Adding an extension to the View type makes applying the HideWithScreenshot modifier easier across any SwiftUI view.
extension View {
    func hideWithScreenshot() -> some View {
        modifier(HideWithScreenshot())
    }
}
This extension of the View protocol creates a more intuitive, readable way to apply the modifier. Instead of calling modifier(HideWithScreenshot()) every time, you can simply call hideWithScreenshot().
Applying the modifier to any SwiftUI view with hideWithScreenshot() makes the feature more reusable, enabling users to secure multiple views with minimal code.
Step 4: Integrating the Modifier in ContentView
Here’s an example of how you can apply the hideWithScreenshot() modifier to selectively protect content within your app’s UI. In this setup, we wrap sensitive text in the hideWithScreenshot() modifier, ensuring only non-sensitive elements remain visible when a screenshot or screen recording is attempted.
import SwiftUI

struct ContentView: View {
    var body: some View {
        VStack {
            VStack(spacing: 20.0) {
                Image(systemName: "swift")
                    .resizable()
                    .aspectRatio(contentMode: .fit)
                    .frame(width: 100, height: 100)

                VStack {
                    Text("Create with Swift")
                        .font(.largeTitle)
                        .fontWeight(.light)
                    Text("sensitive content here")
                        .font(.headline)
                        .fontWeight(.light)
                }
                .hideWithScreenshot() // Protects this content
            }
        }
        .padding()
    }
}

#Preview {
    ContentView()
        .preferredColorScheme(.dark)
}

In this example, .hideWithScreenshot() is applied to only the sensitive text view, allowing control over what elements are hidden for privacy purposes. This approach can be easily adapted to secure any view in your SwiftUI app.
Final Result
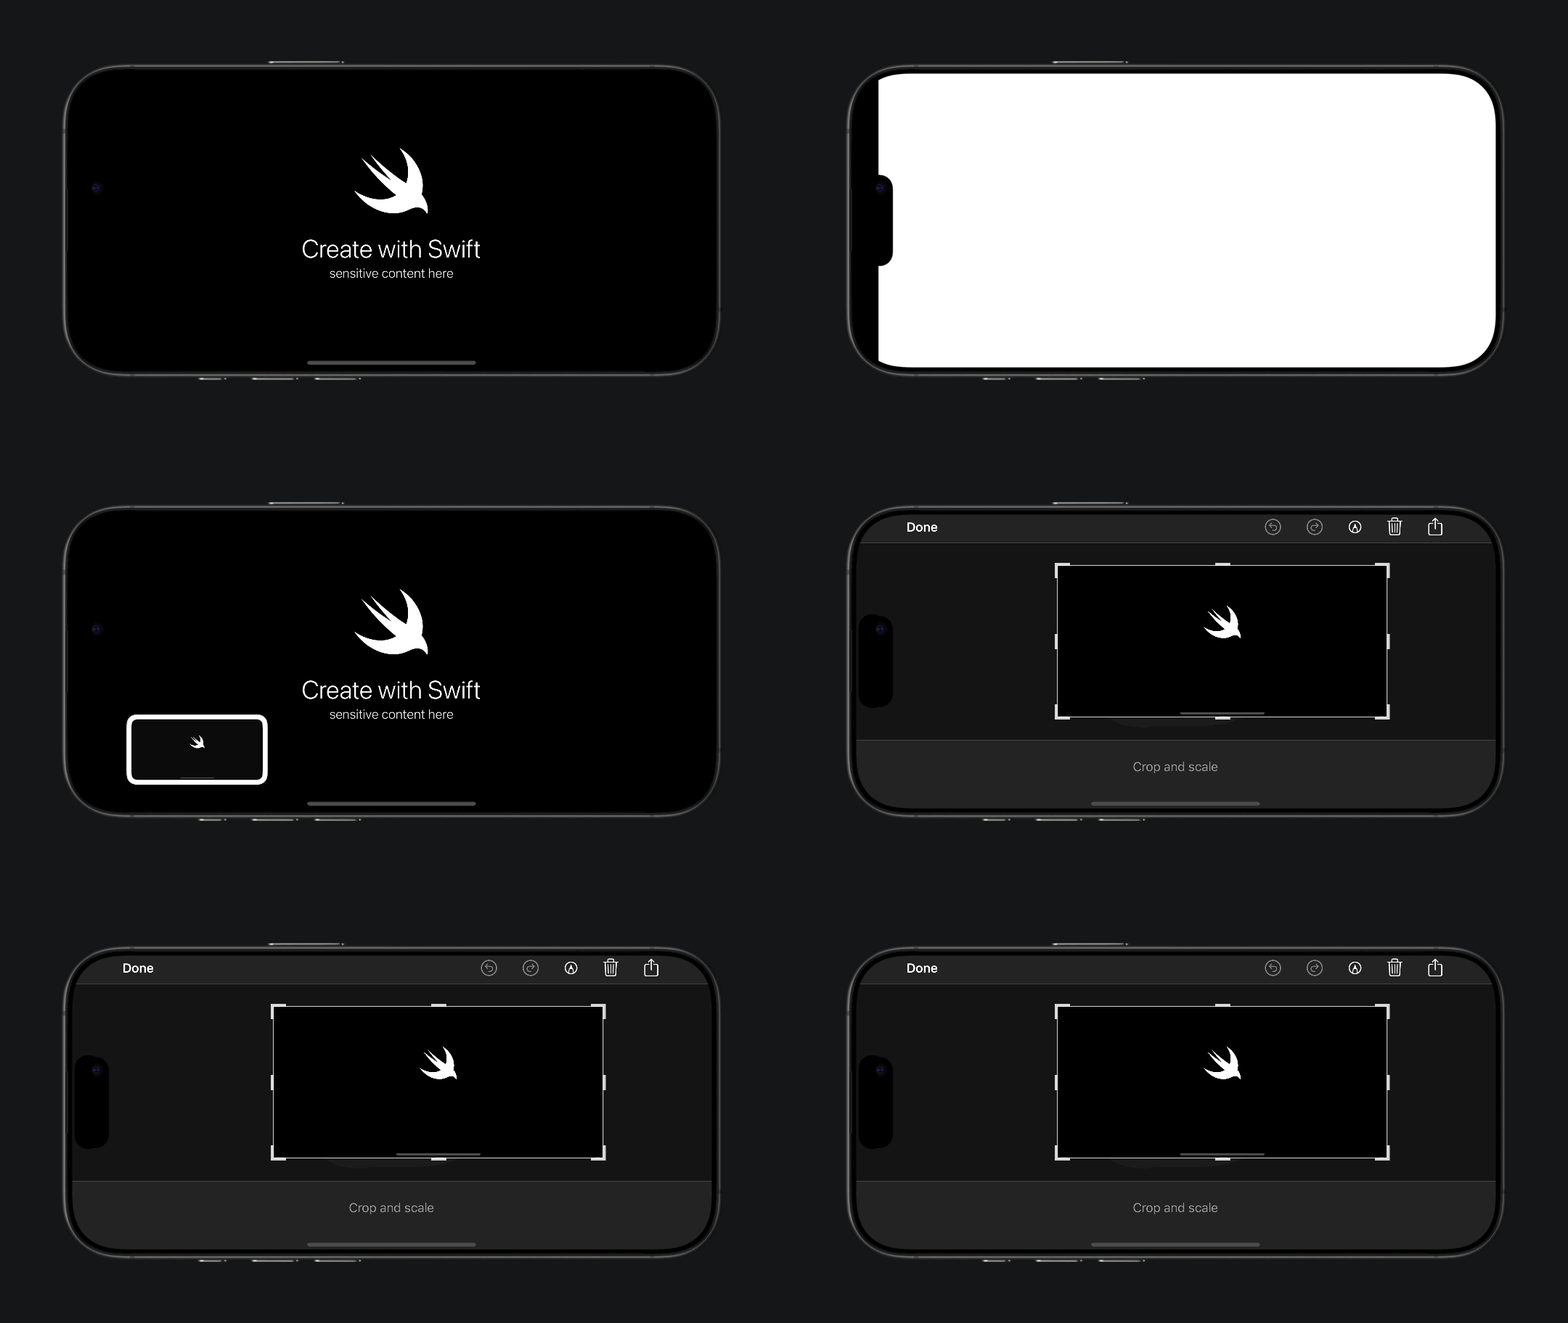
After implementing this feature, any view with hideWithScreenshot() applied will automatically hide during both screenshots and screen recordings, making it ideal for protecting sensitive content in your app. This solution is flexible, allowing you to selectively apply the modifier to specific views (whether it’s sensitive text, images, or entire sections) without affecting the rest of the UI.
With this approach, you can easily create a seamless privacy layer across various parts of your SwiftUI app, ensuring that private data stays secure and inaccessible through unauthorized captures.

