
Adding Annotations to a Mapbox MapView
With this article you will learn how to add Point Annotations and View Annotations to a map using the Mapbox SDK for iOS.

Recently, we explored how to integrate Mapbox within a SwiftUI app. Even though the Mapbox SDK natively supports UIKit, it can be used within a SwiftUI project using the UIViewControllerRepresentable view. Based on that tutorial, we now want to add annotations to the Mapbox MapView that is hosting the map features since version 10 of the API.
The most basic type of annotation is called PointAnnotation and is simple to set up. It requires coordinates to provide the location of the annotation. Then, the annotation comes with an image property that can be initialized with a UIImage object. It can literally be any image, for example, a .png of the custom pin you want to use in your app. You can also configure the annotation anchor, which will define how the image will be displayed.
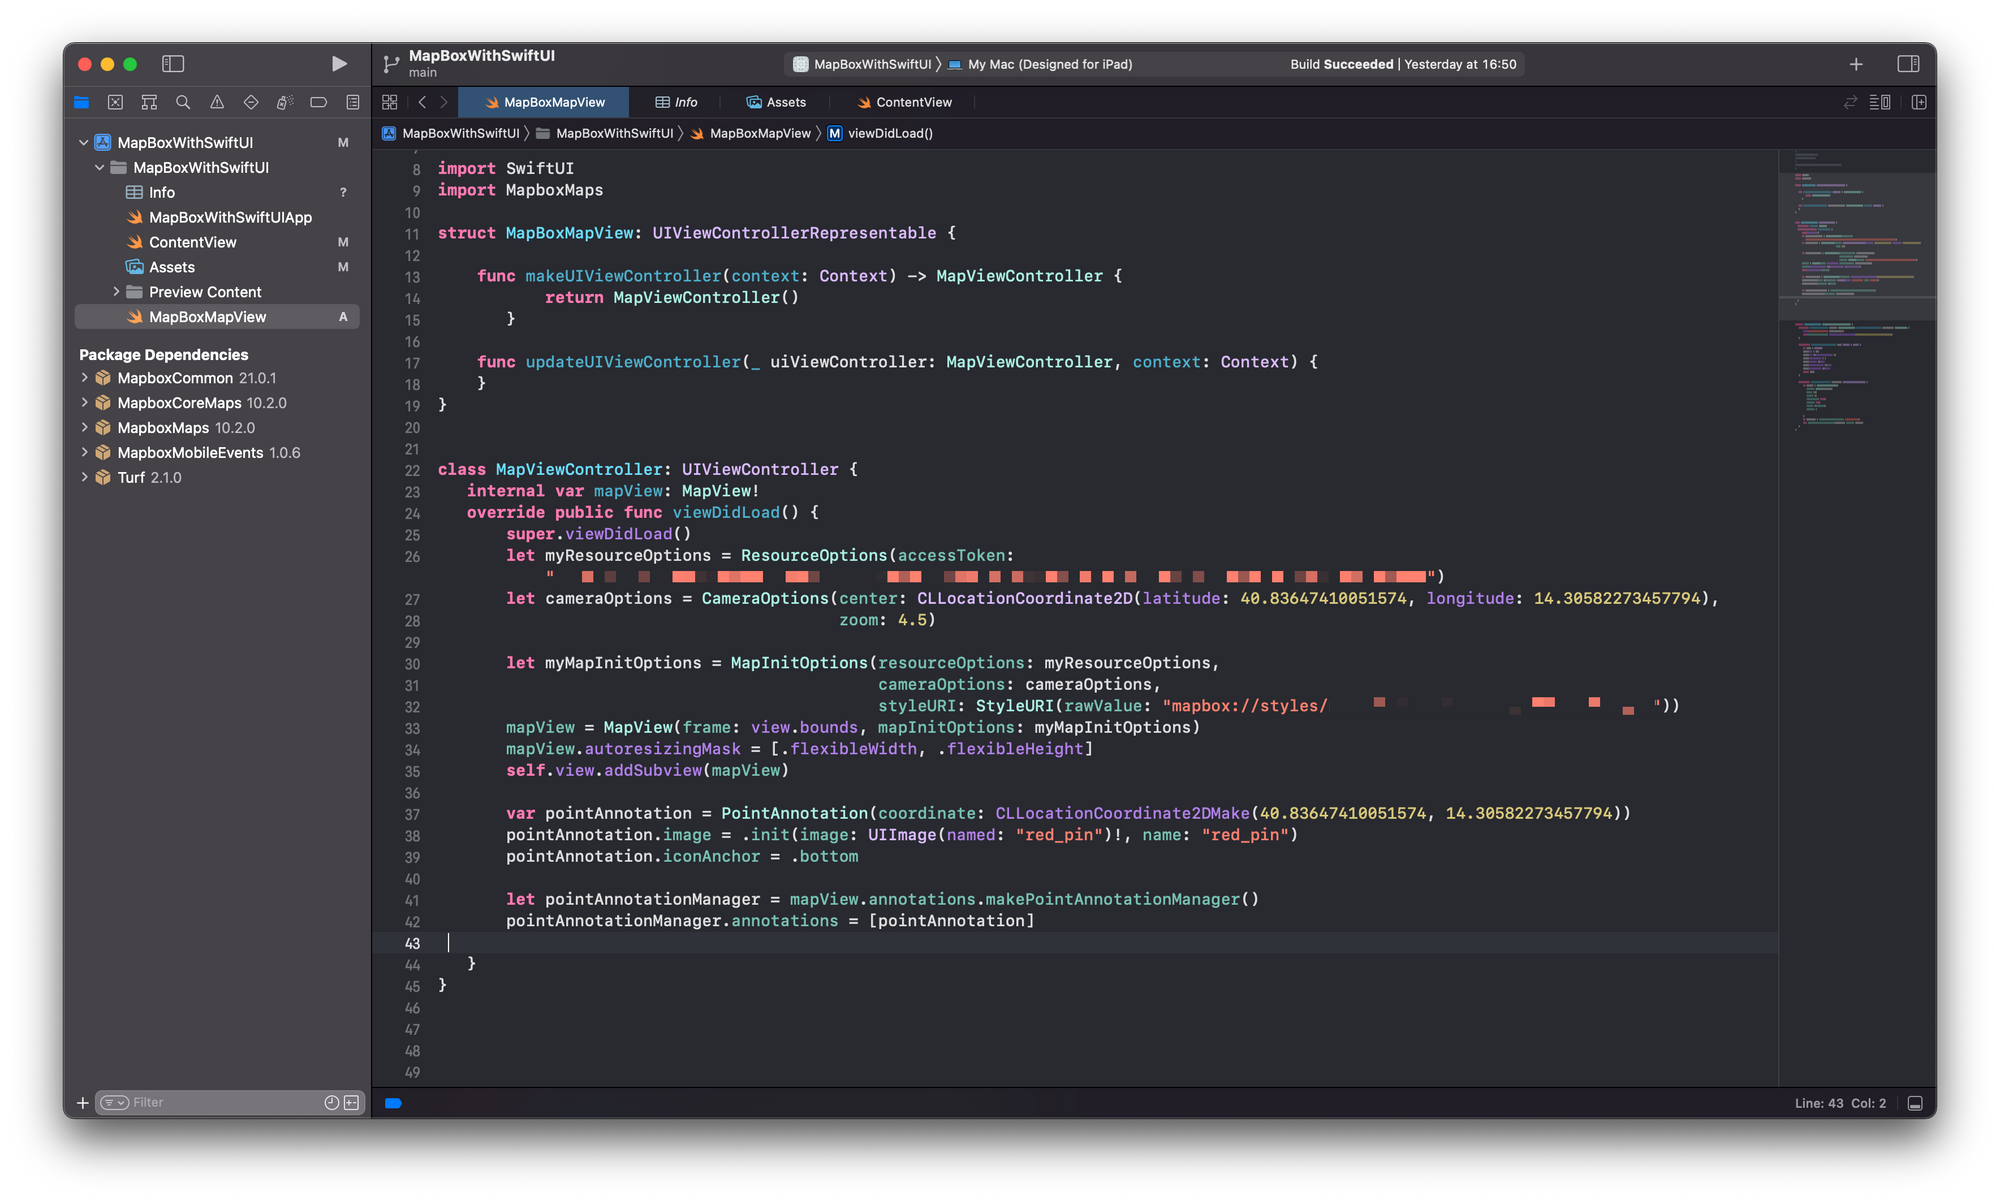
class MapViewController: UIViewController {
   internal var mapView: MapView!
   override public func viewDidLoad() {
       super.viewDidLoad()
       let myResourceOptions = ResourceOptions(accessToken: "YOUR-ACCESS-TOKEN")
       let cameraOptions = CameraOptions(center: CLLocationCoordinate2D(latitude: 40.83647410051574, longitude: 14.30582273457794),zoom: 4.5)
       let myMapInitOptions = MapInitOptions(resourceOptions: myResourceOptions, cameraOptions: cameraOptions, styleURI: )
       mapView = MapView(frame: view.bounds, mapInitOptions: myMapInitOptions)
       mapView.autoresizingMask = [.flexibleWidth, .flexibleHeight]
       self.view.addSubview(mapView)

       var pointAnnotation = PointAnnotation(coordinate: CLLocationCoordinate2DMake(40.83647410051574, 14.30582273457794))
       pointAnnotation.image = .init(image: UIImage(named: "red_pin")!, name: "red_pin")
       pointAnnotation.iconAnchor = .bottom

       let pointAnnotationManager = mapView.annotations.makePointAnnotationManager()
       pointAnnotationManager.annotations = [pointAnnotation]

   }
}
Basic configuration of a MapViewController to display the MapView from Mapbox
As the map could potentially host any number of annotations, you have to initialize the annotation manager of the MapView. It can host any number of annotations, which can be added as an array of PointAnnotation objects.
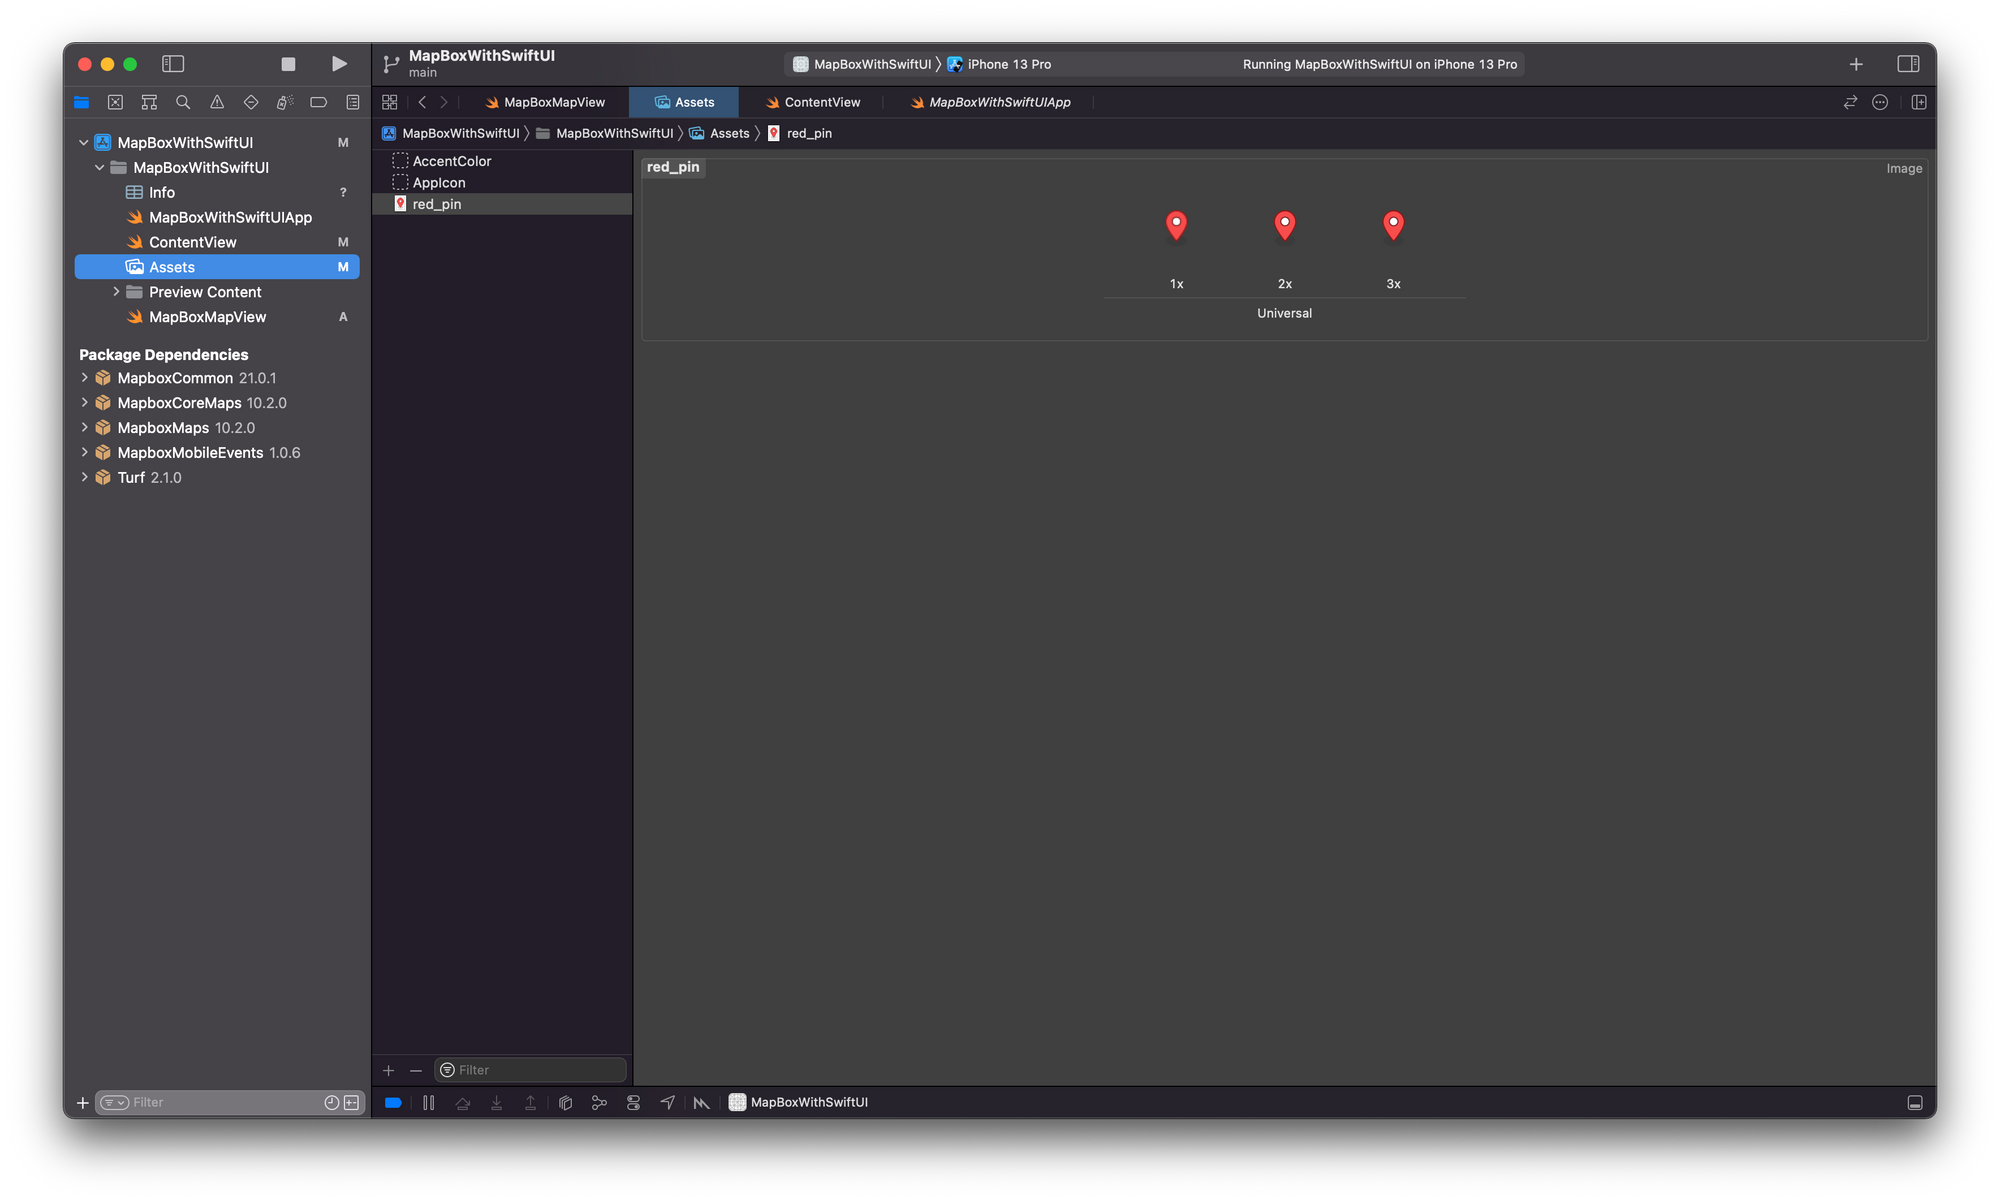
If you use a custom UIImage for the annotation marker, you can add the image to your Assets folder inside the Xcode project. You might use different images for different types of annotations. Restaurants, shops, or gas stations could each have a dedicated icon, for example.
You can display the Mapbox map using the UIViewControllerRepresentable protocol, inside any SwiftUI view. It ensures that the custom MapViewController of this example is wrapped inside a SwiftUI compatible view.
struct MapBoxMapView: UIViewControllerRepresentable {
func makeUIViewController(context: Context) -> MapViewController {
return MapViewController()
}
func updateUIViewController(_ uiViewController: MapViewController, context: Context) {
}
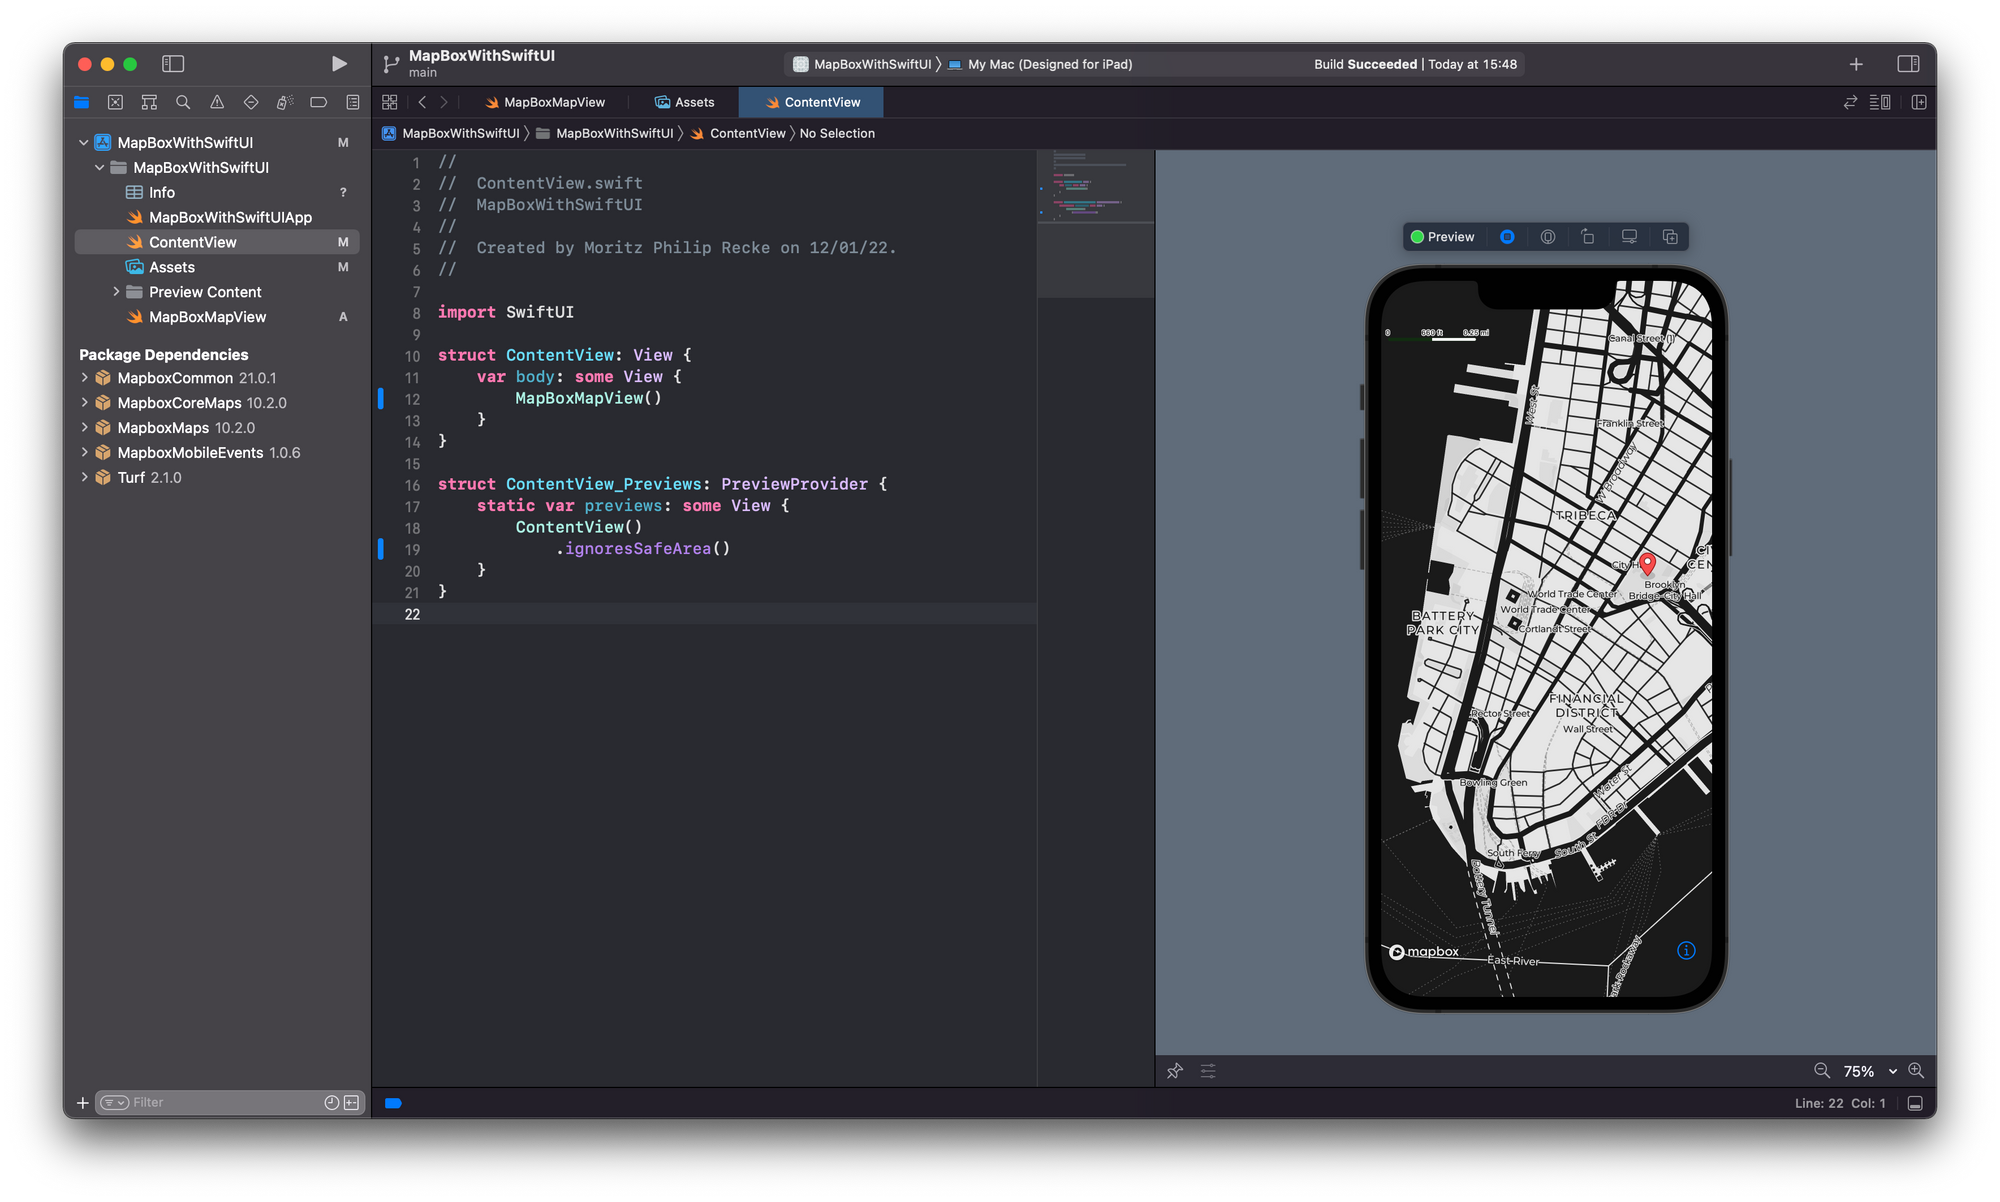
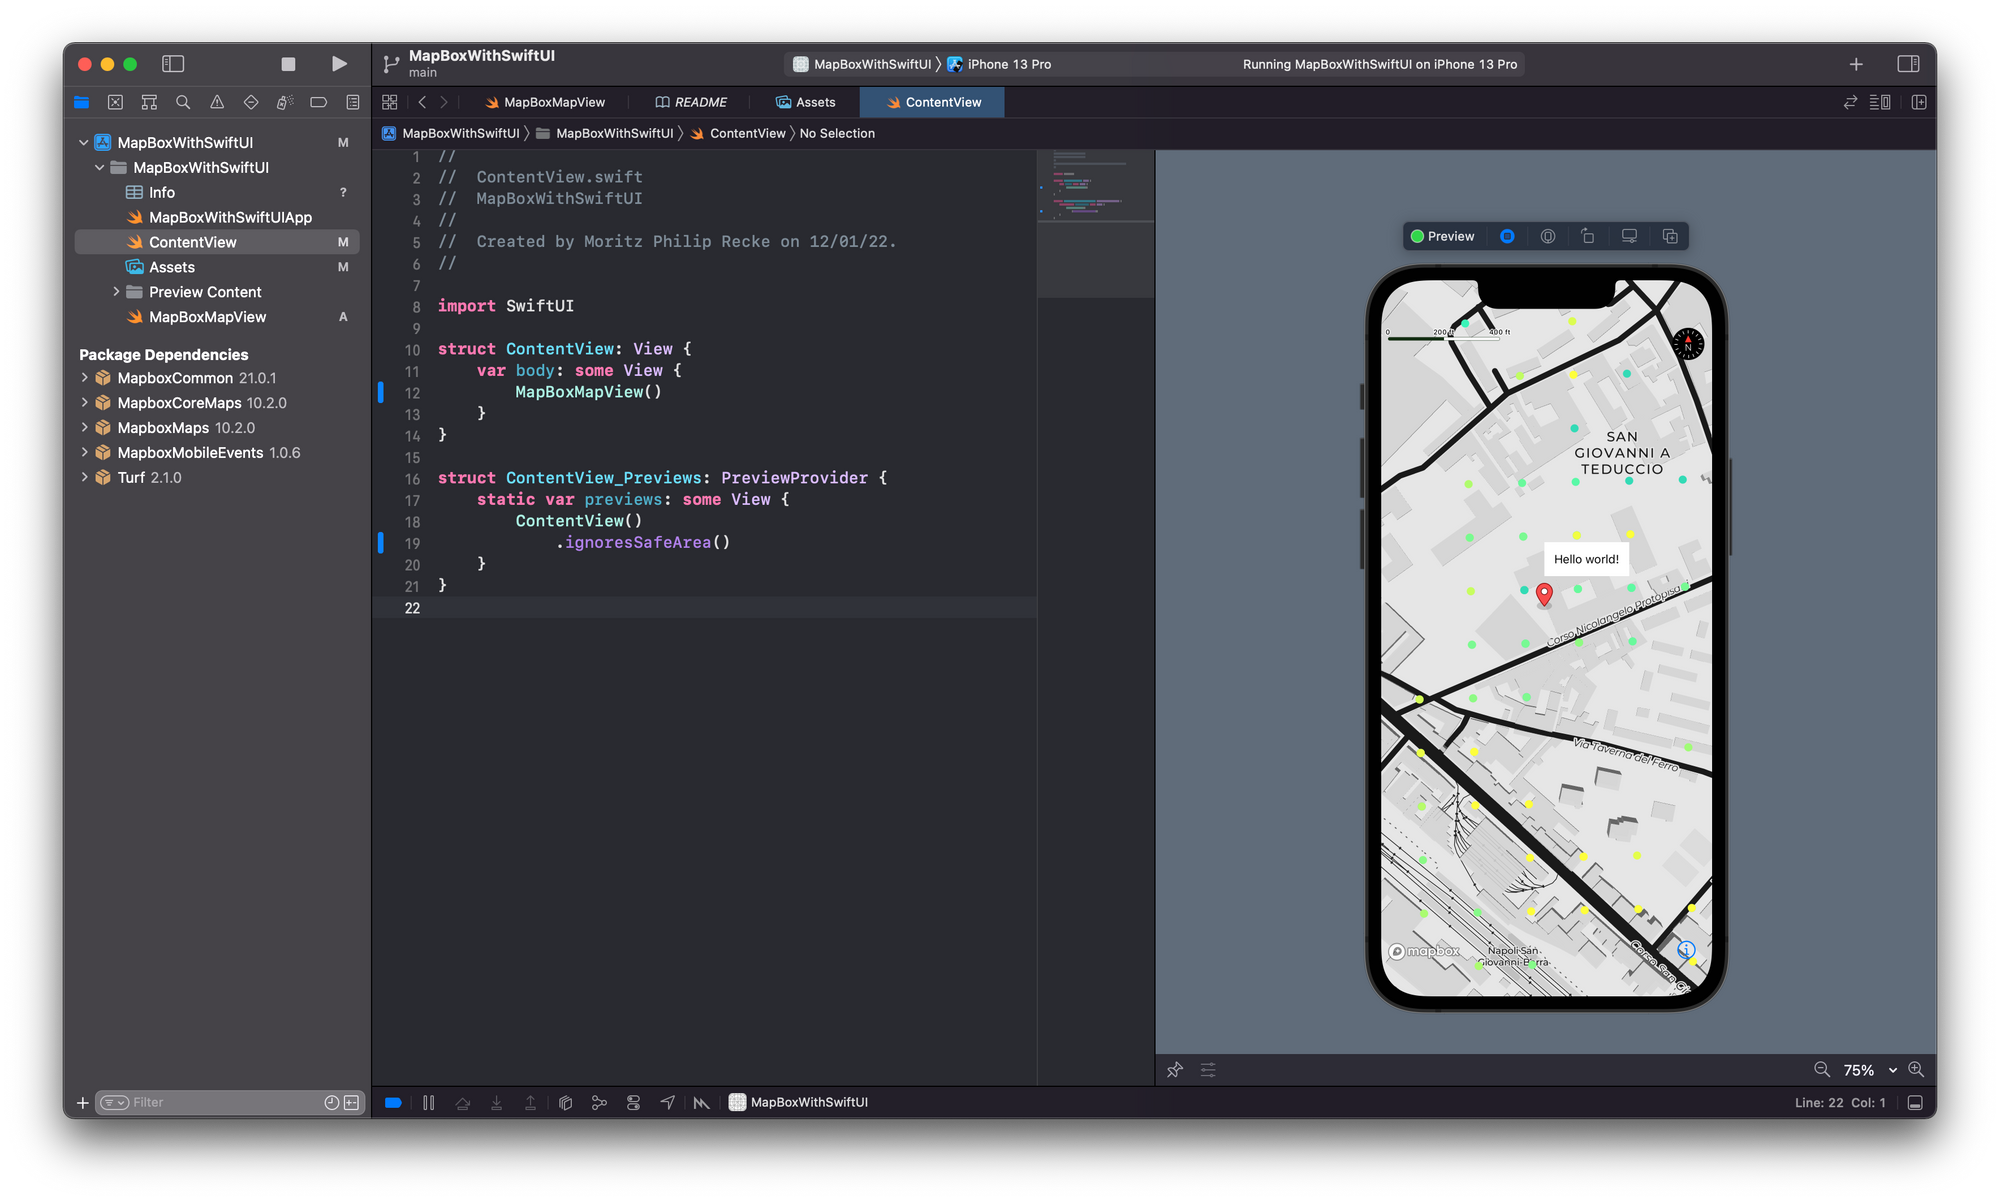
}Adding the MapBoxMapView() to the default ContentView.swift file of any new SwiftUI project in Xcode will display the map with the annotation at the provided coordinates.
struct ContentView: View {
    var body: some View {
        MapBoxMapView()
            .ignoresSafeArea()
    }
}
Interacting with Annotations
To allow touch interaction with the Mapbox annotation, the MapViewController class must conform to the AnnotationInteractionDelegate protocol. Its protocol stub, func annotationManager(_ manager: AnnotationManager, didDetectTappedAnnotations annotations: [Annotation]), provides a convenient way to detect when a tap interaction happens on any annotation on our view. To make it work, the annotation manager delegate has to be set to self.
class MapViewController: UIViewController {
internal var mapView: MapView!
override public func viewDidLoad() {
super.viewDidLoad()
[...]
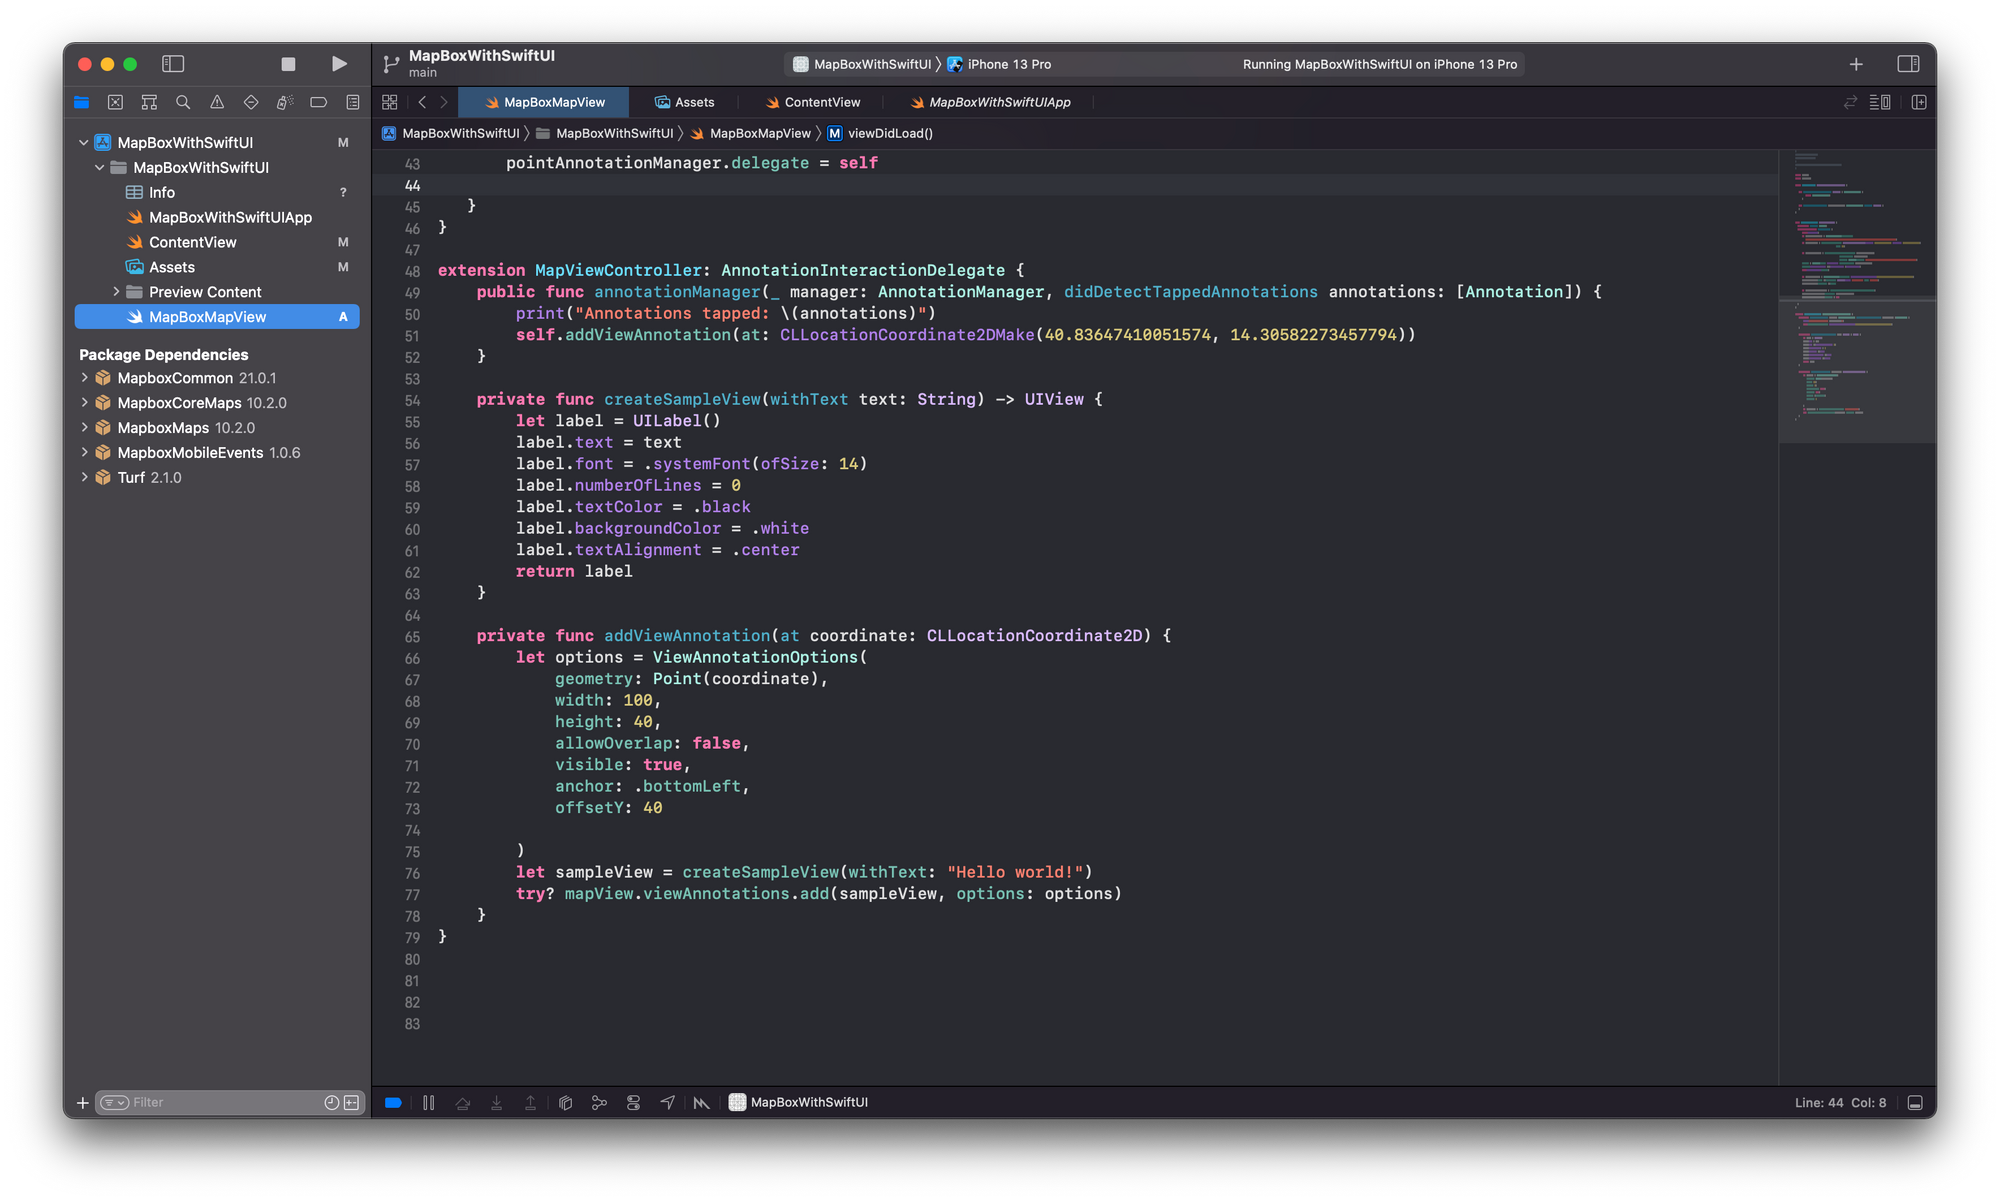
pointAnnotationManager.delegate = self
}
}
extension MapViewController: AnnotationInteractionDelegate {
public func annotationManager(_ manager: AnnotationManager, didDetectTappedAnnotations annotations: [Annotation]) {
print("Annotations tapped: \(annotations)")
}
}In this code snipped, the print statement will just output the annotation details to the console. Obviously, the functionality can be extended to incorporate any desired behavior, for example, hiding/deleting the annotation or showing another view next to the point marker to show more details about the annotation.
To show more details about the annotation, the mapview's .addViewAnnotations can be used, which basically hosts any UIView. Follow this example approach to get started:
- Create a sample view using a
UILabeland configure its colors, font size, and alignment and set the text in the label. - Initiate the view with a
ViewAnnotationOptionsobject defining the size of the view, whether it's visible, whether it can overlap with other view annotations, its anchor, and offset. - Before adding the view annotation to the
MapView, the view has to be initiated with a text, as defined in thecreateSampleView(withText:)function, and theViewAnnotationOptionsobject.
extension MapViewController: AnnotationInteractionDelegate {
    public func annotationManager(_ manager: AnnotationManager, didDetectTappedAnnotations annotations: [Annotation]) {
        [...]
        // Once detected a tap on the map, show the annotation view
        self.addViewAnnotation(at: CLLocationCoordinate2DMake(40.83647410051574, 14.30582273457794))
    }

	// 1. Auxiliary function to create a sample view.
    private func createSampleView(withText text: String) -> UIView {
        let label = UILabel()
        label.text = text
        label.font = .systemFont(ofSize: 14)
        label.numberOfLines = 0
        label.textColor = .black
        label.backgroundColor = .white
        label.textAlignment = .center
        return label
    }

    private func addViewAnnotation(at coordinate: CLLocationCoordinate2D) {
	    // 2. Setting up the annotation options
        let options = ViewAnnotationOptions(
            geometry: Point(coordinate),
            width: 100,
            height: 40,
            allowOverlap: false,
            visible: true,
            anchor: .bottomLeft,
            offsetY: 40

        )

        // 3. Creating and adding the sample view to the mapView
        let sampleView = createSampleView(withText: "Hello world!")
        try? mapView.viewAnnotations.add(sampleView, options: options)
    }
}
In the example above, the view annotation anchor is set to .bottomLeft with an offsetY of 40 to display the UILabel on the top of the point annotation with the bottom left edge of the UILabel being 40 points above the point annotation.
Now, when showing the Mapbox map inside the SwiftUI app, the PointAnnotation is touchable and when tapped, a viewAnnotation is added to the map, which shows the UILabel above the point annotations. In this example, it shows the text "Hello World!".
Stay tuned for more content on how to use maps in your SwiftUI apps. We will cover more in-depth features of MapKit as well as Mapbox, how to make use of Core Location to show the user's location on the map, and other topics in the future.