
Integrating Mapbox with SwiftUI
You will learn how to use the powerful Mapbox SDK v10.2 and newer in an SwiftUI iOS app with UIViewControllerRepresentable.

In this article, I will cover the basic steps to get MapBox v10.2 and newer to run in an iOS app with SwiftUI. Mapbox is a neat and performative map framework for multiple platforms and can easily be integrated into iOS. Its latest version 10 came with major upgrades and important changes for the integration in iOS. As a benefit, it now is even more amazing and makes use of Metal for even faster performance.
Generally, I really like Apple's native framework for maps, MapKit. It works perfectly across Apple platforms, is fast, and provides a native use and feel that users came to appreciate. In certain use cases, however, Apple Maps are lacking features in comparison to the competition. For me, the only use case where this is critical is when using heatmaps. Even though such a functionality could be achieved with MapKit Overlays, it is non-trivial to implement and there is no great solution available in the open-source community that neatly integrates with MapKit. Therefore, Mapbox is a valid alternative to create amazing heatmaps.
Let's have a look at how it works.
Getting Started with Mapbox
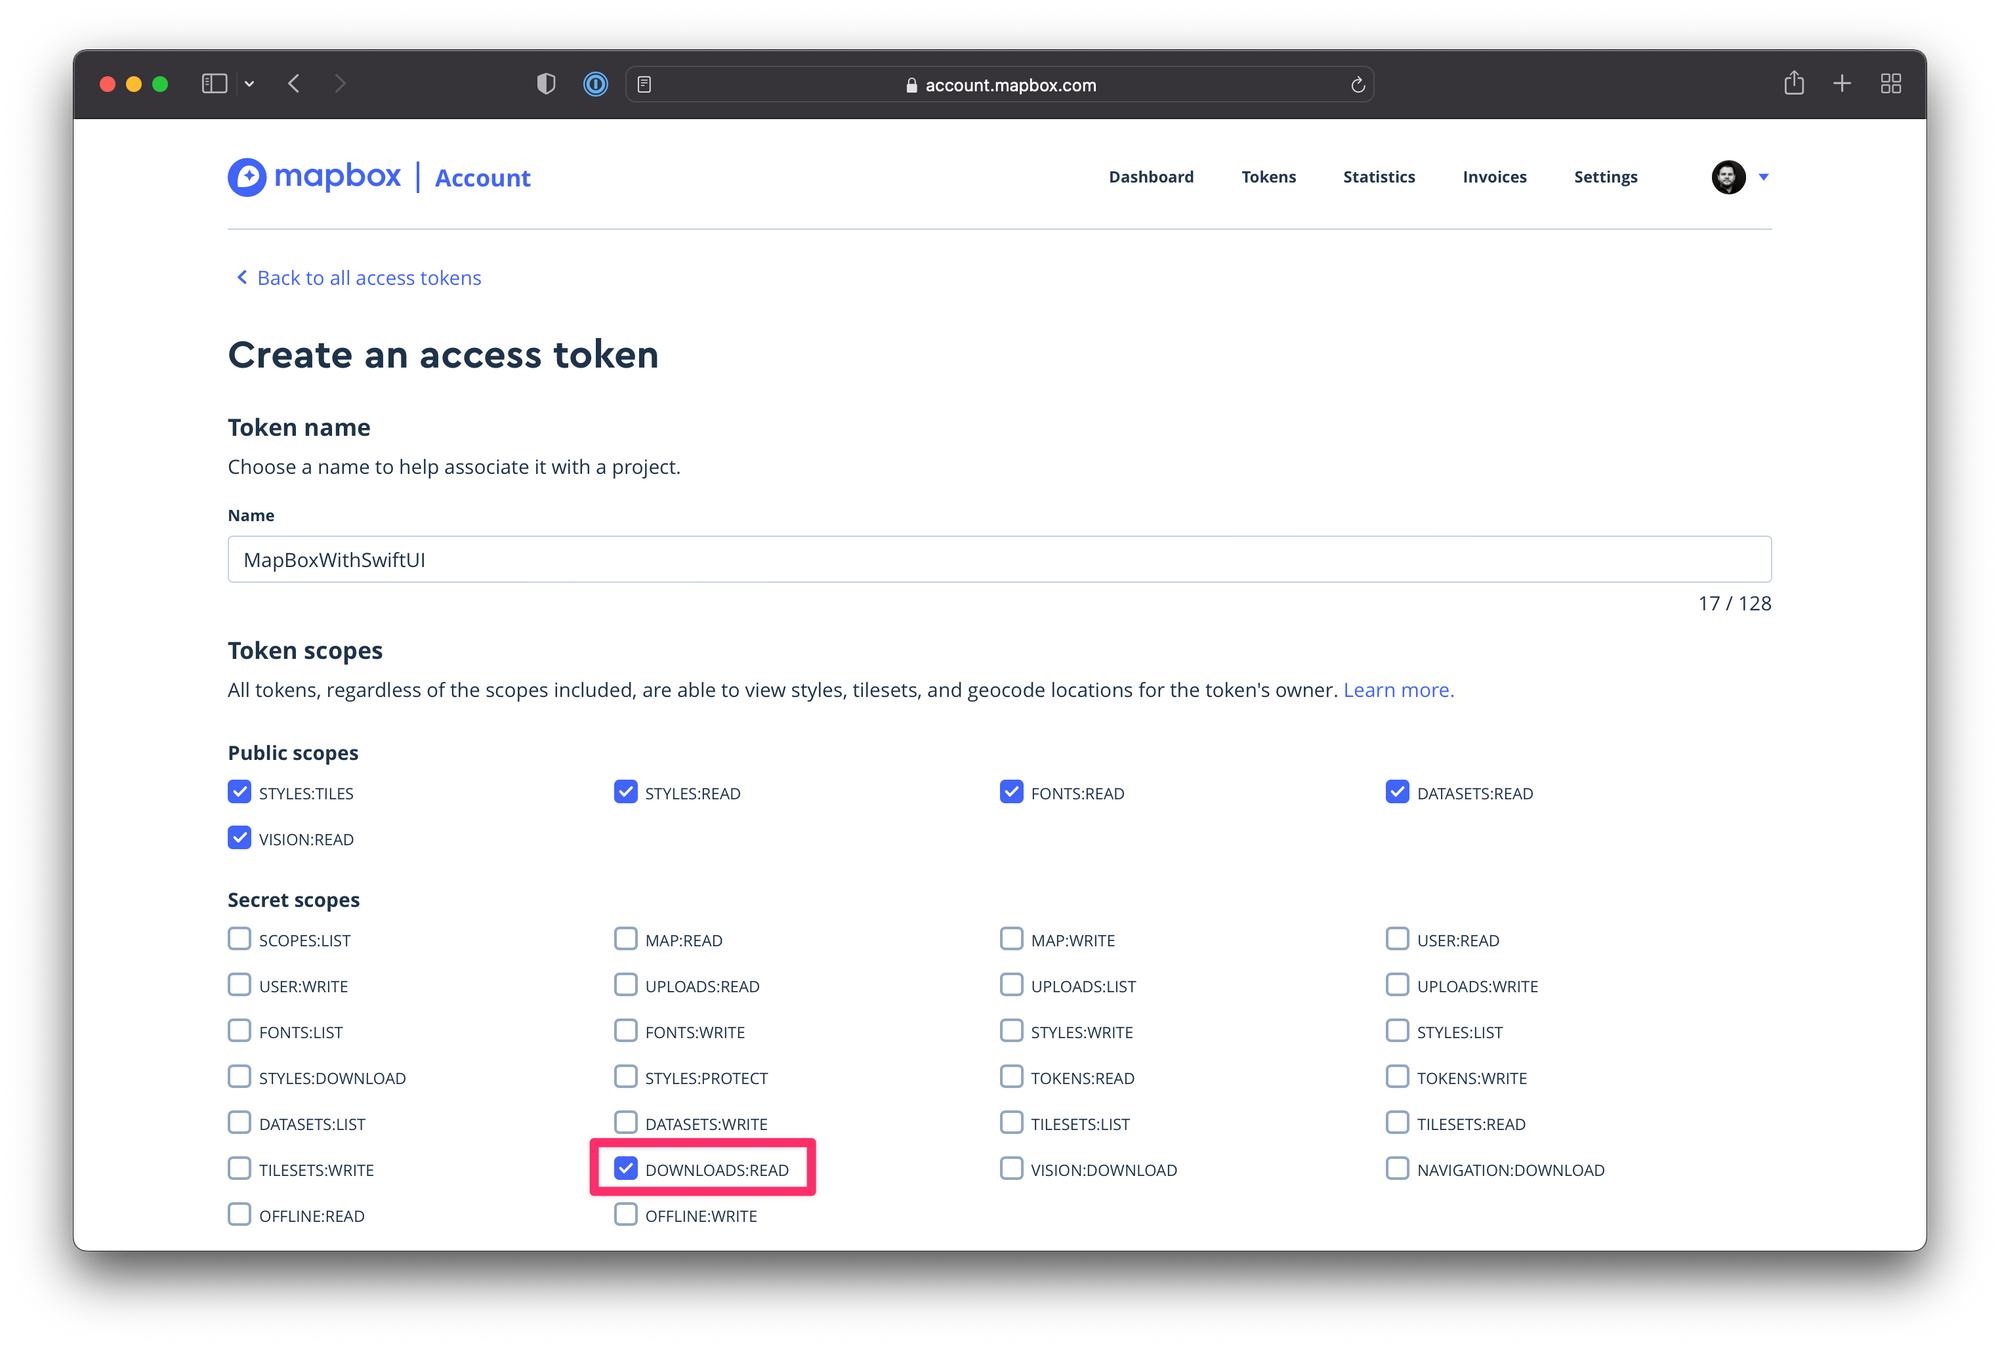
The first thing to do is register a Mapbox account to create an access token for development. After registering, there is a public access token available, but as a good practice, it makes sense to create a dedicated token for each project.
Apart from various options, most critically, the option DOWNLOADS:READ has to be enabled to conveniently integrate Mapbox with the Swift Package Manager inside an Xcode project.
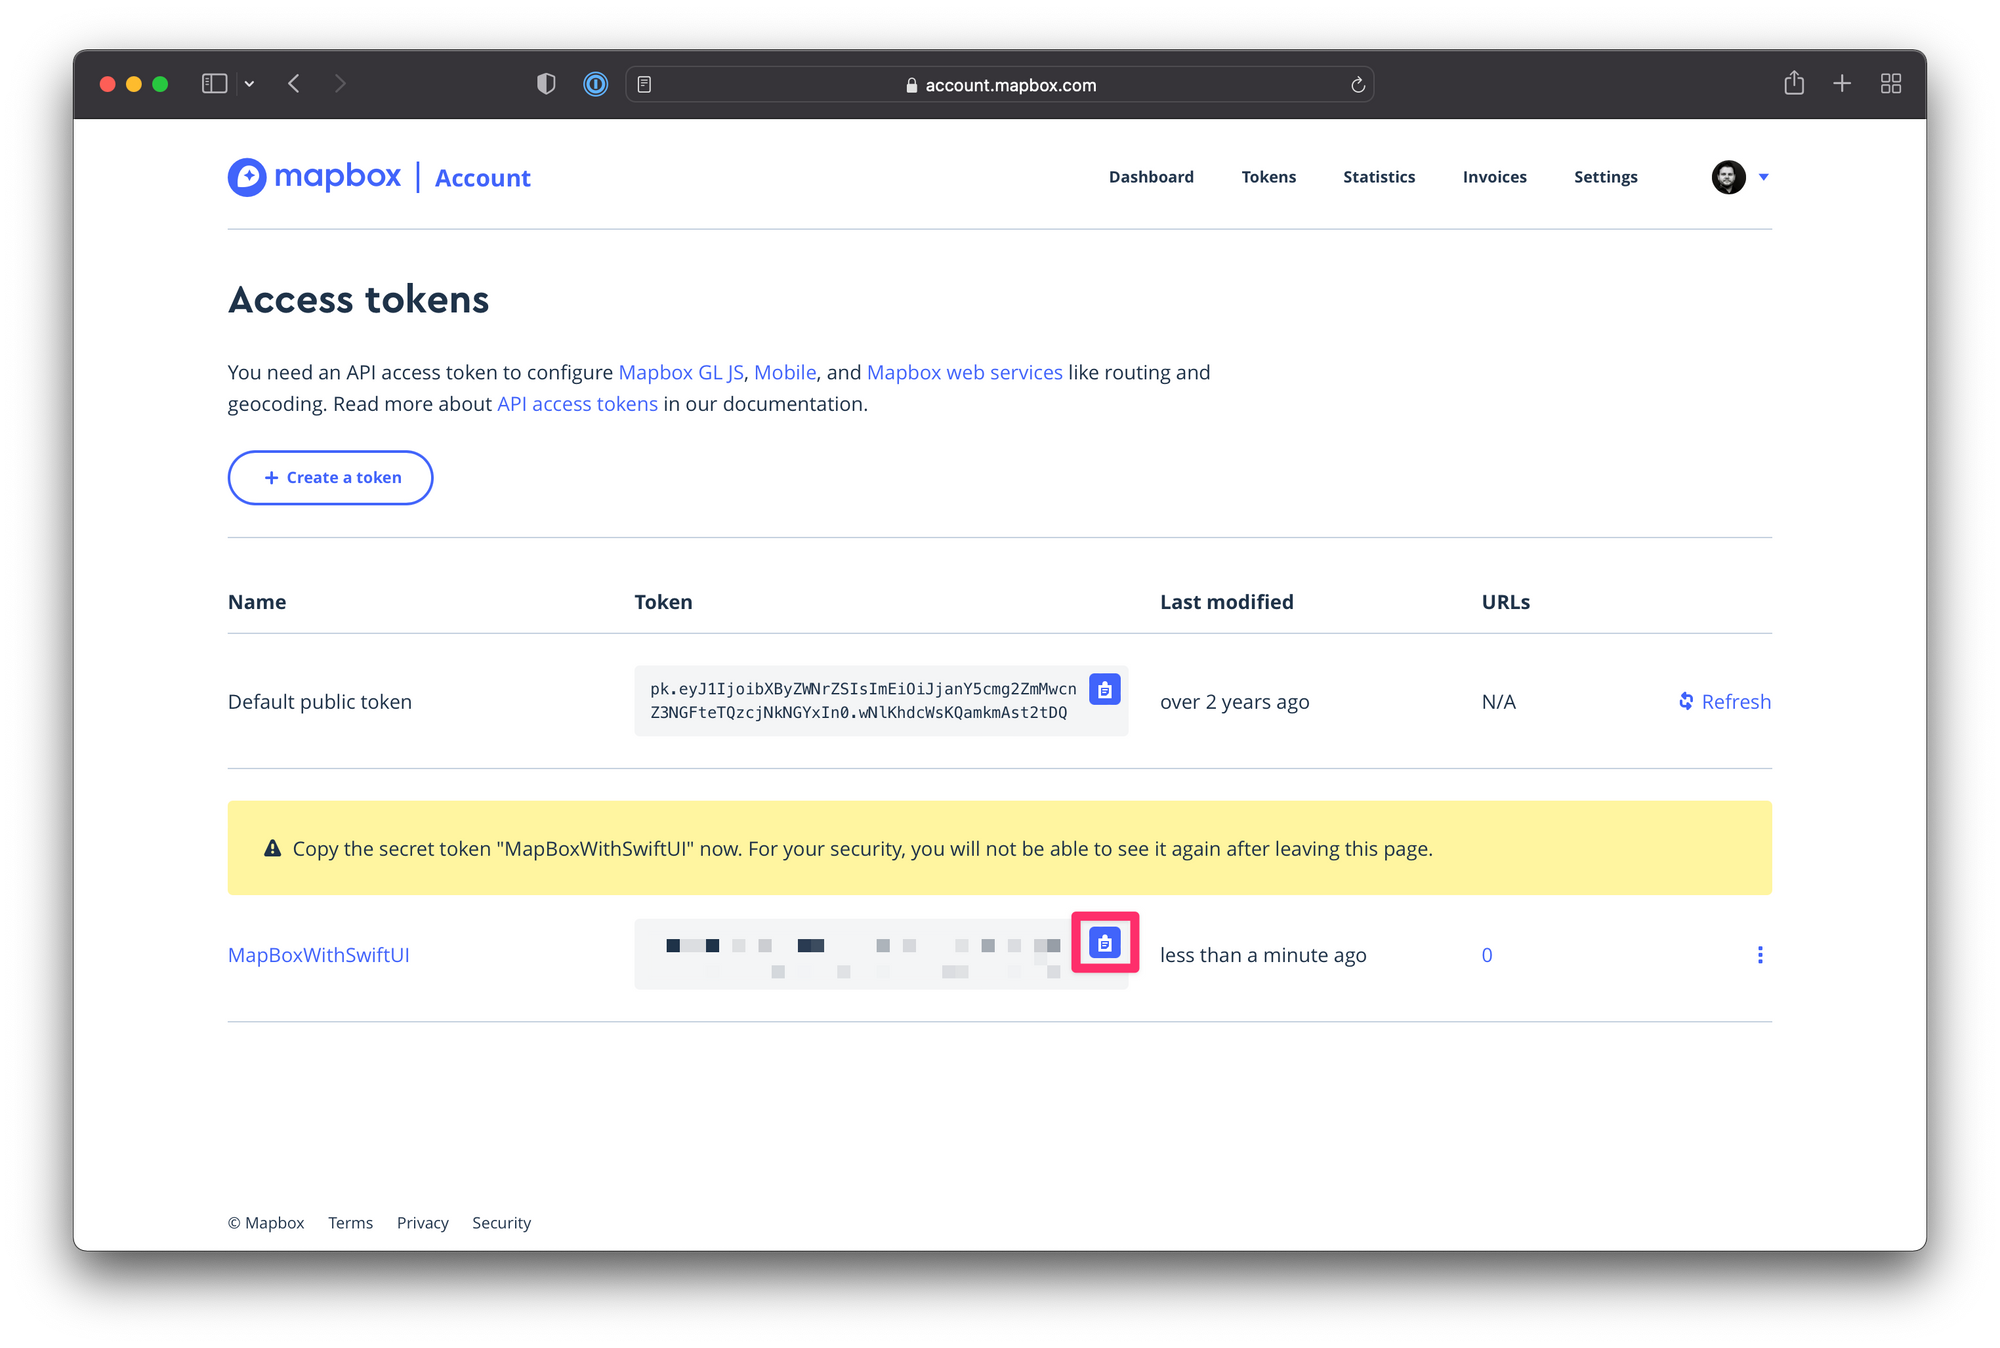
Once created, you can copy the access token and store it in a safe place as it will not be displayed again. The token is used inside Xcode and also inside a configuration file inside your macOS user's home folder (not the project folder) to work with Mapbox on your development machine.
With Terminal, you can create a .netrc file in your home directory to store the necessary configuration options. You can edit the file directly in Terminal using a text edit tool like vi or nano.
touch .netrc
nano .netrc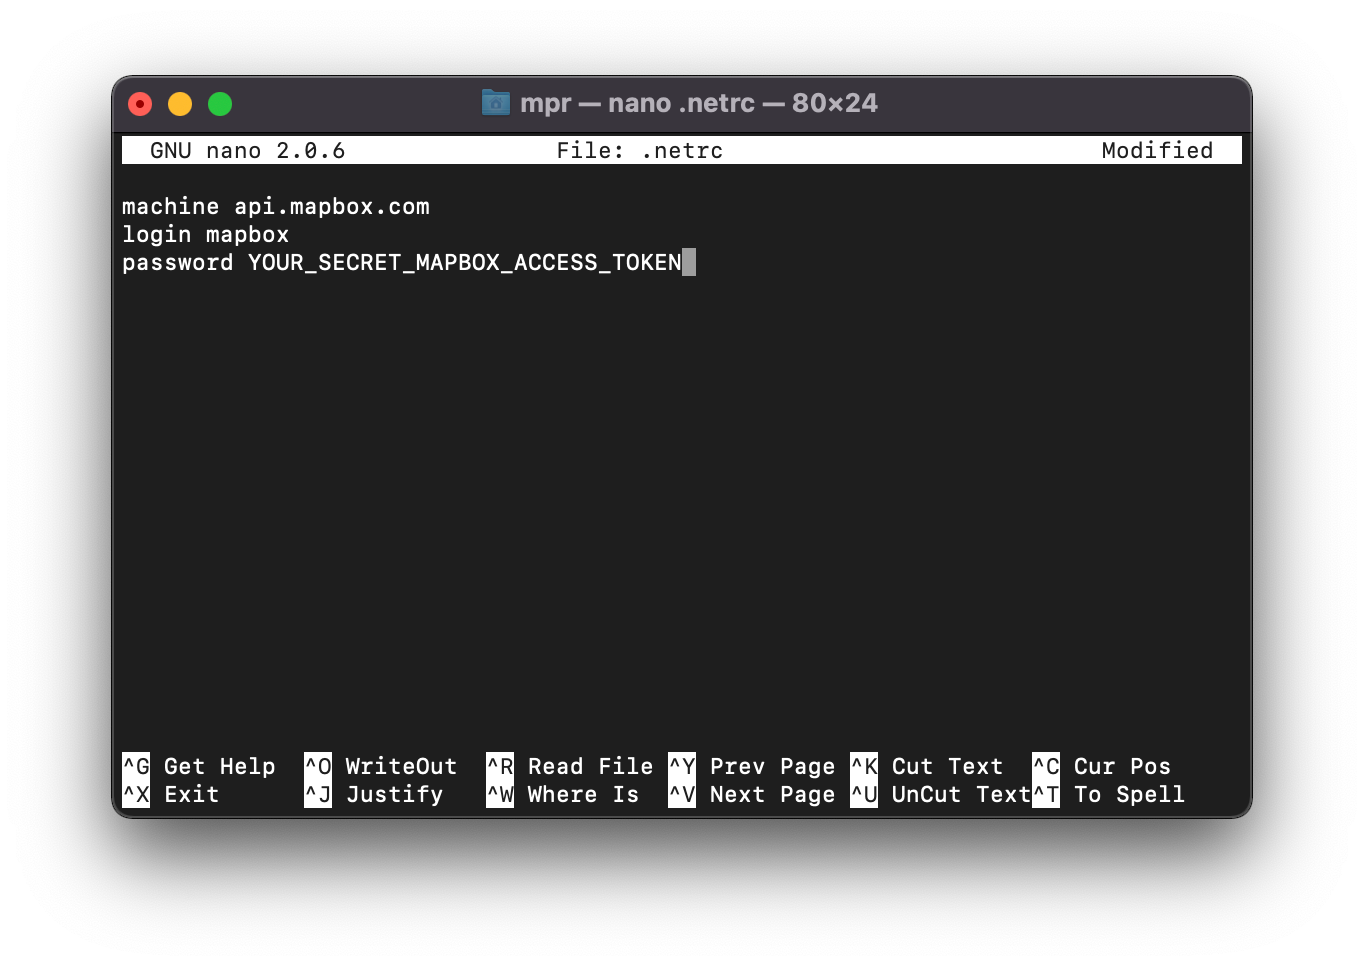
The relevant information is as follow:
machine api.mapbox.com
login mapbox
password YOUR_ACCESS_TOKEN
Configuration of .ntrc file with access token
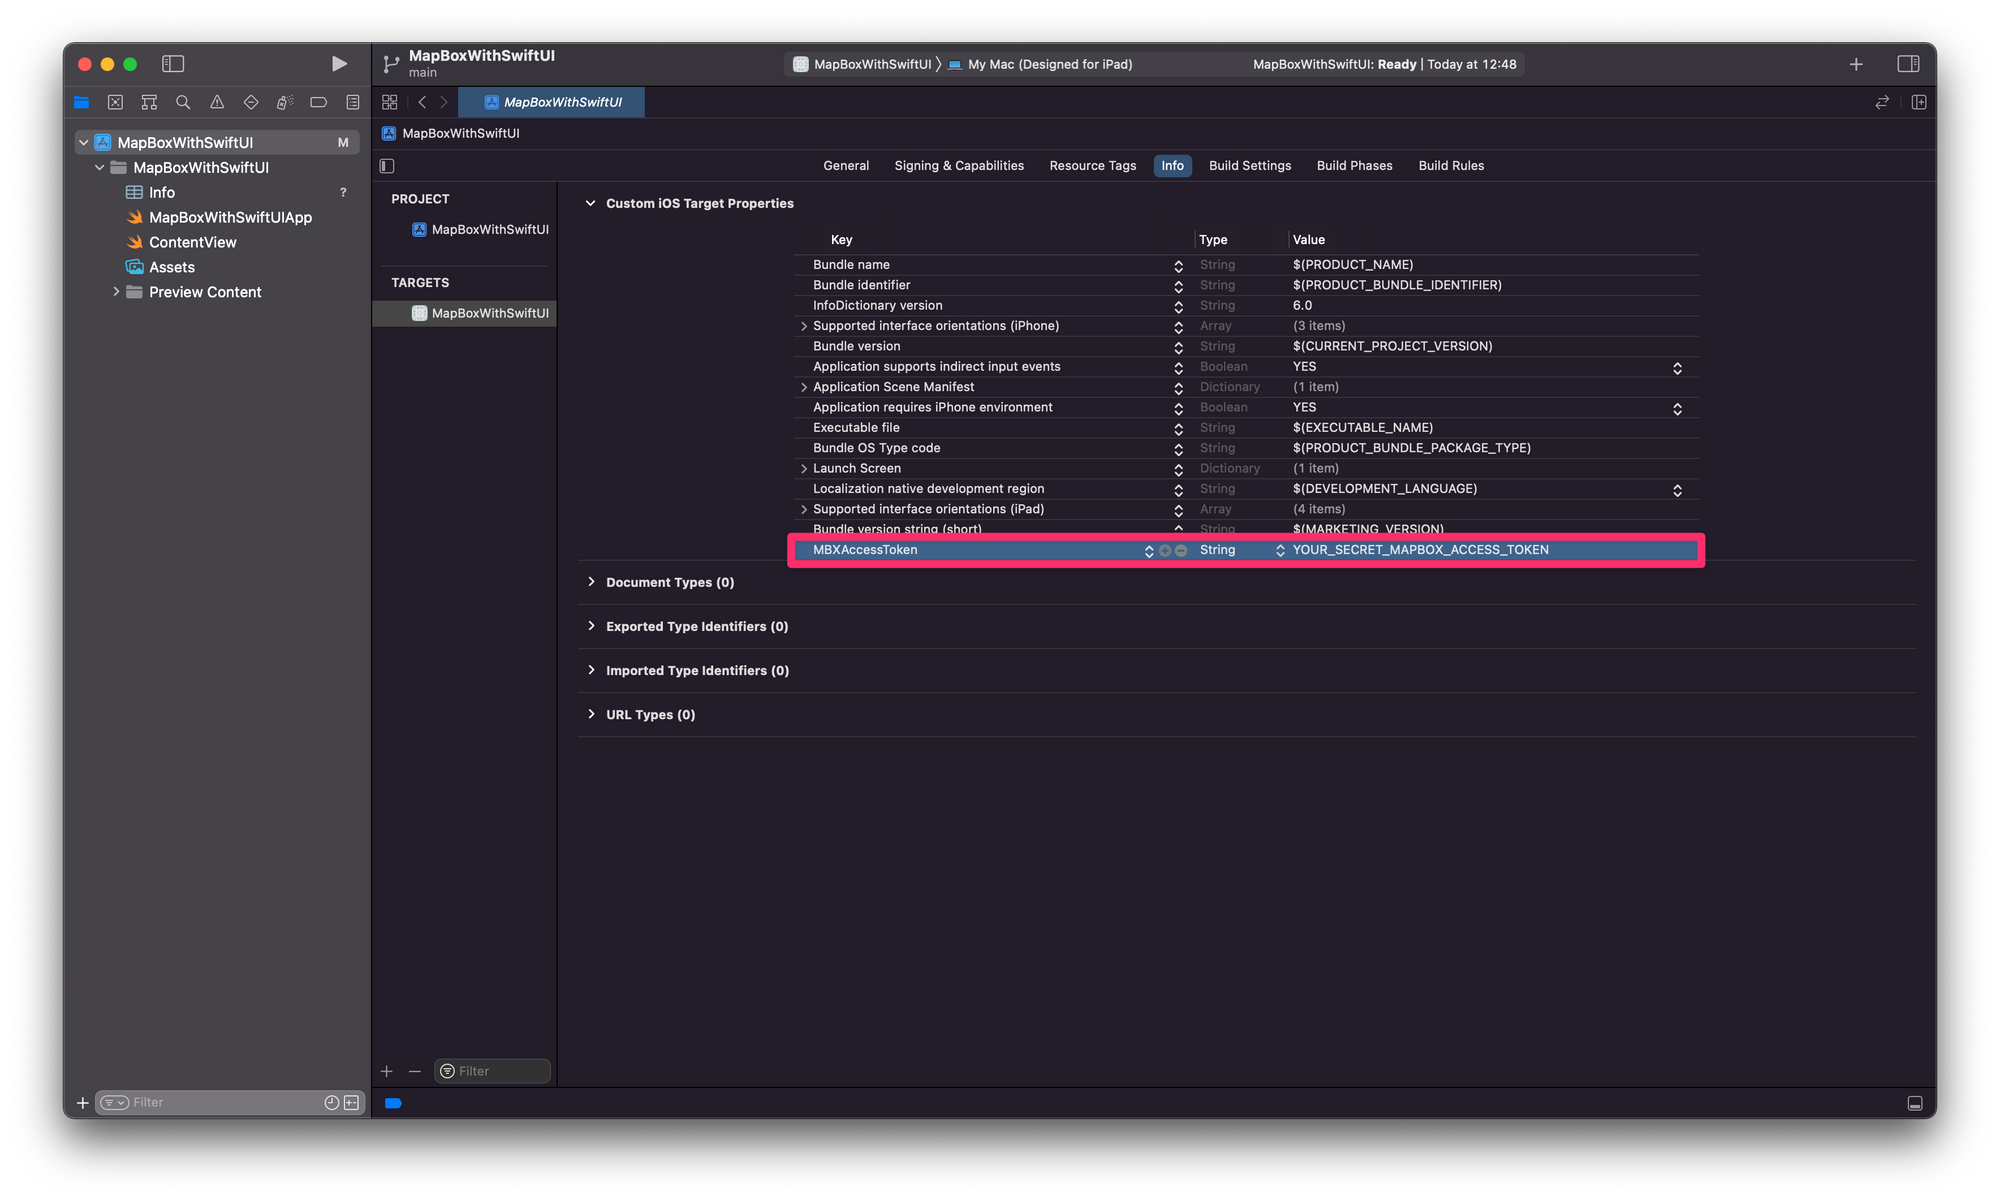
As the last step, you have to also add the access token to the configuration of your Xcode project by adding an entry in the info.plist file. Add MBXAccessToken as the key and your access token as the value.
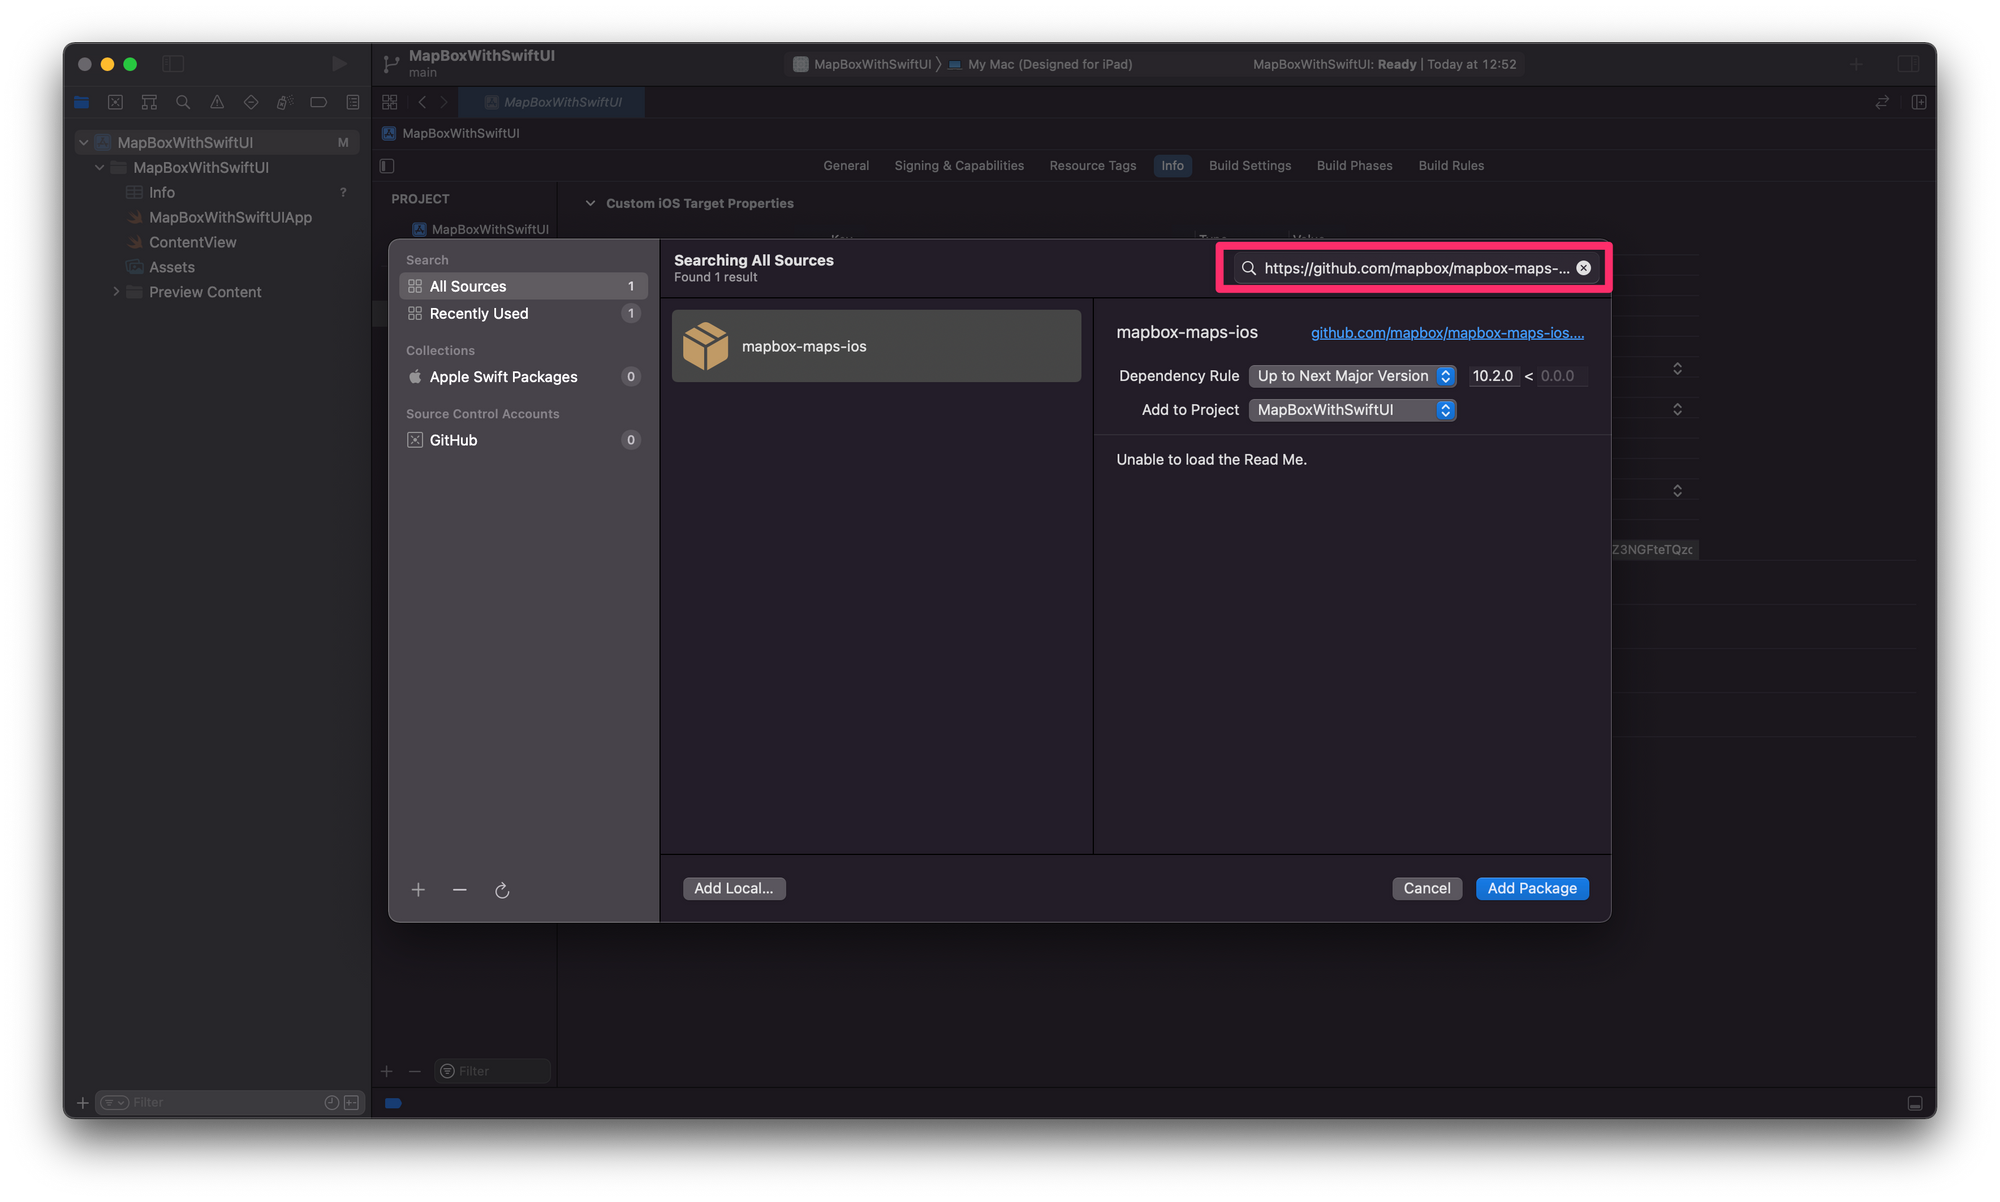
Now you can add Mapbox as a dependency using the Swift Package Manager. To do it go to the Xcode Menu > File > Add Package and search for Mapbox in the appearing dialogue. Alternatively, you can also paste the GitHub URL https://github.com/mapbox/mapbox-maps-ios.git for the Mapbox project in the search field.
Finally, the dependencies will be added to the project and you are ready to use Mapbox inside your app.
Creating Mapbox Views
The Mapbox SDK comes with support for UIKit, but anyway, the framework can be used in the context of SwiftUI by making use of UIViewRepresentable and UIViewControllerRepresentable. These special views for SwiftUI wrap UIKit elements such as UIView and UIViewController in SwiftUI compatible views to be used inside a SwiftUI app.
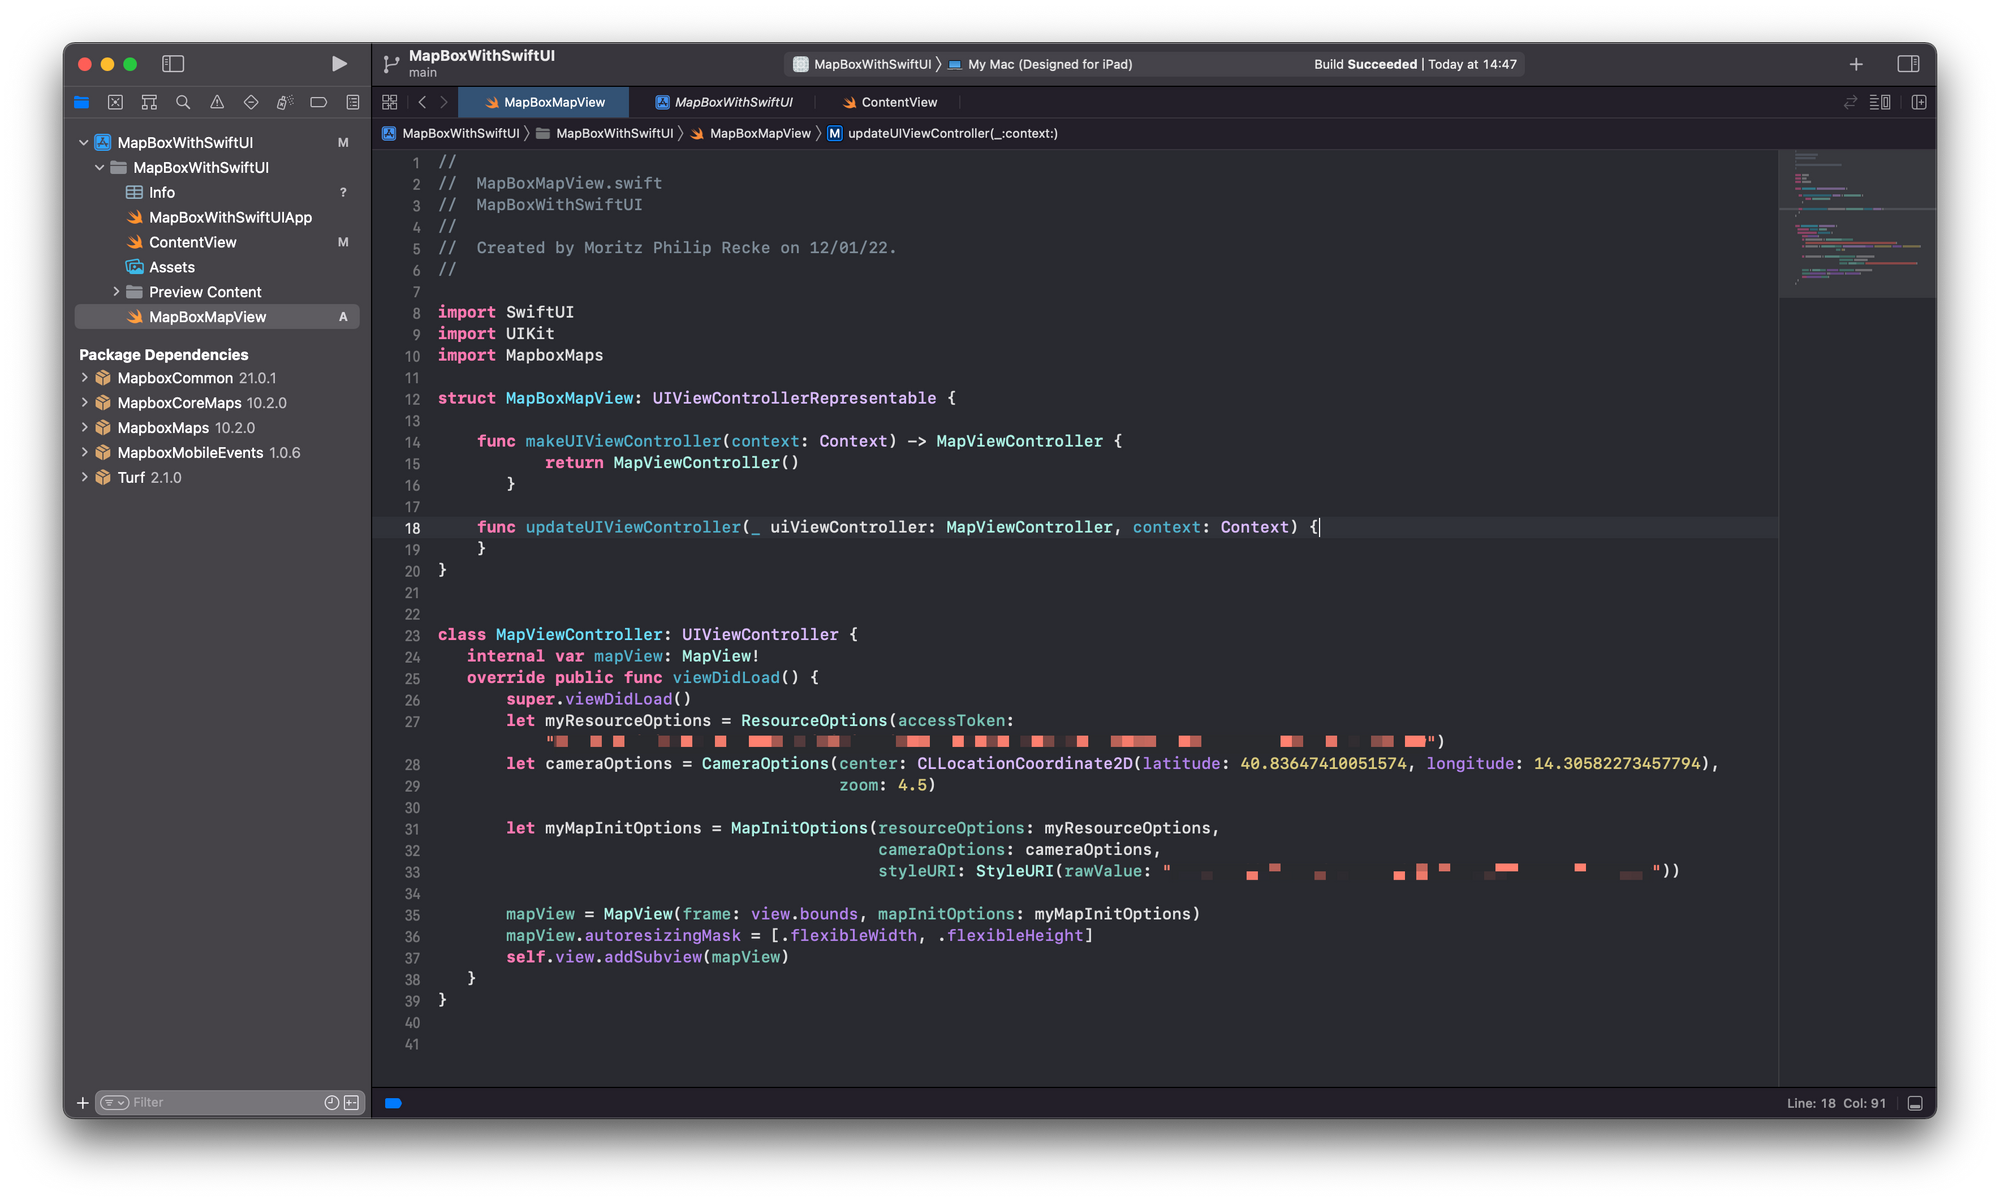
Create a new Swift file called MapBoxMapView.swift to host a UIViewControllerRepresentable structure. Inside create a MaxBoxMapView struct, which will be the View used throughout the SwiftUI app.
There are 2 required protocol stubs that need to be added, a updateUIViewController(_,context:) and a makeUIViewController(context:) function, that creates and updates the view controller that is then used in a SwiftUI compatible view. In this example, the view controller that we are going to create is called MapViewController.
import SwiftUI
import MapboxMaps

struct MapBoxMapView: UIViewControllerRepresentable {

    func makeUIViewController(context: Context) -> MapViewController {
           return MapViewController()
       }

    func updateUIViewController(_ uiViewController: MapViewController, context: Context) {
    }
}
Next, create the MapViewController class to implement the Mapbox map as it would be inside an UIKIt implementation. It is quite simple and works with the MapView object that Mapbox introduced in their version 10 major and its entailed upgrade to the SDK.
Create a constant called myResourceOptions to provide your access token to the Mapbox framework and a constant called myMapInitOptions to set up the basic configuration of the Mapbox map to be displayed.
Then initialize the mapView property using the myMapInitOptions object and add it as a subview to the view hierarchy. That's it.
class MapViewController: UIViewController {
   internal var mapView: MapView!
   override public func viewDidLoad() {
       super.viewDidLoad()
       let myResourceOptions = ResourceOptions(accessToken: "YOUR-ACCESS-TOKEN")
       let myMapInitOptions = MapInitOptions(resourceOptions: myResourceOptions)

       mapView = MapView(frame: view.bounds, mapInitOptions: myMapInitOptions)
       mapView.autoresizingMask = [.flexibleWidth, .flexibleHeight]
       self.view.addSubview(mapView)
   }
}
Of course, for a feature-rich app, other things are needed. For example, displaying the users' locations or annotations on the map. But these few steps will already allow you to display a Mapbox map in your app.
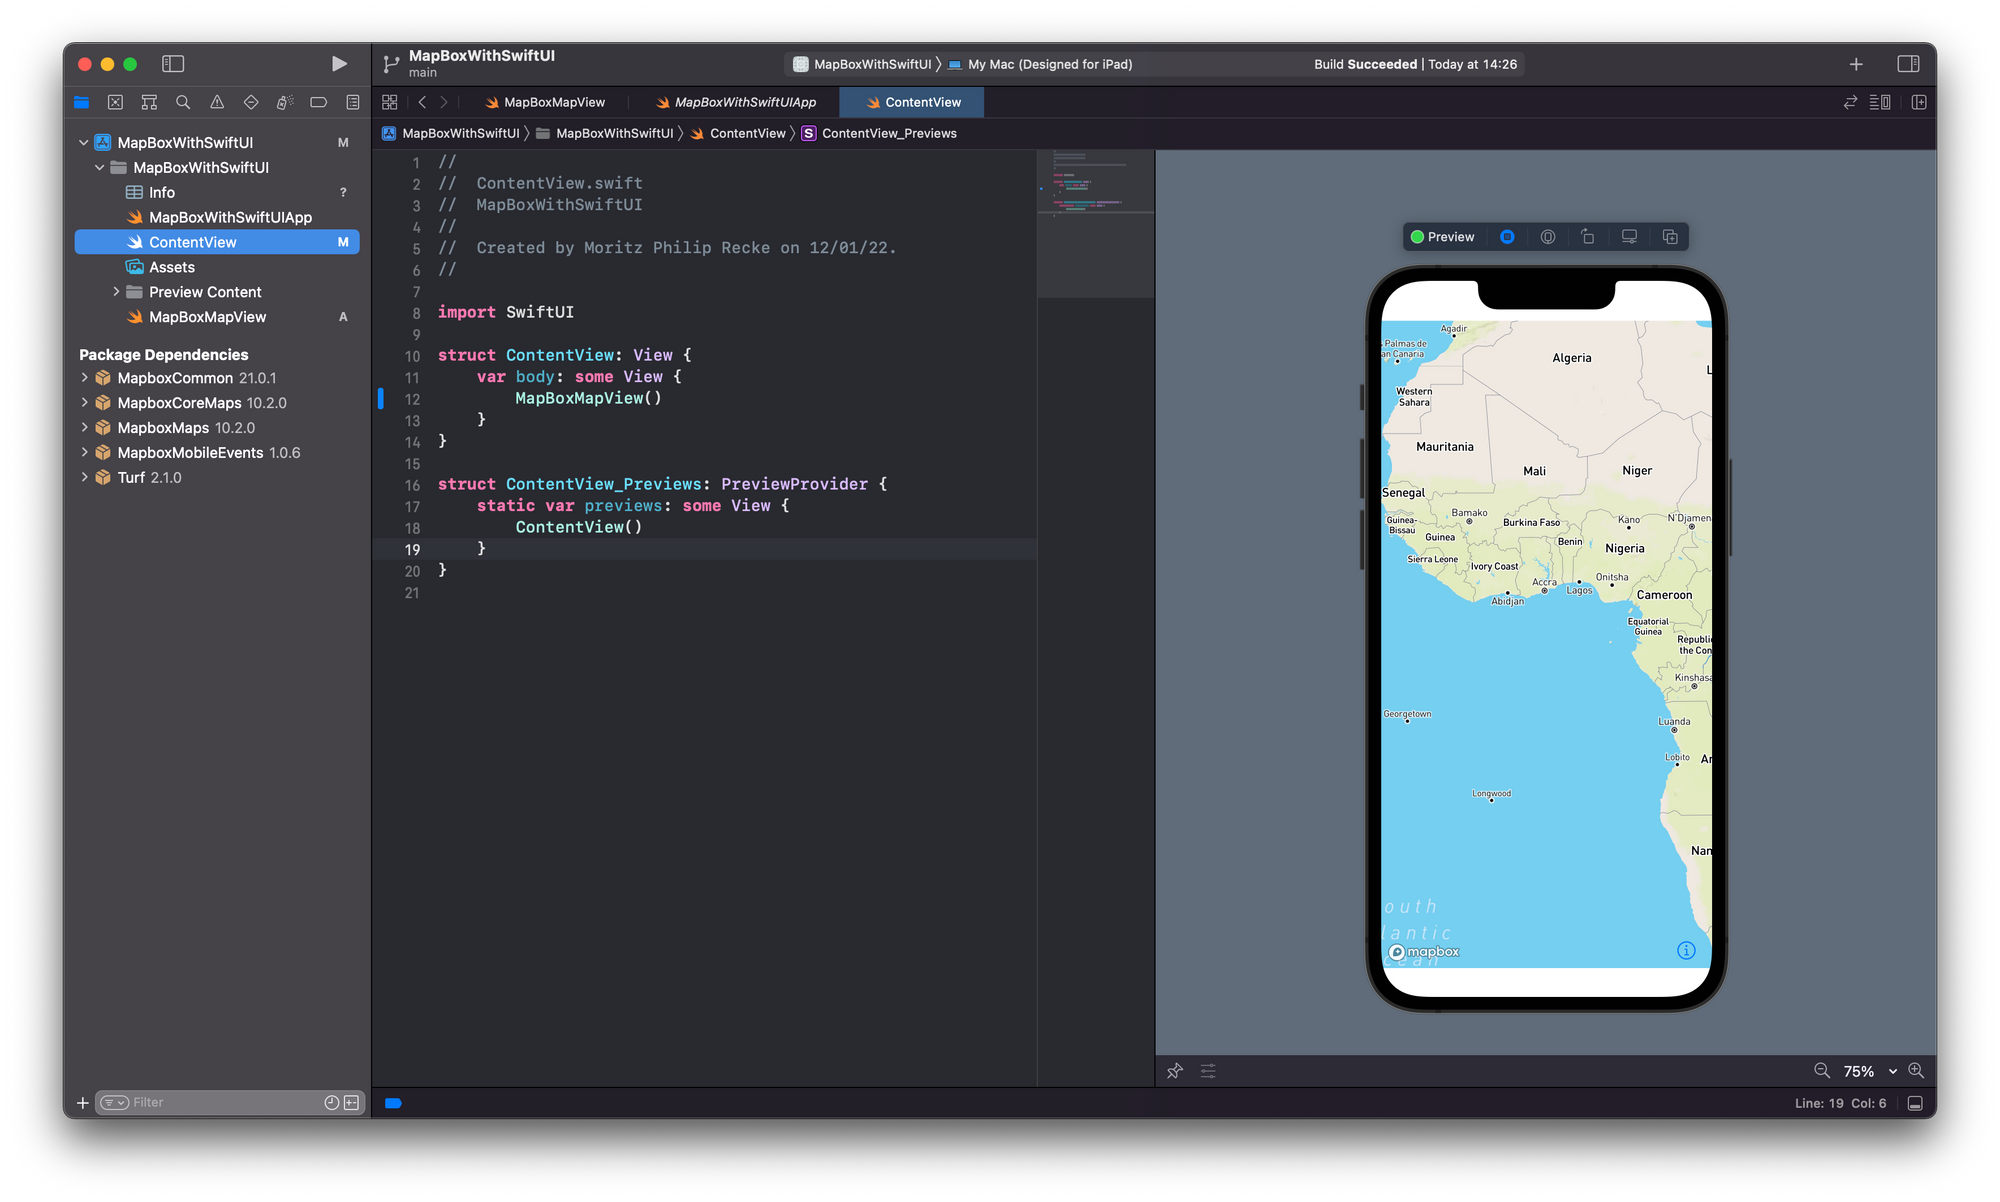
With the default configuration, you can use the MapBoxMapView inside your SwiftUI app, for example in the default ContentView.swift that is automatically created when starting a SwiftUI app for iOS.
With the default MapInitOptions the map will be centered at coordinates of longitude zero and latitude zero, also known as Null Island. Of course, these parameters are easy to change and we will get into that in just a moment.
Customizing the Mapbox Camera and Style
Many things can be done with the Mapbox SDK. For example, you add annotations to the map, show the user's location, use the map for navigation, create animations and add custom styles and layouts to the map itself.
The Mapbox SDK documentation covers this in great length, so we are going to focus on setting the camera or the map to a location of our choice as well as changing the style of the map.
Setting the camera of the map
In the MapViewController class, you can add a constant called cameraOptions to configure the center of the map, its zoom level, as well as bearing and pitch. The center is provided as an CLLocationCoordinate2D object, with latitude and longitude. The zoom level, bearing, and pitch can be used to adjust the height of the camera, its orientation, and perspective. If some of these values are omitted, the default values will be used.
let cameraOptions = CameraOptions(center: CLLocationCoordinate2D(latitude: 40.83647410051574, longitude: 14.30582273457794), zoom: 4.5, bearing: -17.6, pitch: 45)

[...]

let myMapInitOptions = MapInitOptions(resourceOptions: myResourceOptions, cameraOptions: cameraOptions)
CameraOptions for MapInitOptions used in the MapView
These settings could also be adjusted depending on the use case of the app. A common use case would be to update the map view based on the user's location. In a later article, we will cover how to obtain the user's location in real-time and how the MapMox view can be updated based on the device's coordinates. If you are curious, check out the documentation.
Setting the style of the map
When creating the MapInitOptions object, you can also provide a styleURI parameter to configure the look of the map. There are various default options to choose from, for example:
- Streets:
StyleURI.streets - Outdoors:
StyleURI.outdoors - Satellite:
StyleURI.satellite - Satellite & Streets:
StyleURI.satelliteStreets - Light:
StyleURI.light - Dark:
StyleURI.dark
let myMapInitOptions = MapInitOptions(resourceOptions: myResourceOptions, cameraOptions: cameraOptions, styleURI: StyleURI.dark)Add a Mapbox style to the MapInitOptions with the styleURI parameter
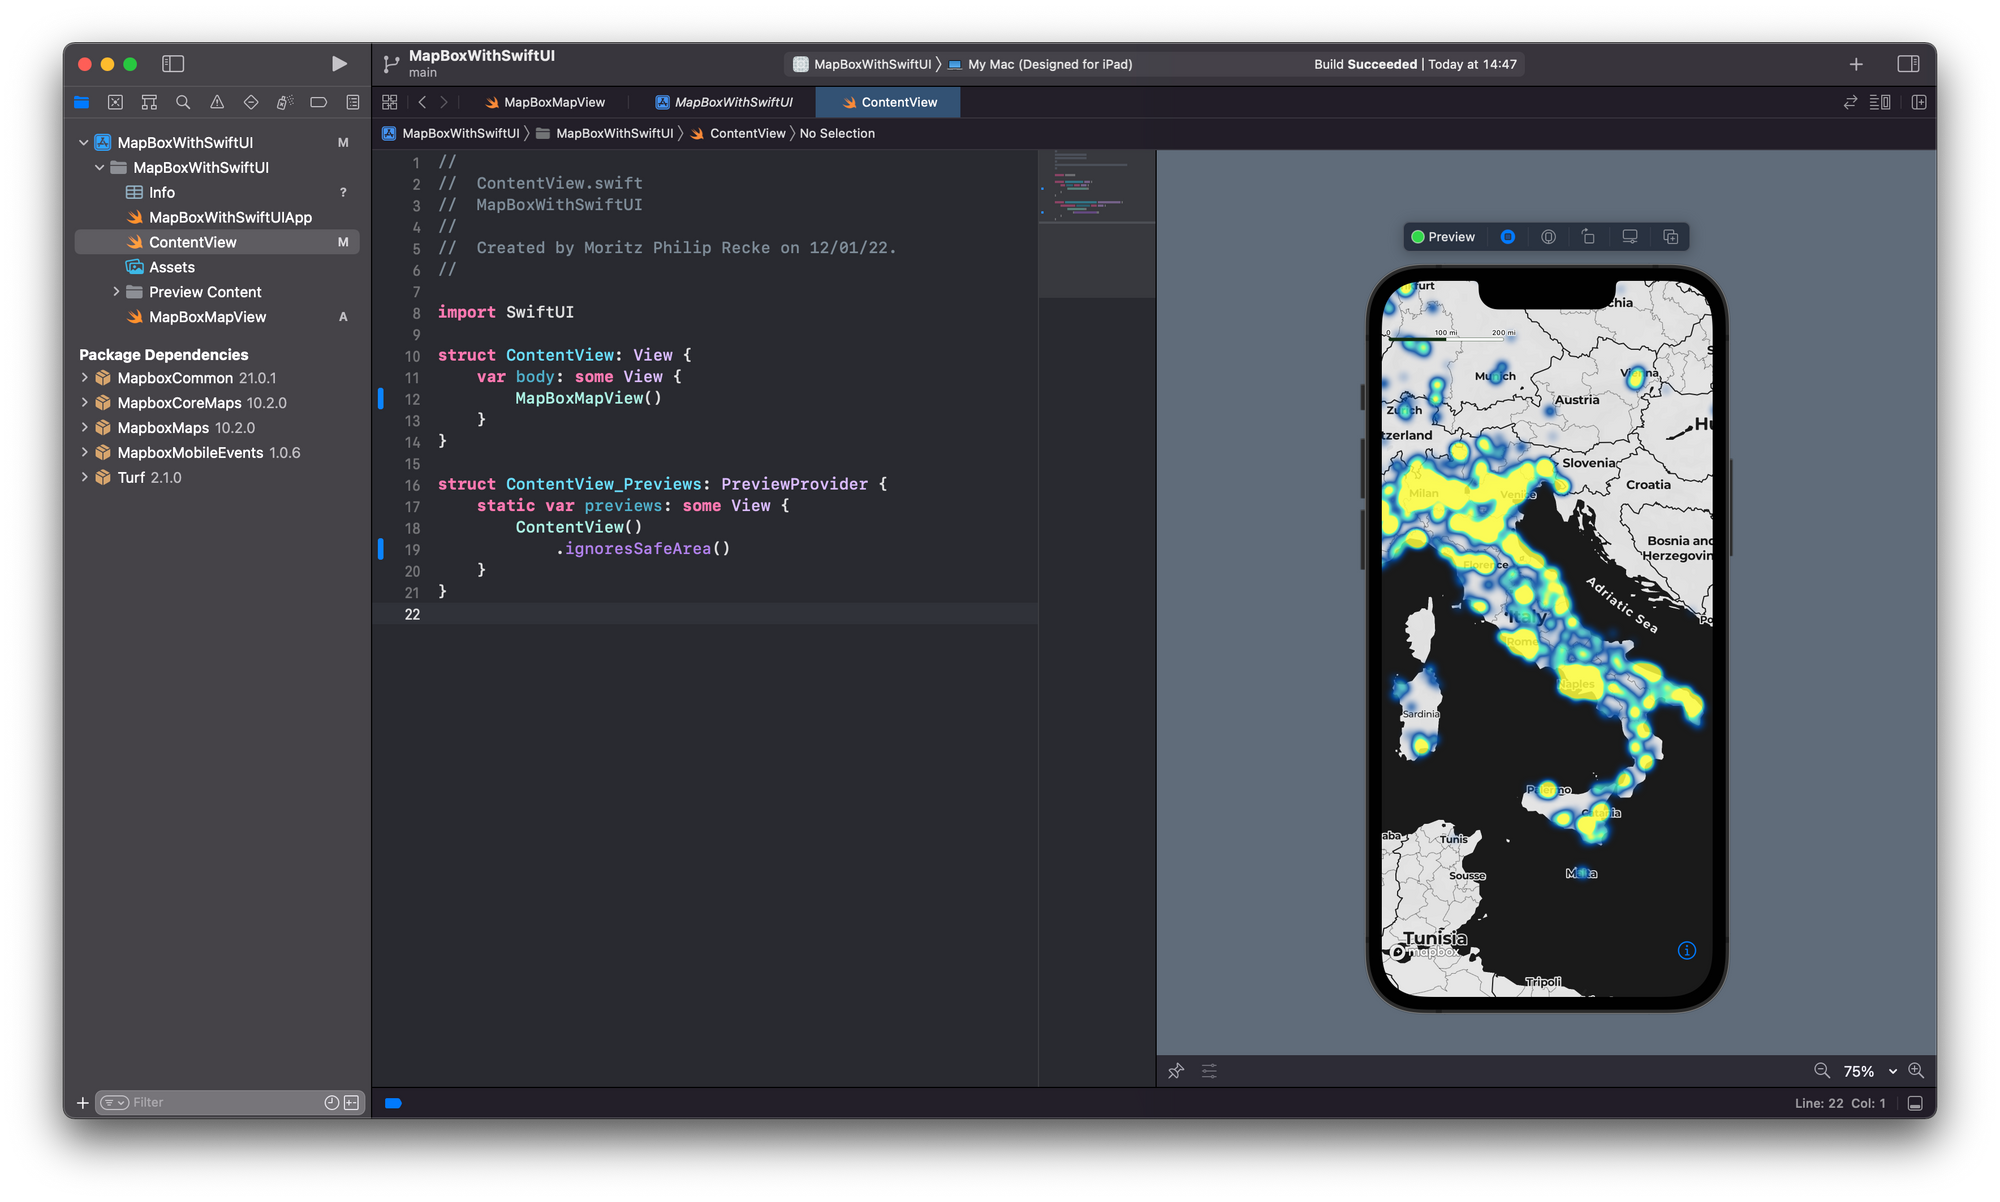
To push this even further, you can also specify custom styles, for example by creating a uniquely designed map style in Mapbox Studio. Here you can see a custom map created for the Noise Gate app, making use of the heat map features that Mapbox offers.
There are many base styles available to choose from, you can upload GeoJSON files and there are no limits to your creativity on how to make your map stand out. Whenever a design is finished, you can share the style in the Mapbox Studio Editor by copying the style URL.
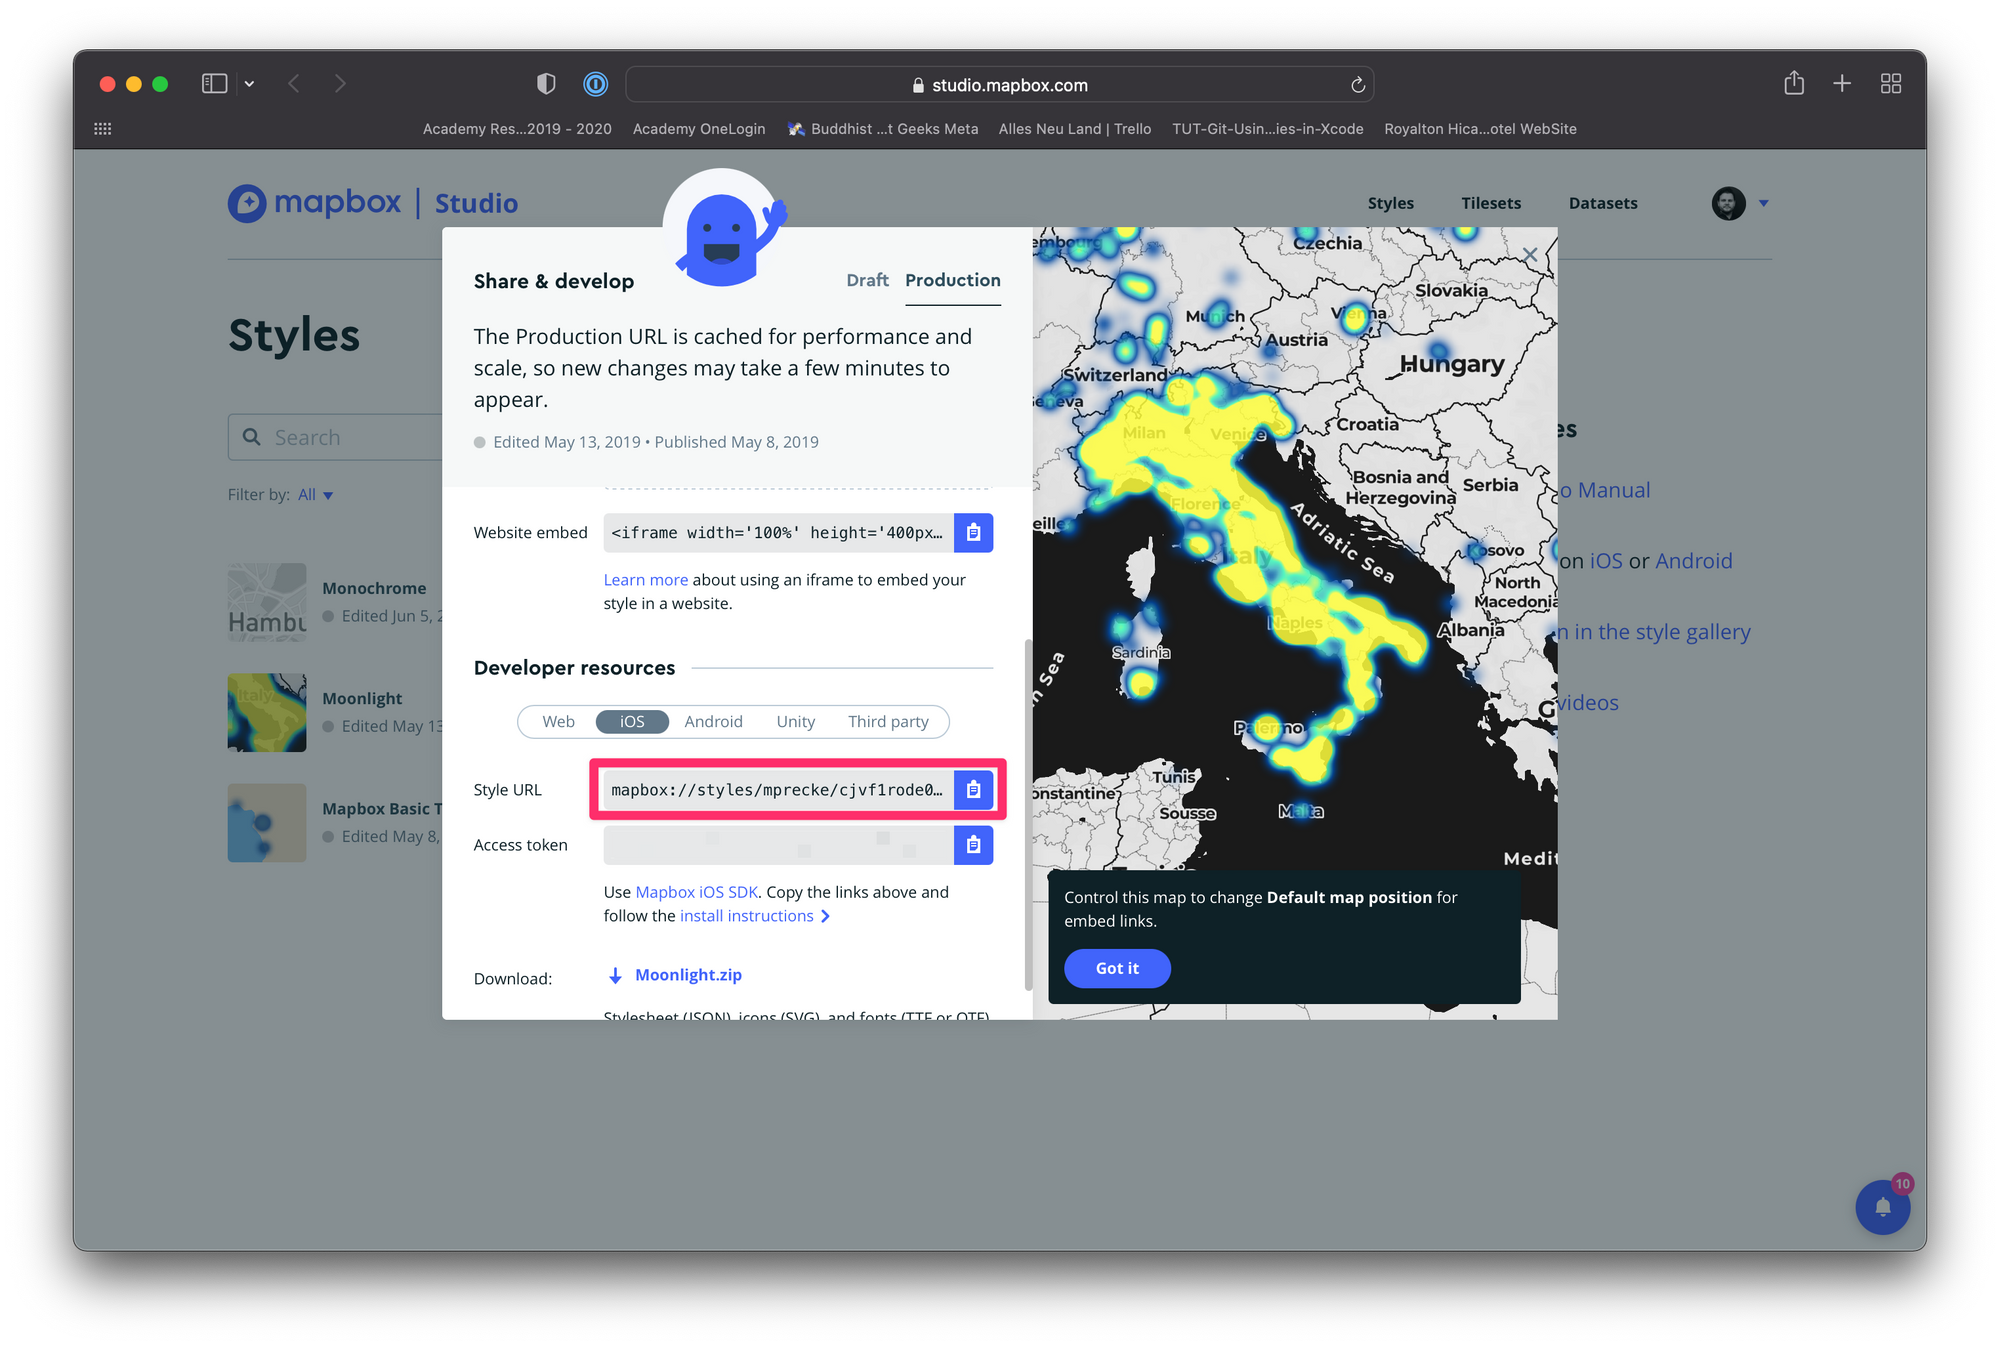
Then, in the MapInitOptions object you can add the URL as the styleURI parameter.
let myMapInitOptions = MapInitOptions(resourceOptions: myResourceOptions, cameraOptions: cameraOptions, styleURI: StyleURI(rawValue: "mapbox://styles/YOUR-USER-NAME/YOUR-STYLE"))Add the Mapbox studio Style URL as the styleURI in the MapInitOptions
As a result, the overall code for the MapViewController still is very concise and easy to adopt even with little knowledge about UIKit.
import SwiftUI
import MapboxMaps

struct MapBoxMapView: UIViewControllerRepresentable {

    func makeUIViewController(context: Context) -> MapViewController {
           return MapViewController()
       }

    func updateUIViewController(_ uiViewController: MapViewController, context: Context) {
    }
}


class MapViewController: UIViewController {
   internal var mapView: MapView!
   override public func viewDidLoad() {
       super.viewDidLoad()
       let myResourceOptions = ResourceOptions(accessToken: "YOUR-ACCESS-TOKEN")
       let cameraOptions = CameraOptions(center: CLLocationCoordinate2D(latitude: 40.83647410051574, longitude: 14.30582273457794), zoom: 4.5)

       let myMapInitOptions = MapInitOptions(resourceOptions: myResourceOptions, cameraOptions: cameraOptions,styleURI: StyleURI(rawValue: "mapbox://styles/YOUR-USER-NAME/YOUR-STYLE"))

       mapView = MapView(frame: view.bounds, mapInitOptions: myMapInitOptions)
       mapView.autoresizingMask = [.flexibleWidth, .flexibleHeight]
       self.view.addSubview(mapView)
   }
}
And just like that, you can use the MapBoxMapView View in your ContentView.swift file to show a map of the location of your choosing with a custom map style.
In this case, I used the heatmap style that was created with the Noise Gate iOS app, the only iOS app that focuses exclusively on the dangerous impact of noise pollution on health and mental wellbeing. For more information, have a look here.
The map style also includes a heatmap layer, based on data added to the map inside Mapbox studie. The same effect can also be achieved inside the app itself by only using the basic syle of the map and generating the heatmap as an overlay layer inside the MapViewController. This however, is a topic for another day.
Stay tuned for more content on how to use maps in your SwiftUI apps. We will cover more in-depth features of MapKit as well as Mapbox, how to make use of Core Location, and other topics in the future.