
Using server-side Swift for machine learning processing
In this tutorial learn how to use a machine learning model on a Vapor server using Swift.


Apple has always been advocating for taking advantage of the powerful on-device machine learning processes in its ecosystem. From building to training and deploying models, Core ML offers lightning-fast performance and makes it simple to integrate machine learning models into your apps. To better understand how the Core ML framework works in details, check this tutorial.
However, in this never-ending progression of AI, the emerging technologies related to generative algorithms make things a bit trickier: heavy models can often require a significant expenditure of resources when processing on-device.
Updates to Machine Learning models are now a daily news item that reaches us on our trusted social networks. Even Apple has been associated with several rumors regarding possible developments and investments in the field of AI. Therefore, learning to interrogate models has become a necessary skill nowadays.
That being the case, if you have always wondered how to optimize the processing resources and introduce a decent level of decoupling for a more solid product, this is the right resource for you.
In this tutorial, you will discover how to host both Machine Learning models and functionalities on a server-based project using Vapor and get direct results in your SwiftUI-based client app without overloading your portable device’s memory.
Before we start
To follow this tutorial and easily get through it, you might need a good understanding of Swift, Core ML, Vision, Vapor, and a little knowledge of terminal commands.
Briefly introducing Vapor: it is a web framework for Swift that allows you to write web apps, Rest APIs, and HTTP servers in Swift.
In particular, it is designed with three principles in mind:
- It leverages the Swift language and all the benefits it offers.
- It is built on top of Apple's SwiftNIO, with a non-blocking, event-driven architecture in mind.
- It offers itself as expressive, protocol-oriented, and focused on type safety.
In addition, another incredible benefit of using Vapor for your backend is the community that is present behind the project. Indeed, it includes over a hundred official and community-maintained server-first Swift packages that you can use to create an experience based on your needs.
If you would like to find out more about Vapor, or better understand its architecture, we invite you to take a look at the official documentation, which is also very complete and includes some practical examples.
Now let’s get straight into the tutorial, shall we?
Step 1: Install Vapor and create a project
To install and use the latest version of Vapor on macOS, you need:
- Swift 5.6 or greater
- Homebrew installed, to install Vapor and set up the server-side project
If you already have Homebrew installed, open the Terminal app and type the following command to install Vapor:
$ brew install vapor
To ensure that Vapor has been installed properly, try the help command.
$ vapor --help
Now that we have all the necessary dependencies installed, we can create the project using our Mac as a local host. To do this, we can go to the folder where you want to create the project (we are doing it on the Desktop for this tutorial) and use Vapor's CLI to initialize the project with the following command:
$ vapor new <server-project-name> -n
For simplicity, we opted for the name “server” for our server project and we will keep using this name in this tutorial, but you can choose any name you want.
-n if you need a basic empty template, that is fine for this template, this will automatically answer no to all the questions asked during the setup process. If you remove this flag, the Vapor CLI will ask you if you want to install Fluent (ORM) and Leaf (templating). If you need it for your project, it could be useful to not use the -n flag, but specifically set if you want or not this plugin respectively with --fluent/--no-fluent and --leaf/--no-leafTo kick things off, let’s open the project with Xcode. Open the newly created folder and open the Package.swift file:
$ cd <server-project-name>
$ open Package.swift
Now it’s the time to configure the project and introduce the ML Model.
Step 2 - Configure the project on Xcode and prepare the ML Model
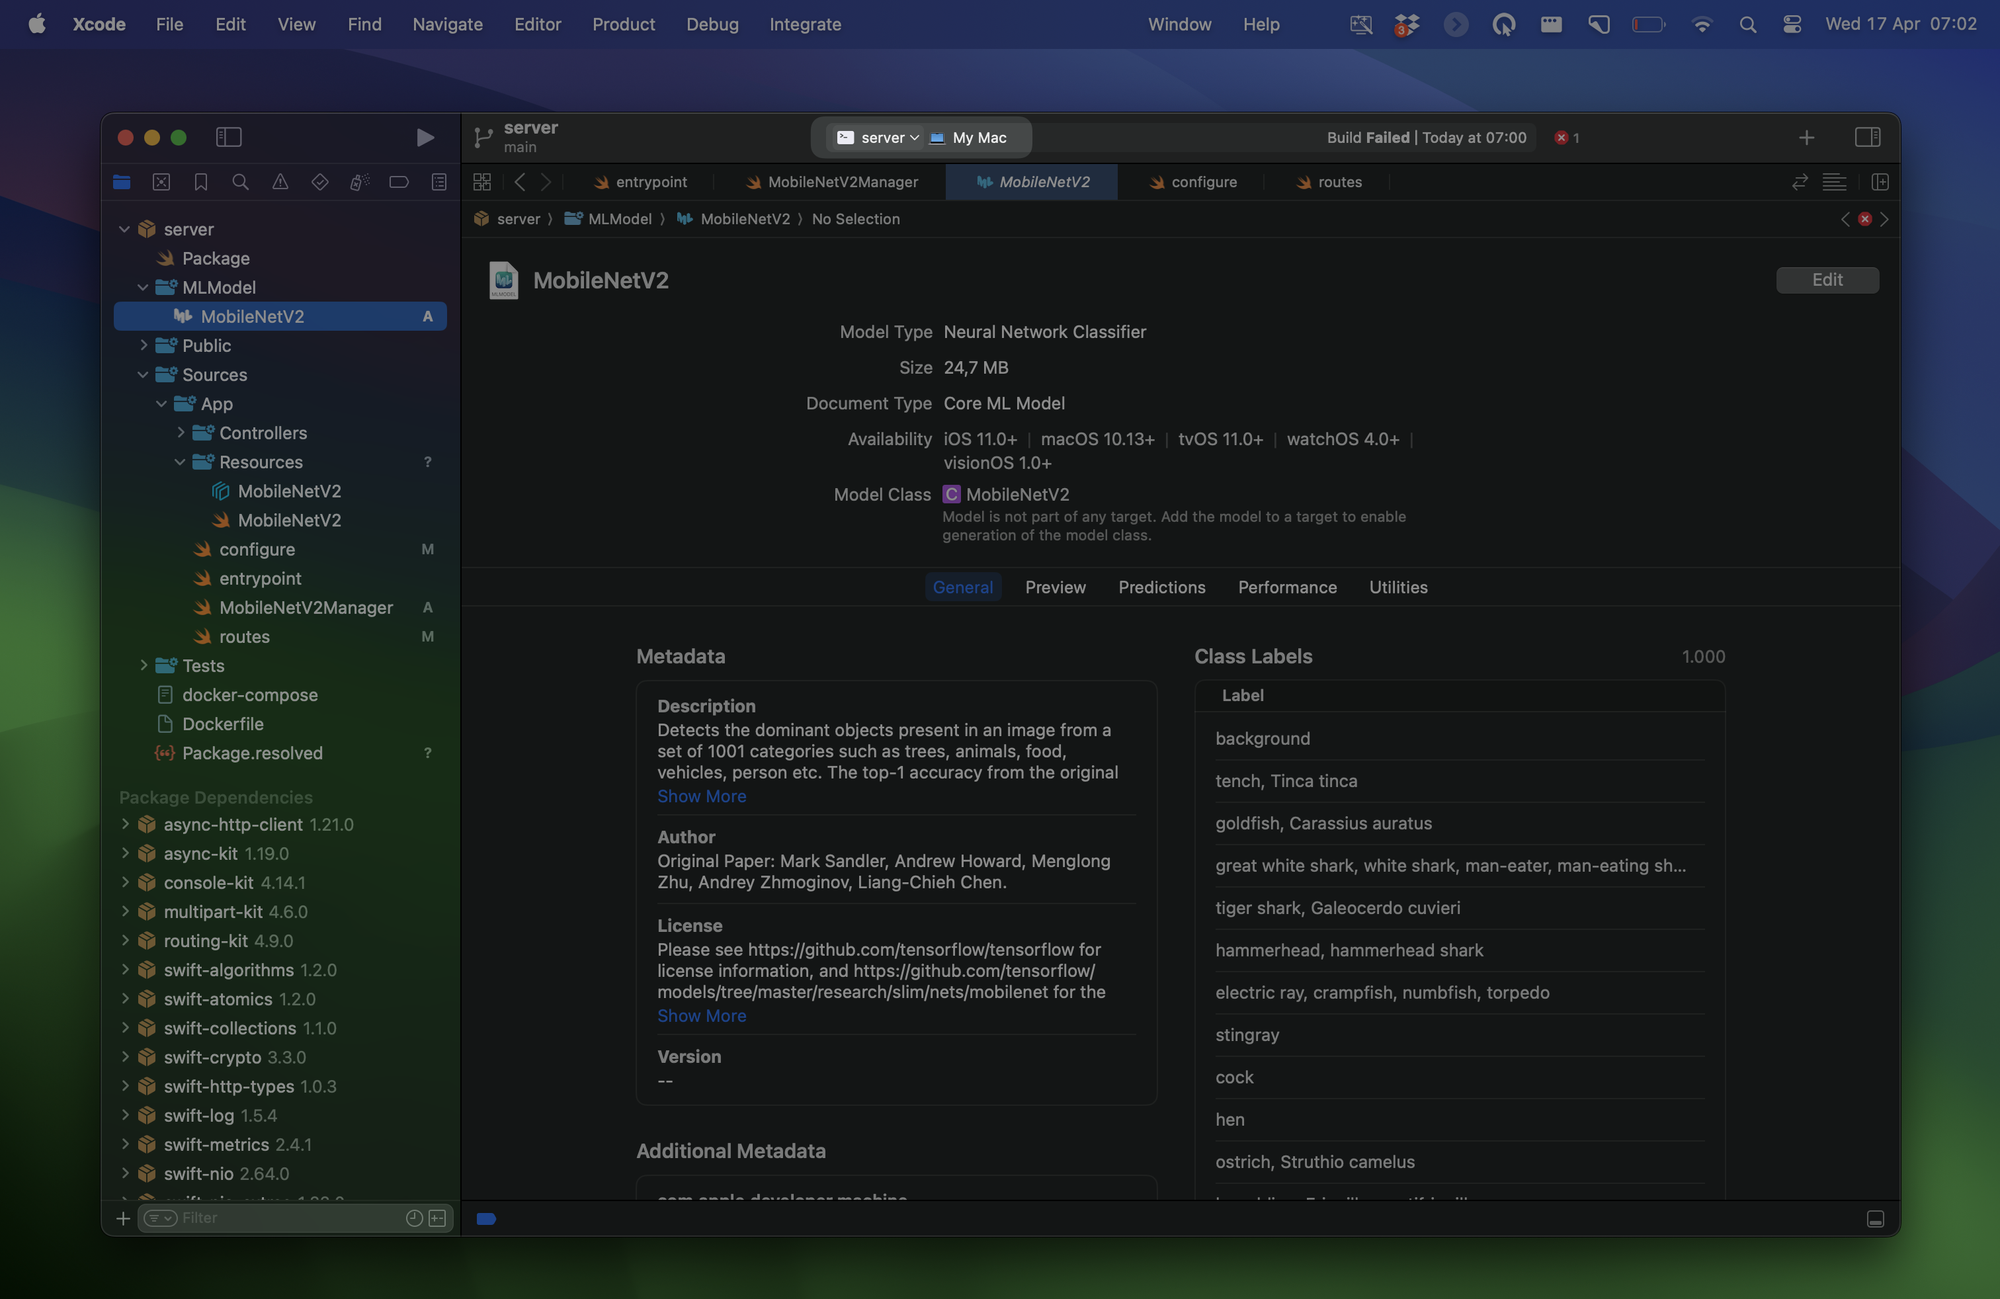
To start, you'll require a Core ML model. In this demonstration, we'll use an Image Classifier named MobileNetV2, which is a pre-trained model readily available on Apple's Core ML machine learning models page. However, feel free to experiment with any other model you prefer.
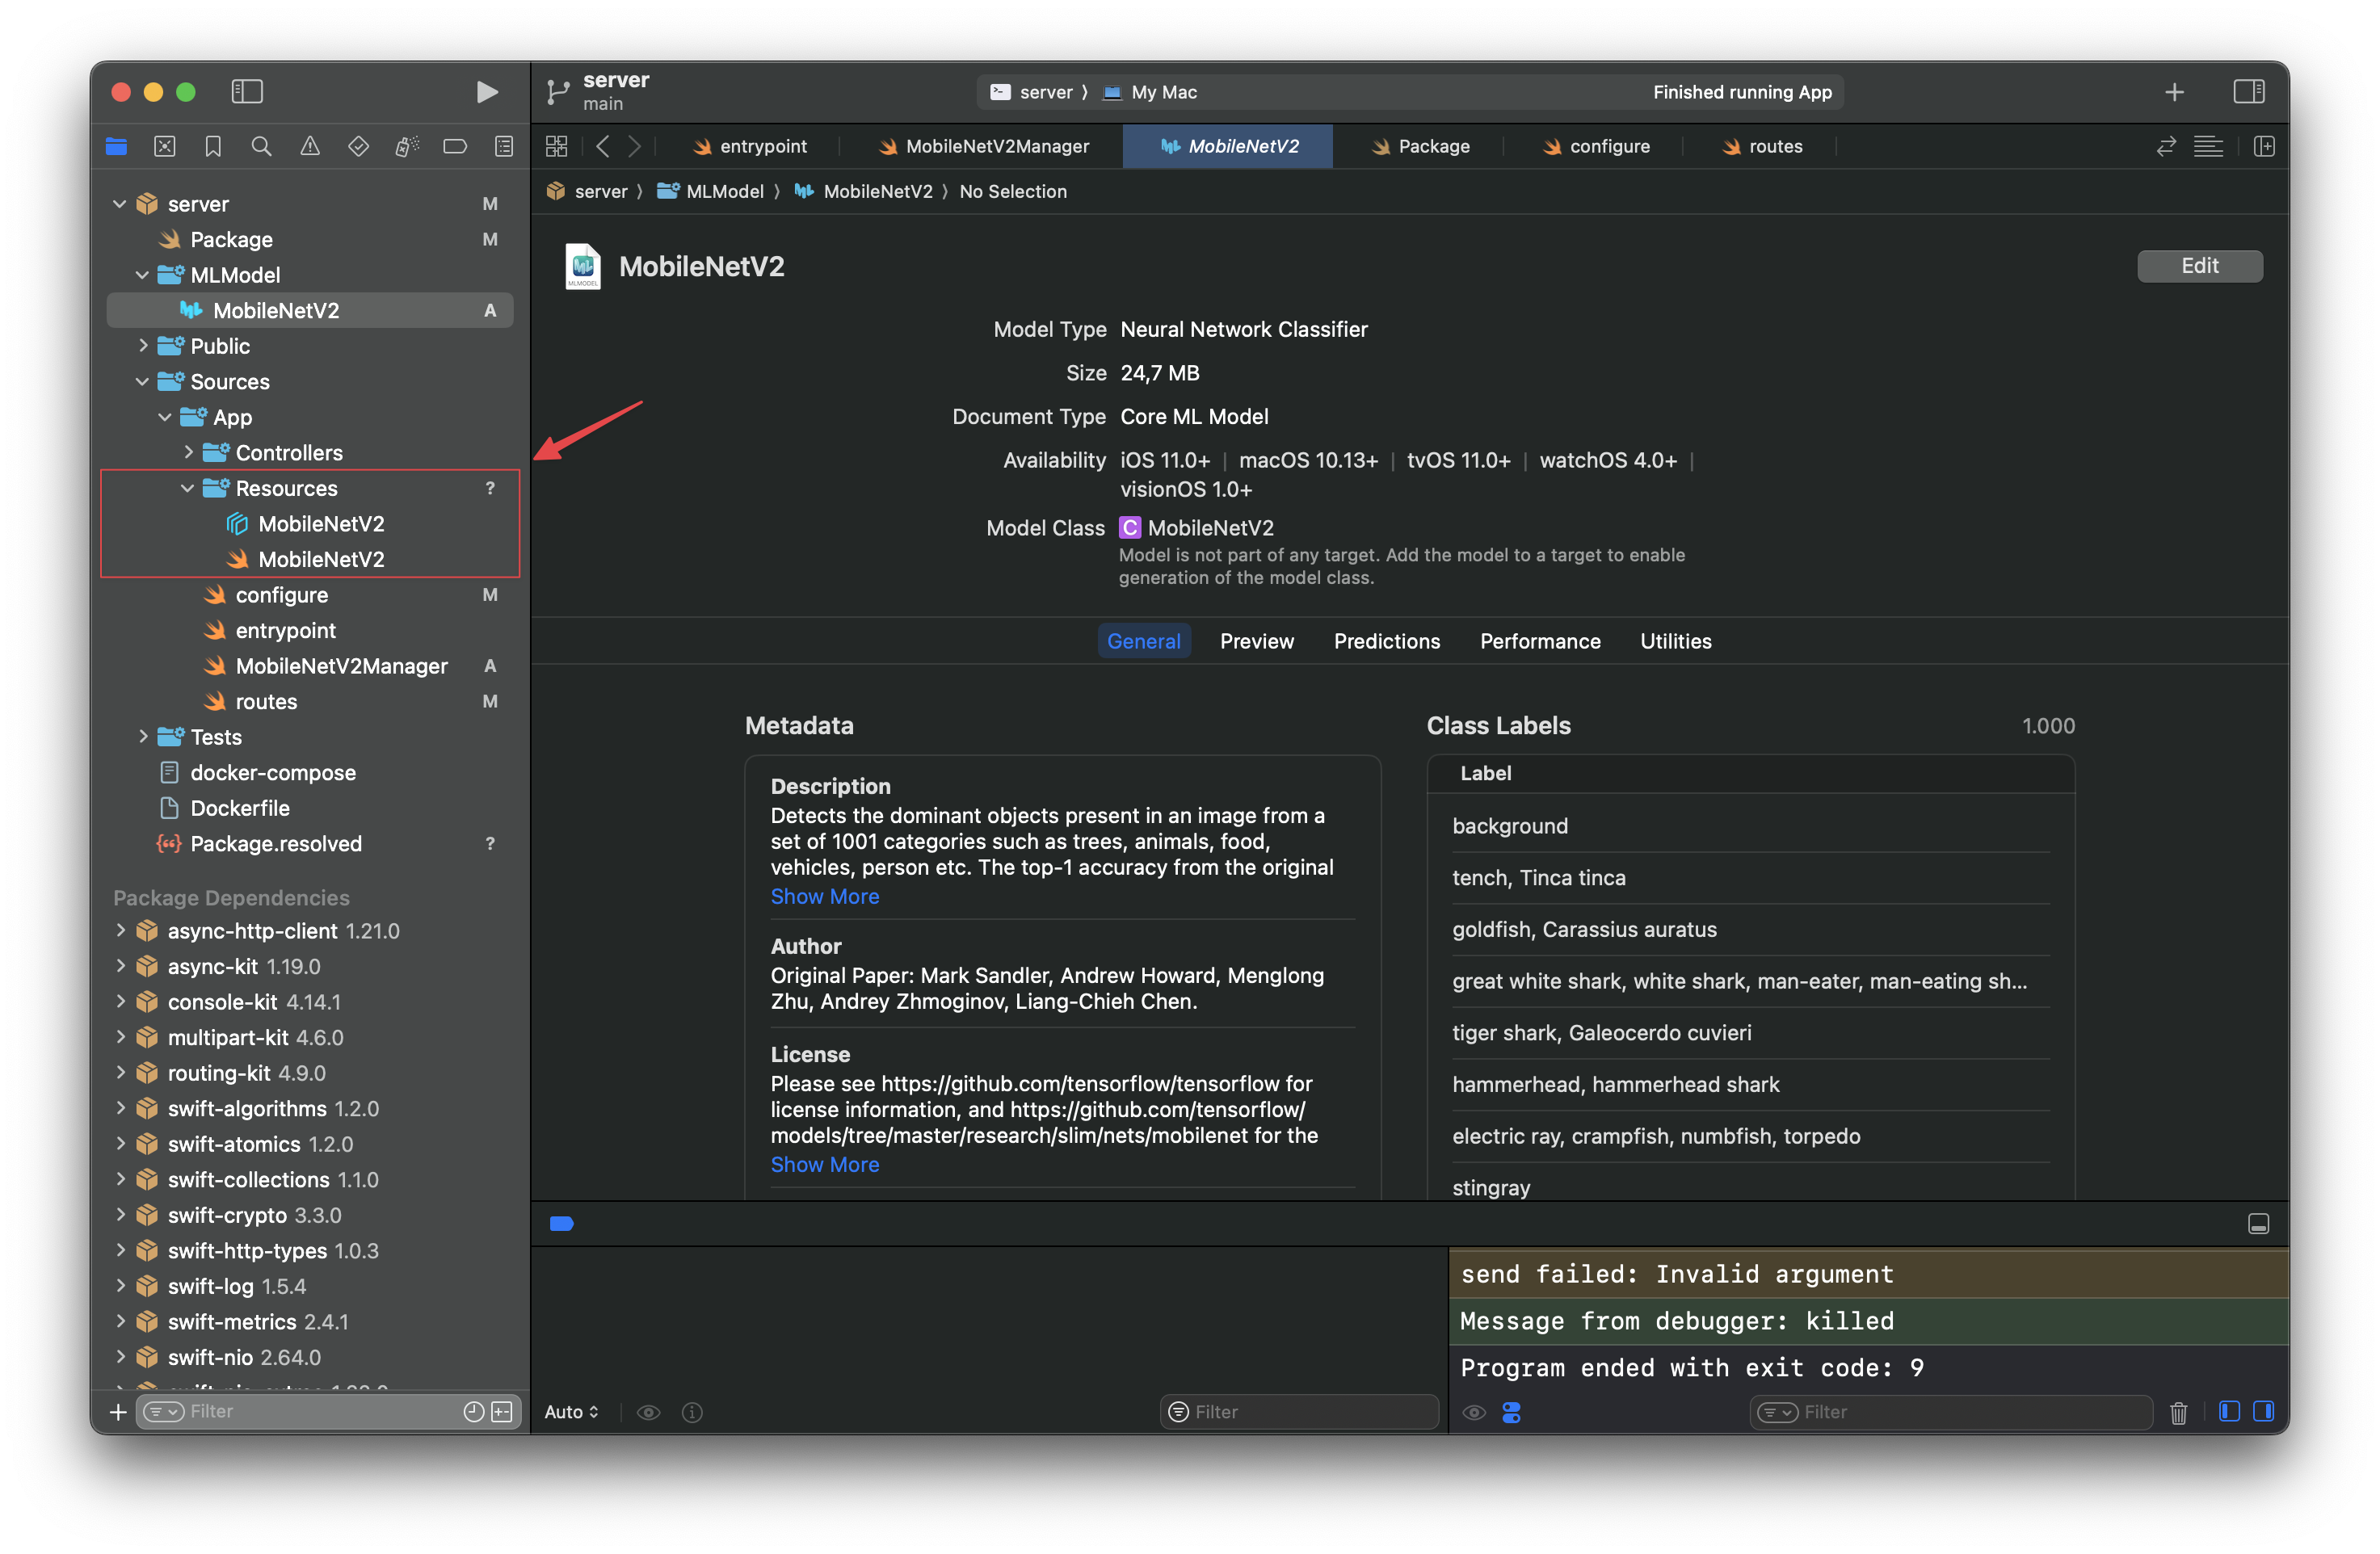
Let's begin by creating a new folder named "MLModel" in the server package root and Place the MobileNetV2.mlmodel file into this folder. Next, create a new folder named "Resources" in /Sources/App/.
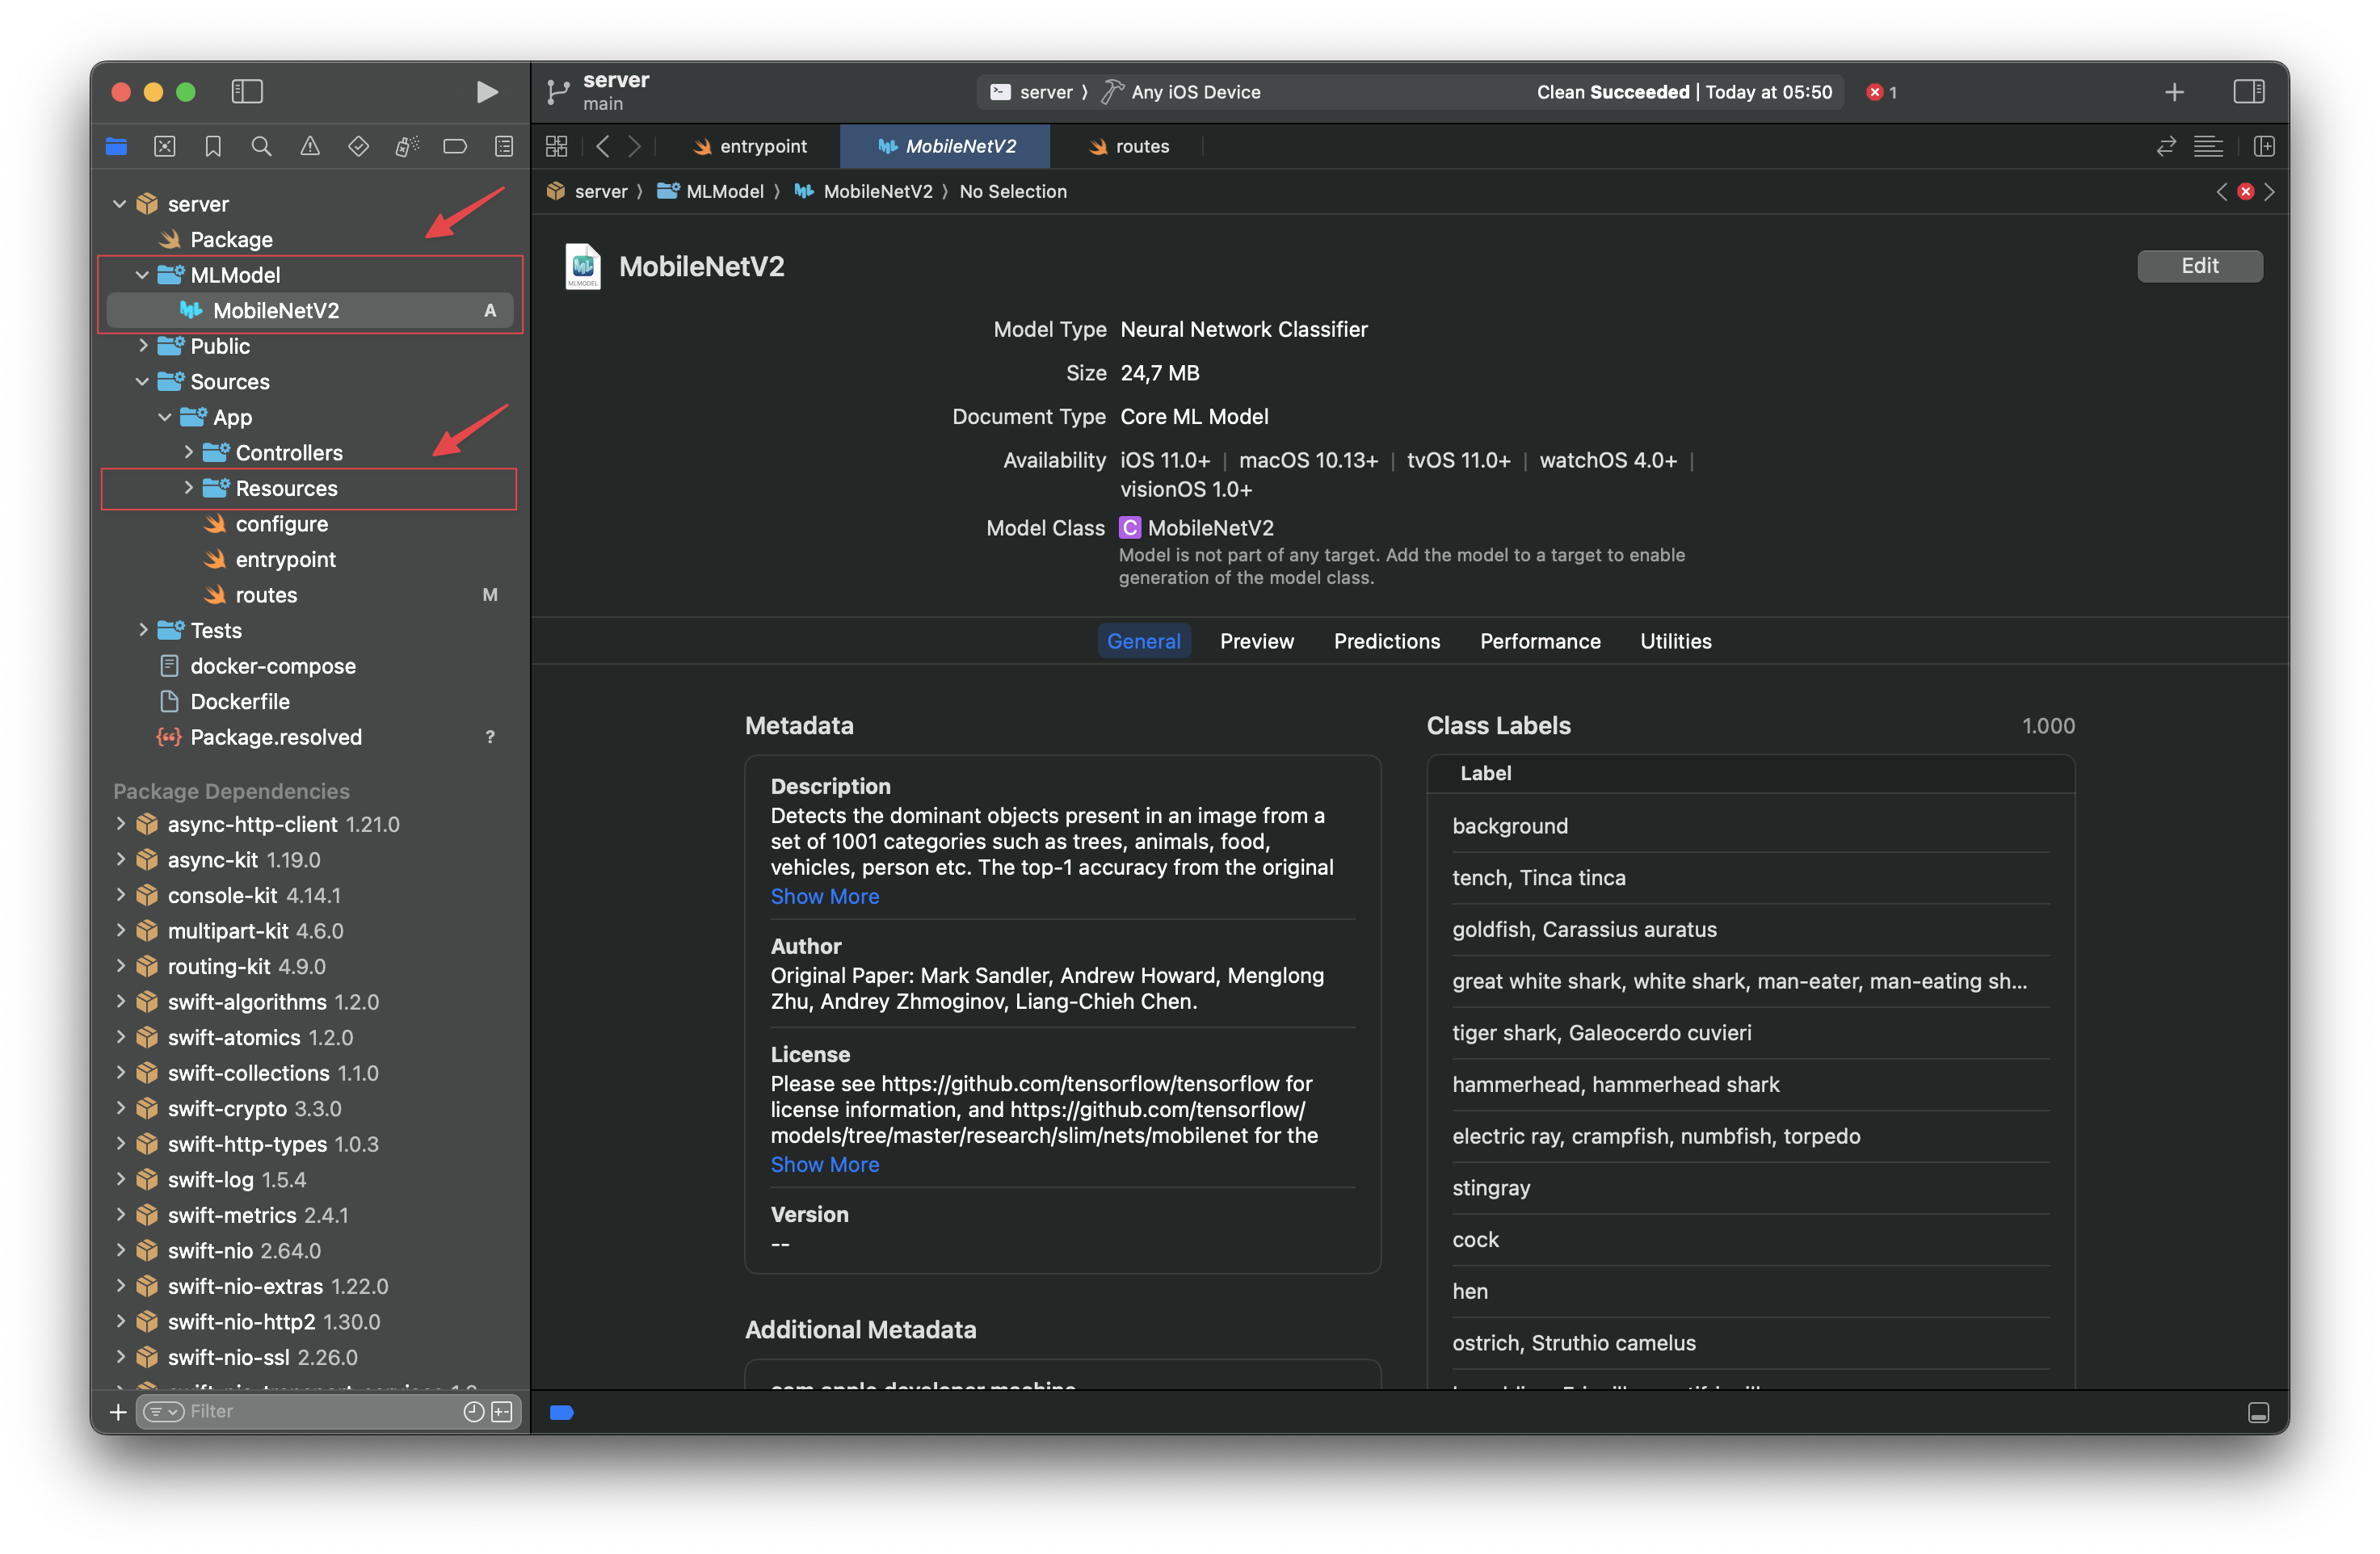
Since we have to compile the model and create its Swift class, we navigate with the Terminal towards the /server directory (where the Package.swift file is) and type the following command:
$ cd MLModel && \\
	xcrun coremlcompiler compile MobileNetV2.mlmodel ../Sources/App/Resources && \\
	xcrun coremlcompiler generate MobileNetV2.mlmodel ../Sources/App/Resources --language Swift
The compilation is now done and you should see both the Swift class and the compiled model files in the Resources folder.
To refer to the compiled ML model resource we are not done yet, as we need to add it to the package bundle as an executable target. Therefore, make sure the Package.swift file includes it like this:
.executableTarget(
    name: "App",
    dependencies: [
        .product(name: "Vapor", package: "vapor"),
    ],
    resources: [
        .copy("Resources/MobileNetV2.mlmodelc"),
    ]
)
Package.swift
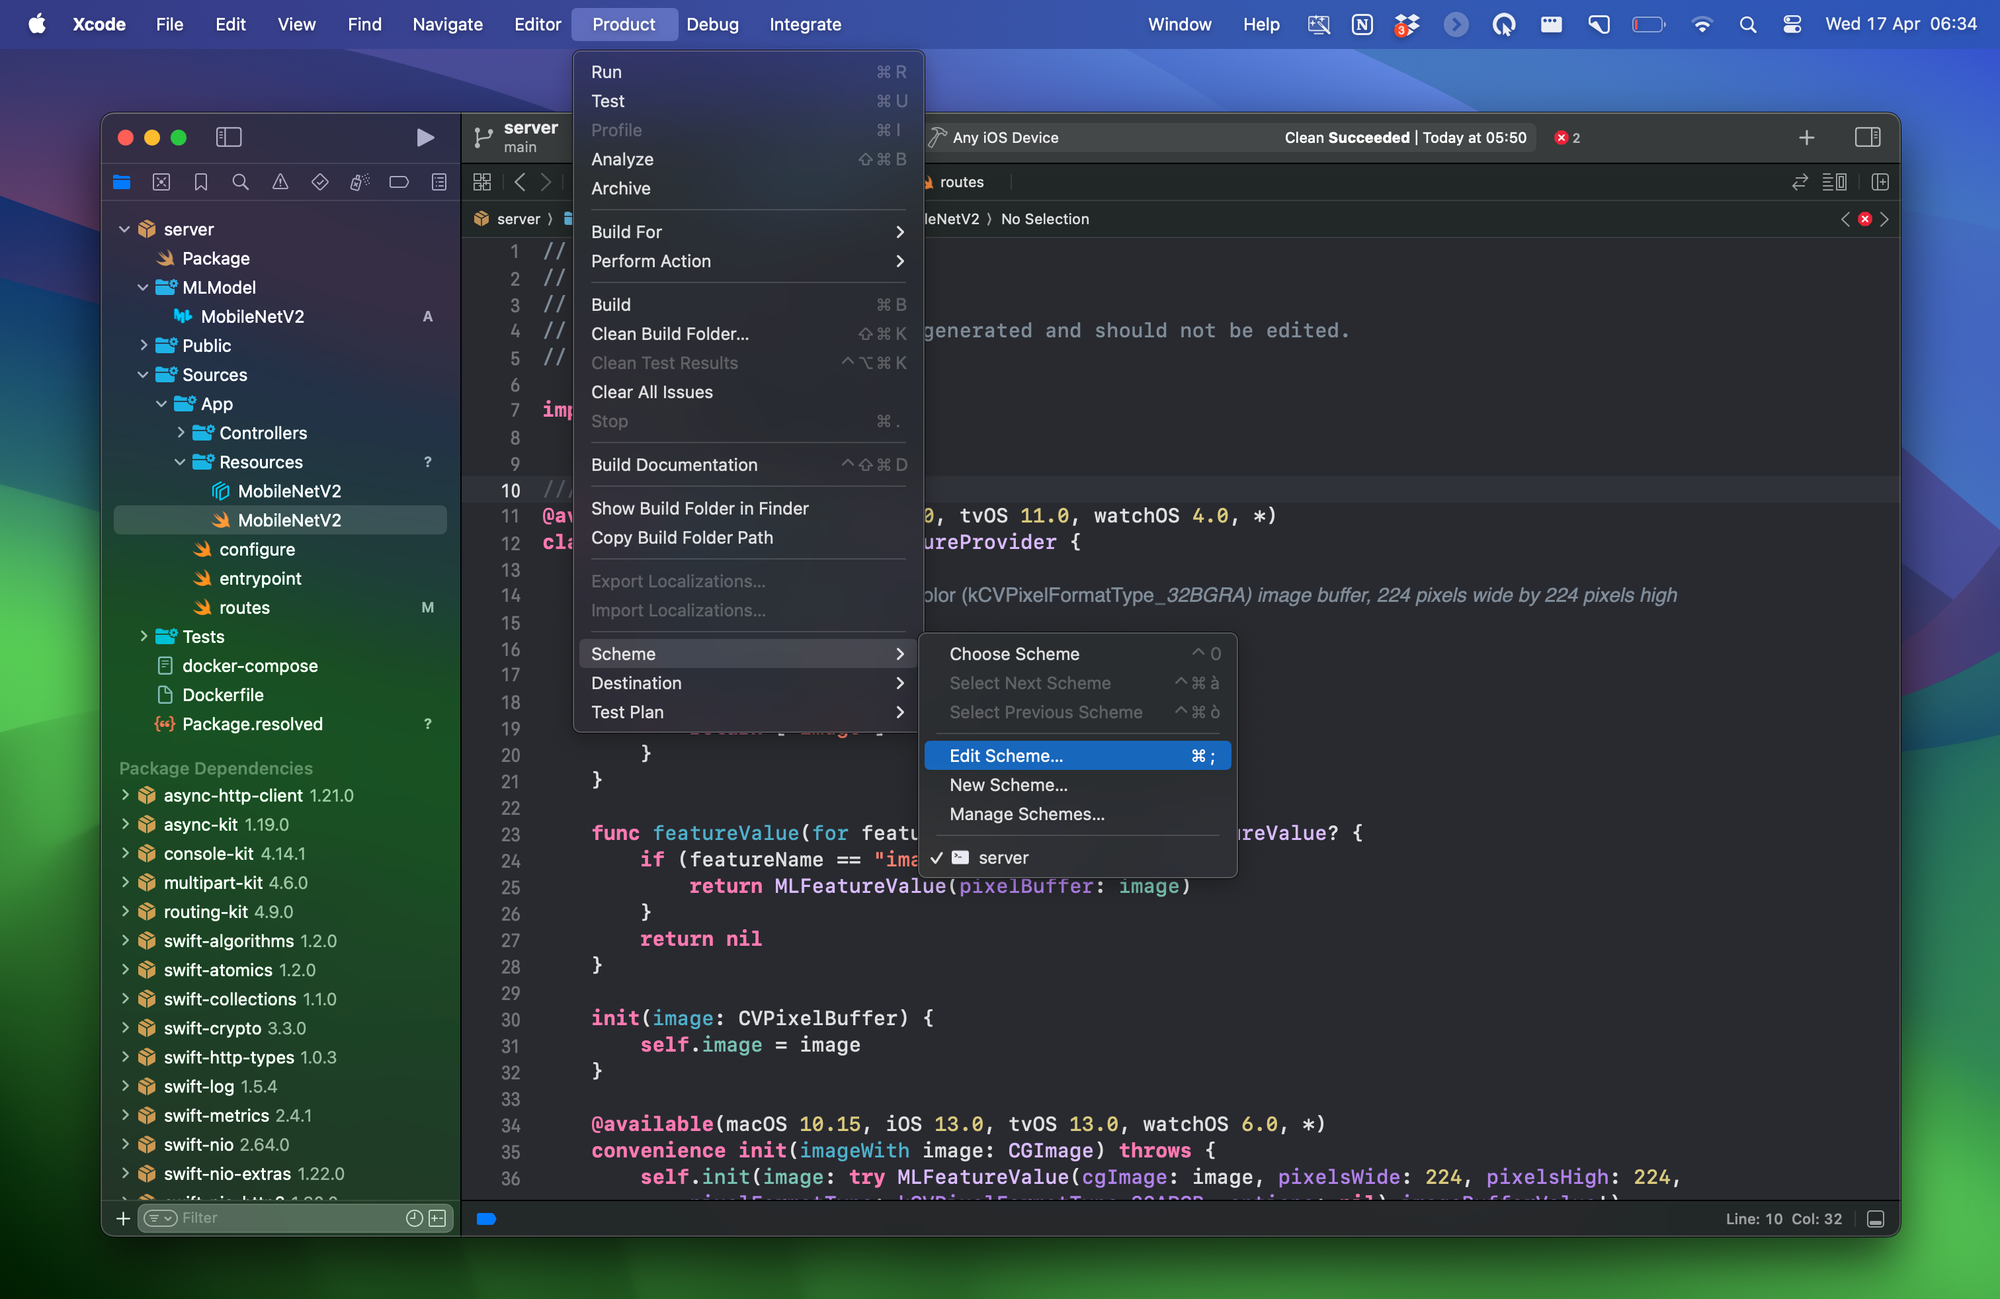
The last step for configuring this server-side project is to make it discoverable and accessible (for now it will be the localhost) on the network by modifying the App scheme. Go to the scheme editor navigating this way Product→Scheme→Edit Scheme…→Run→Arguments→Arguments Passed On Launch and add serve --hostname 0.0.0.0 like so:
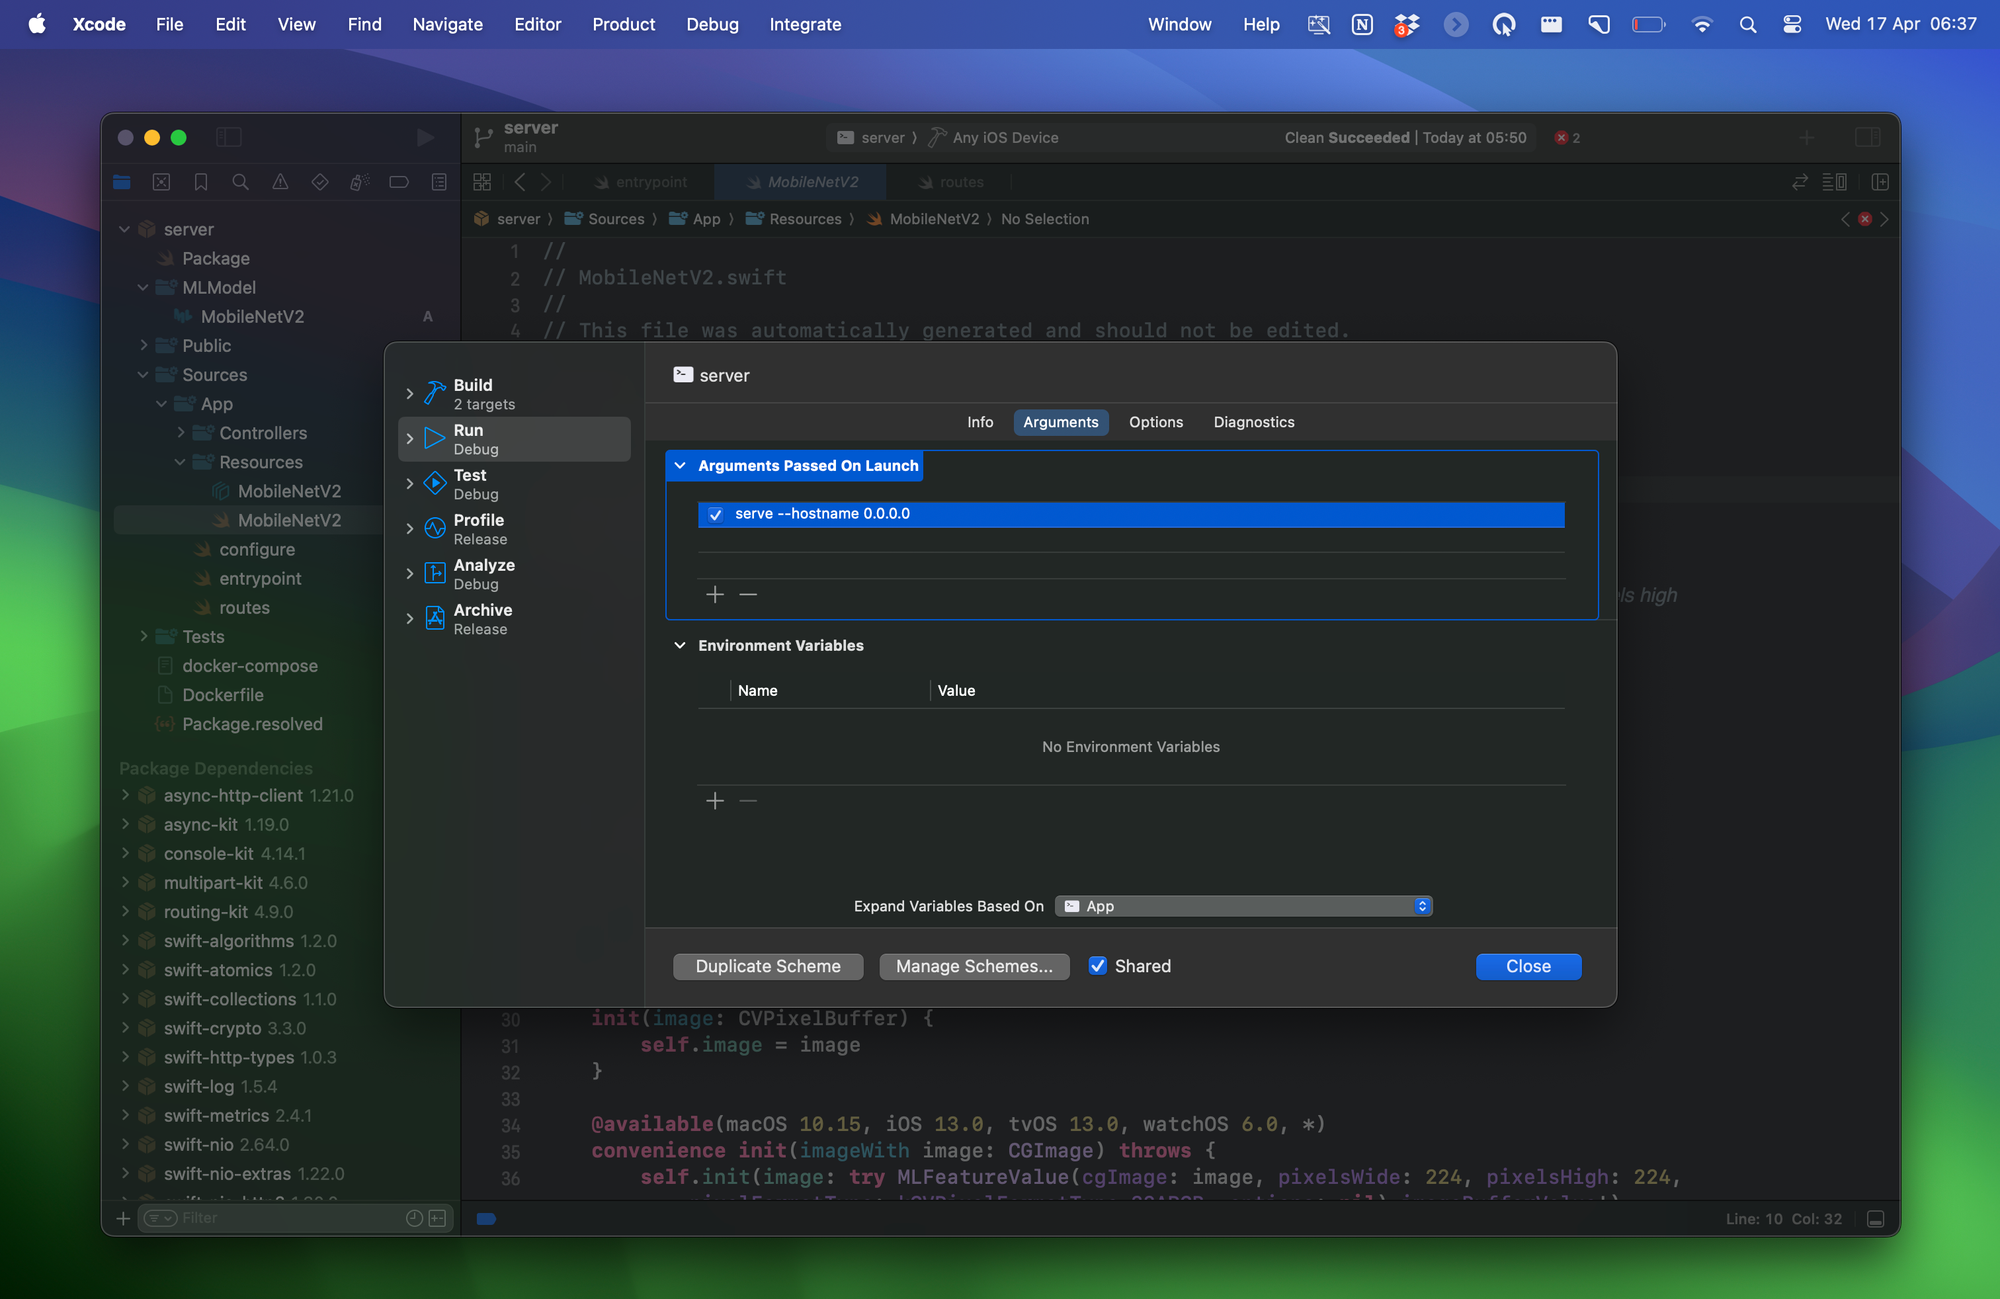
To make some errors disappear, switch the Run Destination of the project to “My Mac”
Now the project is ready and set, and we can start implementing our server to create the Rest API to process the Machine Learning tasks.
Step 3 - Create the Classification tasks and the route to query the ML model
How do we structure the Machine Learning tasks that will be summoned through the Rest API calls coming from the client app?
In this step we are going to define a structure called MobileNetV2Manager that will handle the Machine Learning processing in a new file to include in the /Sources/App/ folder.
Here, we will also define the ClassificationResult structure to store the results of the Image Classification, since we must remap the results in order to deliver them to the client app using the JSON format: these kinds of Classifiers usually generate a label and the level of accuracy (referred to by the name of “confidence”) as the result.
Furthermore, we will have to add a function that will classify the uploaded image and define the kinds of errors that can arise from it, and we will have something that will look like this:
import Vapor
import CoreImage
import Vision

struct MobileNetV2Manager {

    enum MLError: Error {
        case modelNotFound
        case noResults
    }

    func classify(image: CIImage) throws -> [ClassificationResult] {

        // Creating an instance of the MobileNetV2 model
        let url = Bundle.module.url(forResource: "MobileNetV2", withExtension: "mlmodelc")!
        guard let model = try? VNCoreMLModel(for: MobileNetV2(contentsOf: url, configuration: MLModelConfiguration()).model) else {
            throw MLError.modelNotFound
        }

        // Creating an image analysis request to process the image
        let request = VNCoreMLRequest(model: model)

        // Creating the handler that processes the image analysis request
        let handler = VNImageRequestHandler(ciImage: image)
        try? handler.perform([request])

        guard let results = request.results as? [VNClassificationObservation] else {
            throw MLError.noResults
        }

        // Mapping the results to return [ClassificationResult]
        let classificationResults = results.map { result in
            ClassificationResult(label: result.identifier, confidence: result.confidence)
        }

        return classificationResults
    }
}

struct ClassificationResult: Encodable, Content {
    var label: String
    var confidence: Float
}
MobileNetV2Manager.swift
In order to define the way we query our server, we move to the routes.swift file.
Here we define the RequestContent structure to store the uploaded content that we will receive through the client’s URL Requests.
struct RequestContent: Content {
    var file: File
}
routes.swift
We define the route app.post("mobilenetv2") that the client app is expected to refer to for uploading images to be classified. In this route, we decode the content that we get sent and we create a CoreImage instance out of it.
Ultimately, we pass the image to mobileNetV2.classify(image:), and this is what the routes.swift file should look like in the end:
import Vapor
import CoreImage

func routes(_ app: Application) throws {
    app.post("mobilenetv2") { req -> [ClassificationResult] in

        // Decoding the request content that has been uploaded
        let requestContent = try req.content.decode(RequestContent.self)
        let fileData = requestContent.file.data

        // Getting the file data
        guard let imageData = fileData.getData(at: fileData.readerIndex, length: fileData.readableBytes),
              let ciImage = CIImage(data: imageData) else {
            throw DataFormatError.wrongDataFormat
        }

        // Creating instance of the MobileNetV2Manager
        let mobileNetV2 = MobileNetV2Manager()

        // This is were the classification happens
        do {
            return try mobileNetV2.classify(image: ciImage)
        } catch {
            print(error.localizedDescription)
            return []
        }
    }
}

enum DataFormatError: Error {
    case wrongDataFormat
}

struct RequestContent: Content {
    var file: File
}
routes.swift
In the configure.swift file, let’s Increase the maximum body size for the content that may be uploaded to support heavier images with the following line of code:
public func configure(_ app: Application) async throws {

    app.routes.defaultMaxBodySize = "20mb"

    try routes(app)
}
configure.swift
And that’s it! The server-side project is done! We have a fantastic server running the MobileNetV2 model to classify uploaded images.
Now what remains is creating a client app to consume these Machine Learning tasks throughout URL Requests. We’re almost at the end!
Step 4 - Create a Client app that can query your backend
Querying and consuming this information in an iOS app is the last step of this tutorial, and it’s the most intuitive part if you are already acquainted with API calls. All we have to do is upload the image we want to classify onto the server’s IP address using the mobilenetv2 route that we defined above and get ready to decode the results of the image classification task that will be sent back.
Let’s create a new Xcode Project and let’s select iOS as our target.
Since we need to upload the image in the body of the request using the right format, creating a method that turns it into data for the multipart form Content-Type is essential.
Create a new Swift file called Extensions.swift and in it create an extension to the type Data. In the extension, create a method that will be responsible for appending strings to a Data object.
// Function to append data to multipart/form-data body for URL Requests
extension Data {
    mutating func append(_ string: String) {
        if let data = string.data(using: .utf8) {
            append(data)
        }
    }
}
Extensions.swift
Create a new Swift file called APIManager.swift.
Create the class APIManager, whose only shared instance will take care of interacting with the server via URL Requests. Define a method to convert an image’s data to a multipart/form-data body like so:
import Foundation
import UIKit

class APIManager {

    static let shared = APIManager() // Shared instance

    private init() {}

    // Creates a multipart/form-data body with the image data.
    private func createMultipartFormDataBody(imageData: Data, boundary: String, fileName: String) -> Data {
        var body = Data()

        // Add the image data to the raw http request data
        body.append("\\r\\n--\\(boundary)\\r\\n")
        body.append("Content-Disposition: form-data; name=\\"file\\"; filename=\\"\\(fileName)\\"\\r\\n")
        body.append("Content-Type: image/jpeg\\r\\n\\r\\n")
        body.append(imageData)
        body.append("\\r\\n")

        // Add the closing boundary
        body.append("\\r\\n--\\(boundary)--\\r\\n")
        return body
    }
}
APIManager.swift
Inside the APIManager class, define a structure called ClassificationResult that will help with decoding the Classification Results that will come from our server like follows:
import Foundation
import UIKit

class APIManager {

    static let shared = APIManager() // Shared instance

    private init() {}

    // Creates a multipart/form-data body with the image data.
    private func createMultipartFormDataBody(imageData: Data, boundary: String, fileName: String) -> Data {
        ...
    }

    // Structure to decode results from the server
    struct ClassificationResult: Identifiable, Decodable, Equatable {
        let id: UUID = UUID()
        var label: String
        var confidence: Float

        private enum CodingKeys: String, CodingKey {
            case label
            case confidence
        }

        init(from decoder: Decoder) throws {
            let container = try decoder.container(keyedBy: CodingKeys.self)
            let label = try container.decodeIfPresent(String.self, forKey: .label)
            self.label = label ?? "default"
            let confidence = try container.decodeIfPresent(Float.self, forKey: .confidence)
            self.confidence = confidence ?? 0
        }
    }
}
APIManager.swift
Finally, what’s left is defining the method that the SwiftUI View will call to query the server for classifying uploaded images.
We used http://localhost:8080/mobilenetv2 for the URL of our server-side app service as we haven’t deployed it anywhere else than the MacBook we are currently working on.
For the moment we are testing this mechanism on our MacBook that acts as our localhost, but remember to change the IP address when you run the server-side app on a real host.
class APIManager {

    static let shared = APIManager() // Shared instance

    private init() {}

    func classifyImage(_ image: UIImage) async throws -> [ClassificationResult] {

        // This is the URL of your host's IP address: for the moment we are using localhost for proving the concept, but remember to change it with the real host's IP address when you will run the app on a real host
        guard let requestURL = URL(string: "<http://localhost:8080/mobilenetv2>") else {
            throw URLError(.badURL)
        }

        // Convert image to JPEG with a compressionQuality value of 1 (0 - best quality)
        guard let imageData = image.jpegData(compressionQuality: 1) else {
            throw URLError(.unknown)
        }

        // Boundary string with UUID for uploading the image in the URLRequest
        let boundary = "Boundary-\\(UUID().uuidString)"

        // POST URLRequest instance
        var request = URLRequest(url: requestURL)

        request.httpMethod = "POST"

        request.setValue("multipart/form-data; boundary=\\(boundary)", forHTTPHeaderField: "Content-Type")

        // Create multipart form body
        let body = createMultipartFormDataBody(imageData: imageData, boundary: boundary, fileName: "photo.jpg")

        // Upload data to the URL based on the specified URL request and get the classification results
        let (data, response) = try await URLSession.shared.upload(for: request, from: body)

        // Check URL Response, statusCode and eventually throw error
        guard let httpResponse = response as? HTTPURLResponse, httpResponse.statusCode == 200 else {
            throw URLError(.badServerResponse)
        }

        // Decode the data into an array of ClassificationResult
        return try JSONDecoder().decode([ClassificationResult].self, from: data)
    }

    // Creates a multipart/form-data body with the image data.
    private func createMultipartFormDataBody(imageData: Data, boundary: String, fileName: String) -> Data {
        ...
    }

    // Structure to decode results from the server
    struct ClassificationResult: Identifiable, Decodable, Equatable {
        ...
    }
}
APIManager.swift
Finally, in order to call the APIManager’s method to classify images that we are going to get from an Image Picker, we created a ViewModel object to avoid overloading the View with these tasks.
In our project we used the UIKit Image Picker in the old-fashioned way, but if you want to use Apple’s new APIs to pick an image from the Photos Library using SwiftUI take a look at this tutorial.
@Observable
class ViewModel {

    private var apiManager = APIManager.shared
    var results: [APIManager.ClassificationResult] = []

    // Function that calls the manager that sends the URL Request
    func classifyImage(_ image: UIImage) async {
        do {
            results = try await apiManager.classifyImage(image)
        } catch {
            print(error.localizedDescription)
        }
    }
}
ViewModel.swift
And this is how to finally classify an image from a SwiftUI View with a tap of a button.
Button("Classify Image") {
	Task {
		await viewModel.classifyImage(image)
	}
}
Button added to the body of the ContentView view
Final Result
After all these steps you should have two different projects running, the Vapor server project and a client iOS app. The app will ask through a network request to analyze the image, and the server will be responsible for interrogating the ML model and responding back to the client.
At this point, our image classification app is quite basic, but it could be expanded with mode features or can be combined with different types of models for a more complex and custom experience.
You can check out the full project on the following repository, containing all the code described in the tutorial. Feel free to check it out and leave a star in case you find it useful!
 create-with-swift
Where to go next?
So far we used our local machine to host the server-side project, but how do we move it to a remote server for production purposes? Of course, the more performant your server is, the better it will be for Core ML to handle large models and use big temporary files.
Of course, we can choose many different hosting providers for our server. Some of the most famous are: AWS, Heroku, DigitalOcean…
Another very important topic to spend time on is to set an NGINX instance as a proxy. This is very useful for requiring that the client use TLS (HTTPS), rate limit requests, or even serve public files without talking to your Vapor application and much more. You can discover more about it here:
 Vapor Community
One of the best practices is to use a Docker image. If you want to know more about it, check the following resource:
Vapor CommunitySome other services that allow you to manage a Machine Learning model that you might want to get deeper into are Azure ML, Amazon SageMaker, and IBM Watson Machine Learning.